Configuring a PAM HA Pair
This section covers:
Introduction
The installation instructions set out on this page are for configuring a new PAM HA Pair.
Deploying the PAM Servers
The first step will be to deploy the software package into your chosen supported infrastructure. You will need two PAM Servers create a HA Pair.
Click on the appropriate link below to be navigated to the deployment steps.
- Deploy using VMware vSphere
- Deploy using Microsoft Azure
- Deploy using Microsoft Hyper-V
- Deploy using Amazon Web Services
- Deploy using Nutanix Prism Central
Configuring the PAM Server HA Pair
Once you have deployed your two standalone PAM Servers, you can configure the servers. The configuration for a Primary and Secondary HA PAM Server will differ so ensure you follow the correct steps:
Configure a Primary PAM Server
Follow these configuration steps if you are setting up a Primary PAM Server.
-
Within the Console window, press ENTER when prompted to start the setup and configuration.
-
Read and accept the EULA to continue.
-
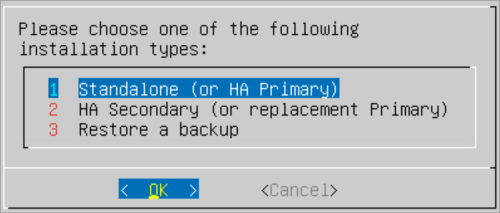
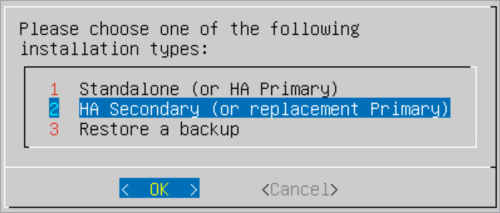
Select Standalone (or HA Primary) as the installation type.
-
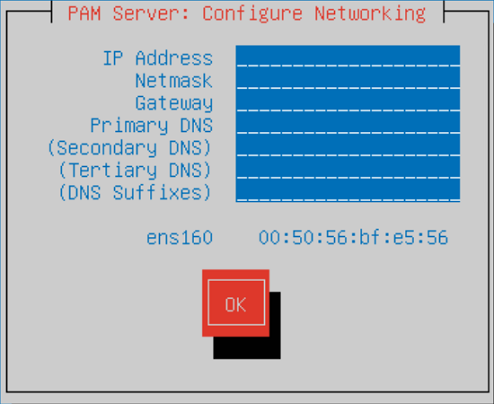
Within the Configure Networking screen, configure the following server settings. Press TAB to navigate between the fields.
- IP Address: Enter the IP Address which will be used to connect to the server.
- Netmask: Enter the network mask.
- Gateway: Enter the network default gateway IP address.
- Primary DNS: Enter the network primary DNS IP address.
- (Secondary DNS): Enter the secondary DNS IP address if relevant, else leave blank.
- (Tertiary DNS): Enter the tertiary DNS IP address if relevant, else leave blank.
- (DNS Suffixes): Enter the DNS Suffixes. Multiple entries can be separated with a comma, else leave blank.
-
Once completed TAB down to the
OKbutton and press ENTER.osi -
Within the Enter a hostname window, enter a name to identify the new server.
-
TAB down to the
OKbutton and press ENTER. -
Your Master Encryption Key will be shown.
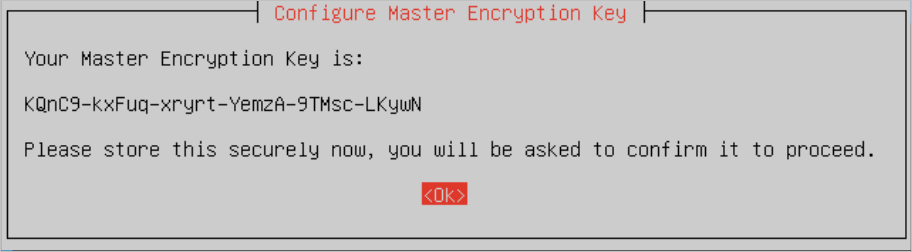
Type Description Master encryption key This key is VERY IMPORTANT so you MUST make a note of it and securely store it externally for future reference as it is not stored on the server. It will be required during a backup/restore procedure to recreate the hash file and decrypt the Osirium PAM database stored within the Osirium backup file. Salt During the installation process the master encryption key is combined with the Salt to generate a hash which is stored in a file. The Salt is stored on the server and will be included in the Osirium backup file. Hash Is generated during the installation process and stored on the server. The hash file will not be included in the Osirium backup file. During a backup/restore procedure the master encryption key will be used with the salt to recreate the hash and decrypt the Osirium backup database file to reinstate the server. -
TAB down to the
OKbutton and press ENTER. -
Enter the Master Encryption Key including the dashes to verify.
-
TAB down to the
OKbutton and press ENTER. -
Set a password for the Primary SuperAdmin account. The username (SuperAdmin) and the password will be used later to log into the UI.
-
TAB down to the
OKbutton and press ENTER. -
Confirm the primary SuperAdmin account password.
-
TAB down to the
OKbutton and press ENTER. Wait while the system is configured. -
Once the setup has completed a message will be displayed. Make a note of the https address which will be required to connect to the PAM Server and run through the system configuration steps.
System Configuration
The following system configuration steps are required on the Primary PAM Server:
Uploading an Osirium product licence REQUIRED
-
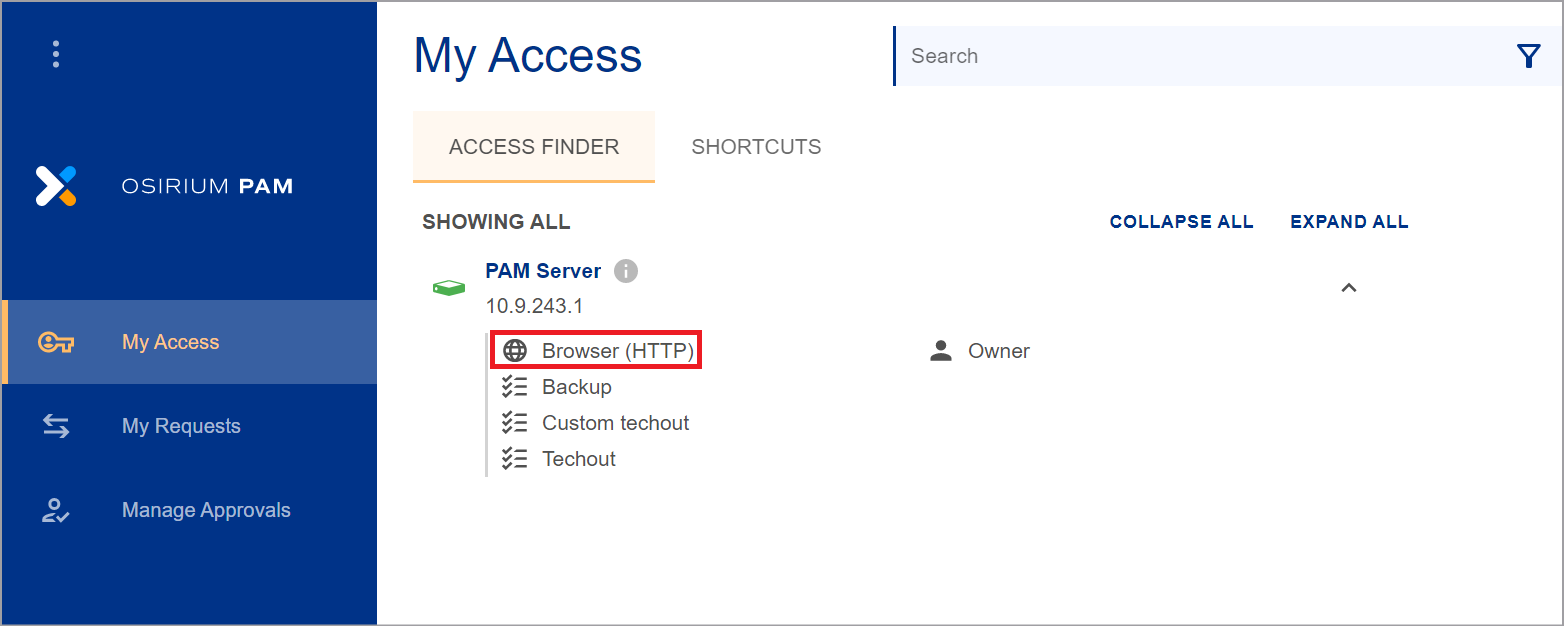
Using the https address noted at the end of your deployment of the PAM Server log on using the superadmin account.

-
Click Browser (HTTP) to open the Admin Interface.
-
Within the Admin Interface you will be prompted to upload a valid Osirium PAM licence before you can continue.
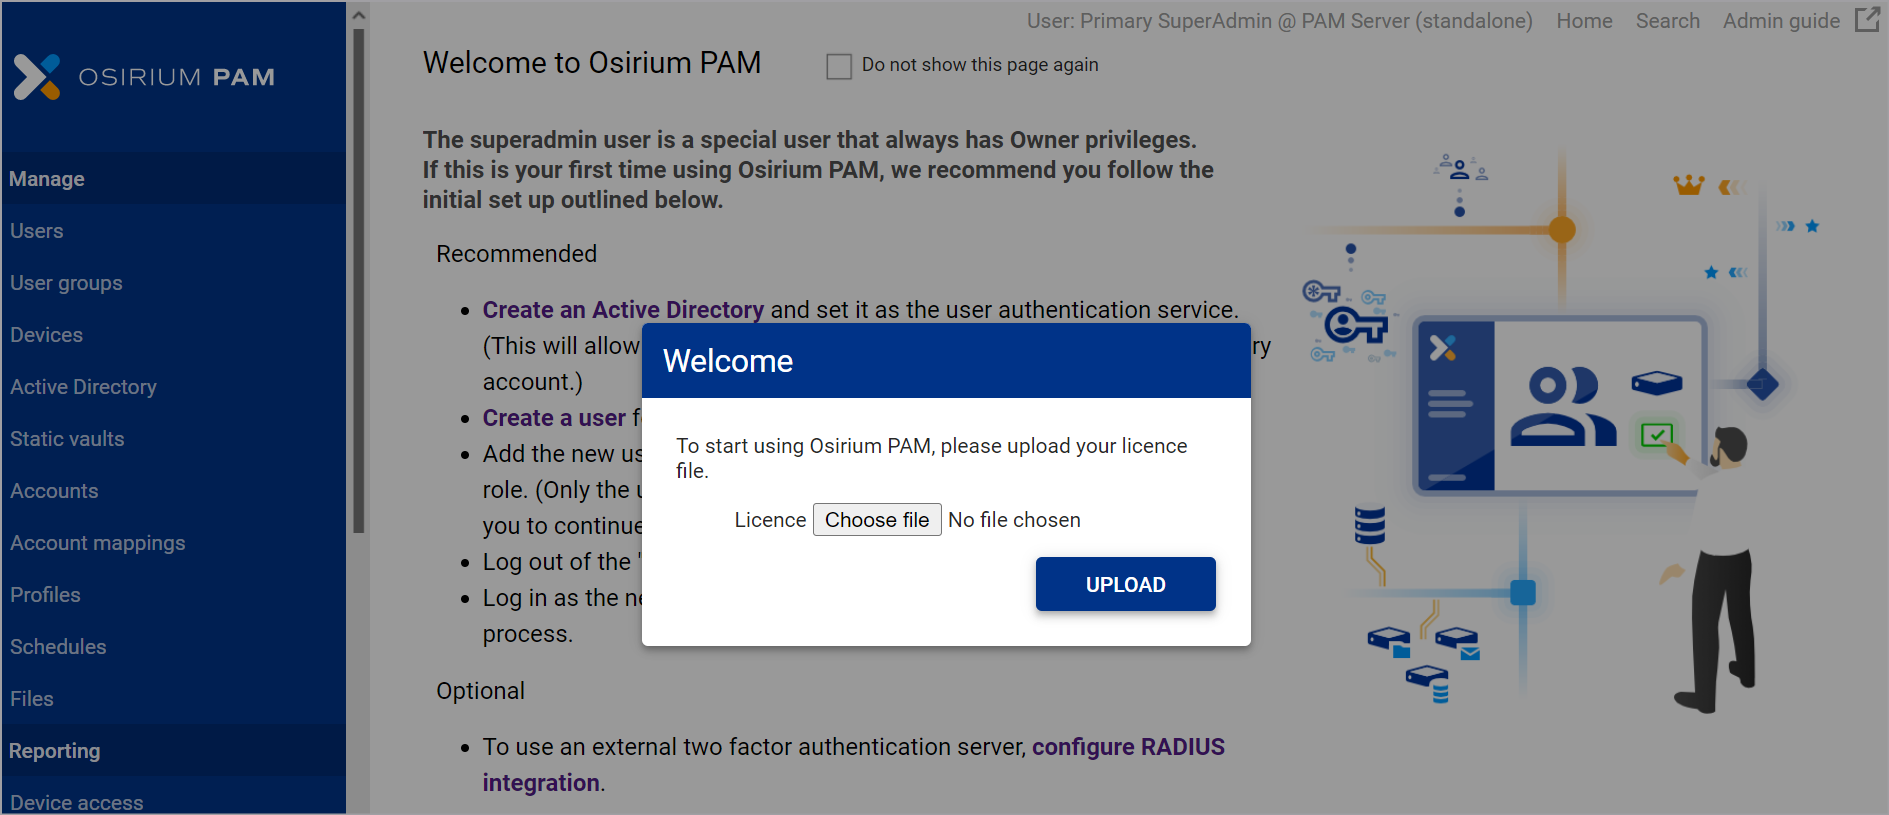
-
Within the Upload licence window, click
Choose File. -
Select your Osirium PAM licence file and click
Open -
Click
UPLOAD. -
Click
ACKNOWLEDGEwithin the Action notifications window. Your browser will be refreshed. Your server is now ready.
SMB Share RECOMMENDED
We highly recommend that an SMB share is configured to maintain resilience and ensure session recordings continue to be available in case of any failovers.
Warning
If an SMB share is not configured then you are at risk of losing files stored locally on the PAM Server.
To configure:
-
Within the Admin Interface navigate to the System configuration > System settings tab.
-
Click on the
 next to SMB share configuration.
 -
Enter the SMB share details.
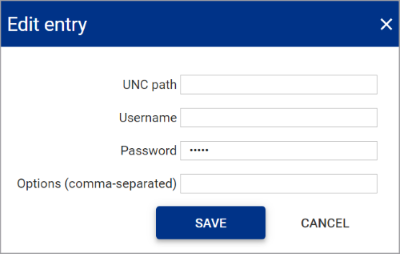
Field name Description UNC path The UNC path by which PAM can connect to the SMB share. For example \\server-name\shared-resource-pathname
Username The username of the SMB share location. Password The password of the SMB share location. Options (comma-separated) Optional
Allows additional parameters to be passed to the SMB share as a comma separated list if required. -
Click
SAVE. -
Click on the
next to File store. -
Select SMB Share and click
SAVE.
Uploading a trusted certificate RECOMMENDED
By default, Osirium PAM provides a generic certificate to allow secure web connections to the UI and Admin Interface.
We recommend that you upload a trusted certificate valid within your organisation. For further details on the types of certificates that can be uploaded click here.
The steps to upload a certificate differ depending upon the certificate type.
Certificate with RSA private key
To upload:
-
Within the Admin Interface navigate to the System configuration > Certificates tab.
-
On the Certificates tab, click LOAD NEW CERTIFICATE.
-
In the Upload TLS Certificate window, upload your trusted certificate and RSA private key. Both are required for a successful upload.
- TLS Certificate: Uploaded certificates will be verified to ensure they are an X.509 certificate with a .pem file format.
- RSA Private Key: Uploaded keys are verified to ensure they are an rsa key with a .key file format. Passwords/passphrase are NOT supported on the the rsa key.
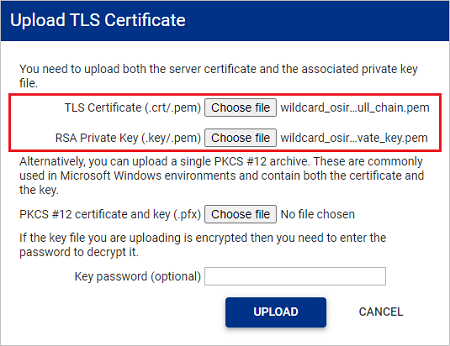
-
If the private key you are uploading has been encrypted, enter the password in the Key password (optional) input box.
-
Click UPLOAD. The certificate is uploaded.
PKCS12 archive file
To upload:
-
Within the Admin Interface navigate to the System configuration > Certificates tab.
-
On the Certificates tab, click LOAD NEW CERTIFICATE.
-
In the Upload TLS Certificate window, upload your PKCS #12 file.
- The certificate contained within the PKCS #12 file will be verified to ensure it is a X.509 certificate.
- The private key contained within the PKCS #12 file will be verified to ensure it is an rsa key.
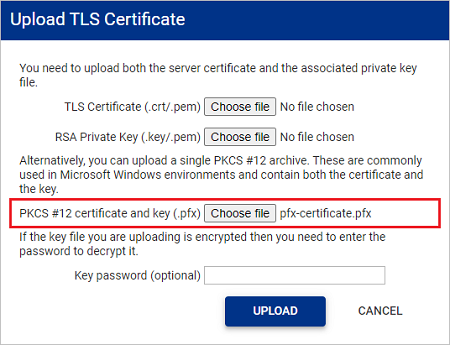
-
If the private key you are uploading has been encrypted, enter the password in the Key password (optional) input box.
-
Click UPLOAD. The certificate is uploaded.
Configure a Secondary PAM Server
Follow these configuration steps if you are setting up a new Secondary HA PAM Server.
-
Within the Console window, press ENTER when prompted to start the setup and configuration.
-
Read and accept the EULA to continue.
-
Select HA Secondary (or replacement Primary) as the installation type.
-
Within the Configure Networking screen, configure the following server settings. Press TAB to navigate between the fields.
- IP Address: Enter the IP Address which will be used to connect to the server.
- Netmask: Enter the network mask.
- Gateway: Enter the network default gateway IP address.
- Primary DNS: Enter the network primary DNS IP address.
- (Secondary DNS): Enter the secondary DNS IP address if relevant, else leave blank.
- (Tertiary DNS): Enter the tertiary DNS IP address if relevant, else leave blank.
- (DNS Suffixes): Enter the DNS Suffixes. Multiple entries can be separated with a comma, else leave blank.
-
Once completed TAB down to the
OKbutton and press ENTER. -
Within the Enter a hostname window, enter a name to identify the new server.
-
TAB down to the
OKbutton and press ENTER. -
Once the setup has completed a message will be displayed. Your system is now ready for High Availability.
Make a note of the joining code displayed on the screen as it will be required to initialise your PAM HA pair.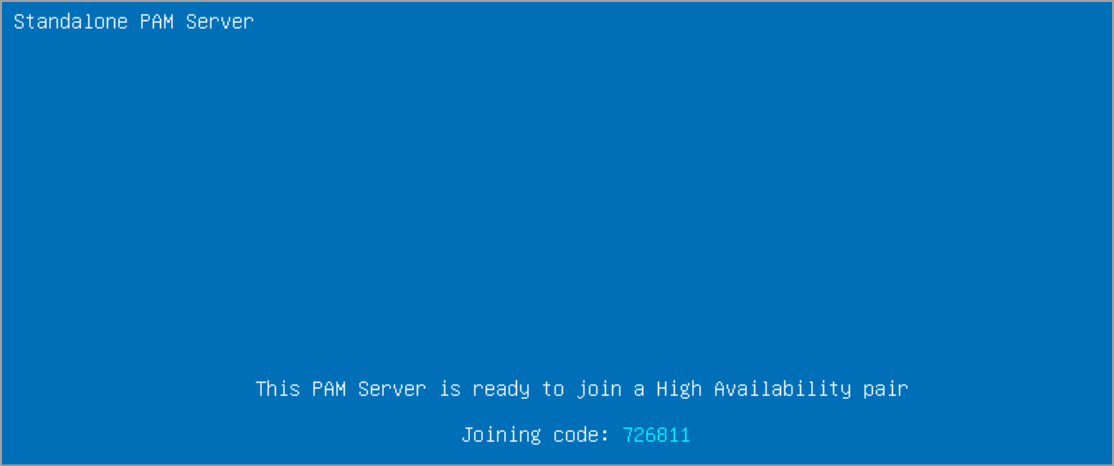
Initialise High Availability
Once you have deployed and configured your PAM Servers, the final step is to initialise your HA pair and setup replication.
-
Open up a web browser and enter the address of the Primary PAM Server:
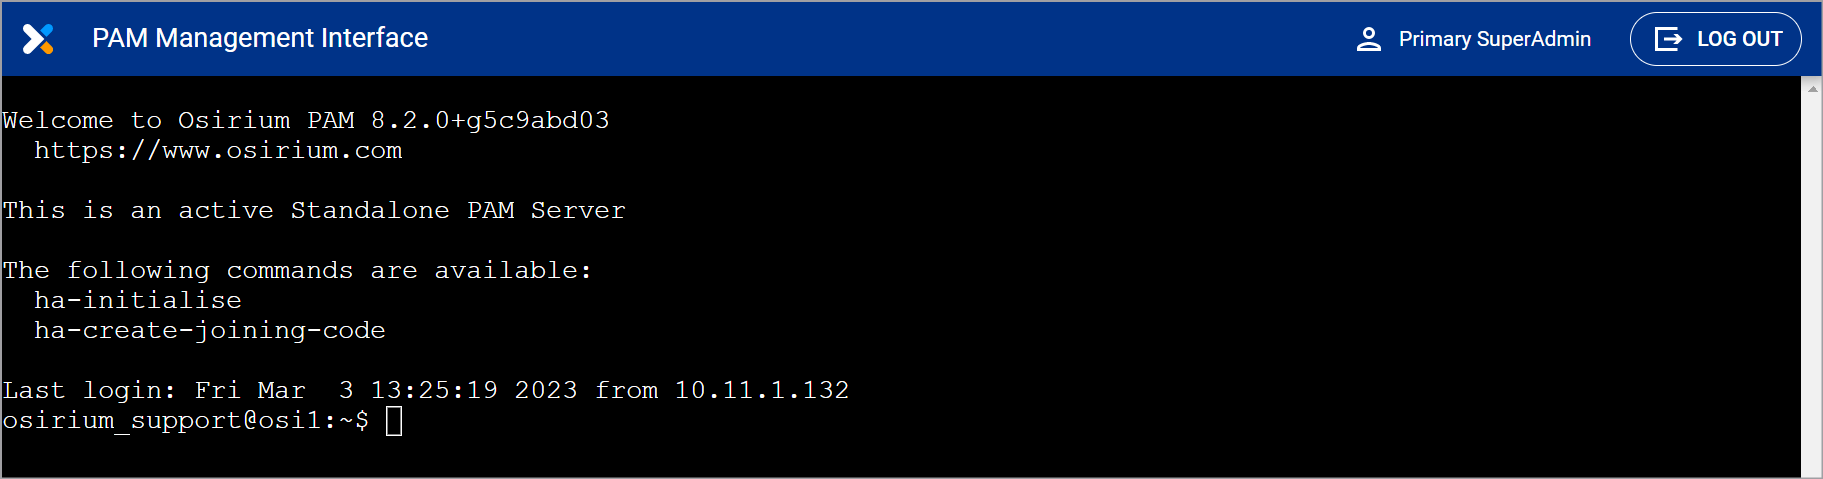
[PAM Server Address]:8443You will be presented with the PAM Management Interface.
-
Login as the Primary SuperAdmin set during installation.

-
You will be presented with PAM Management Interface SSH window.
-
At the prompt type ha-initialise and press ENTER.
Note
If an SMB share is not configured data will be lost in the event of server failure.
-
Enter the IP address of the Secondary PAM Server and press ENTER.

-
Enter a floating IP address and press ENTER.
-
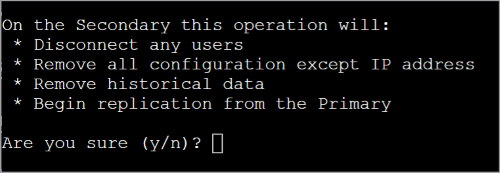
Read what will happen on the secondary then type y and press ENTER to continue.
-
Enter the joining code of your Secondary PAM Server which can be found on the server console window and press ENTER.

-
Wait while the joining procedure completes.
-
When the operation has completed, you will be asked to confirm you can connect to the Management Interface of the Secondary PAM Server.
Follow the instructions on screen and log in using the superadmin username and password set on the Primary PAM Server during configuration.
The message on the Secondary PAM Server console window will also change and state the PAM Server is in standby.
HA Pair configuration is now complete.
Next steps
Only the PAM Owner role can access the Management Interface. We recommend creating personalised user accounts with PAM Owner role to access the Management Interface. See Managing roles for more information.
You can now start to administer your privileged access by adding users, devices and configuring profiles. For more information click here.