Backup Restore Upgrade
This section looks at how to upgrade a standalone PAM Server using a backup and restore method. If you have a PAM Server HA Pair click here.
Prerequisites
Before starting your upgrading make sure the following prerequisites are met:
| Prerequisite | Description |
|---|---|
| Upgrade path | Review the Upgrade path to ensure you are applying the correct upgrade method based on the version you are upgrading from and to. |
| Hardware & Software | Ensure the correct resources are available before upgrading. The following outlines the hardware and software requirements.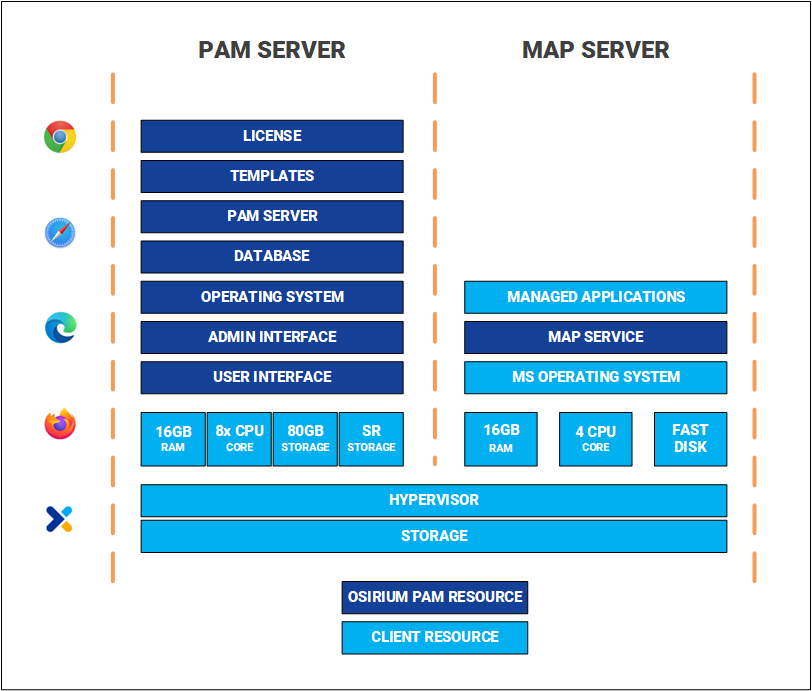 |
| Licencing | A valid license file will be required during the system configuration step. If you don't have a license file contact Osirium. |
| Software downloads | Download the latest PAM Server software, click here. |
| Disk space | Ensure the internal disk has a minimum of 5GB free disk space. |
| Recent backup | We recommend that you have a recent Osirium backup as well as VM Level backup or Snapshot of the PAM Server being upgraded. See Backing up the PAM Server for further details. |
| No active user connections | Ensure there are no active user connections. |
| Disable Task 'Regenerate Account Credentials for all devices' | Within the Admin Interface, disable all scheduled Regenerate Account Credentials for all devices tasks within profiles. |
| Master Encryption Key | Ensure you have the Master Encryption Key (MEK) of the PAM Server you are restoring. |
Backup Restore Upgrade Procedure
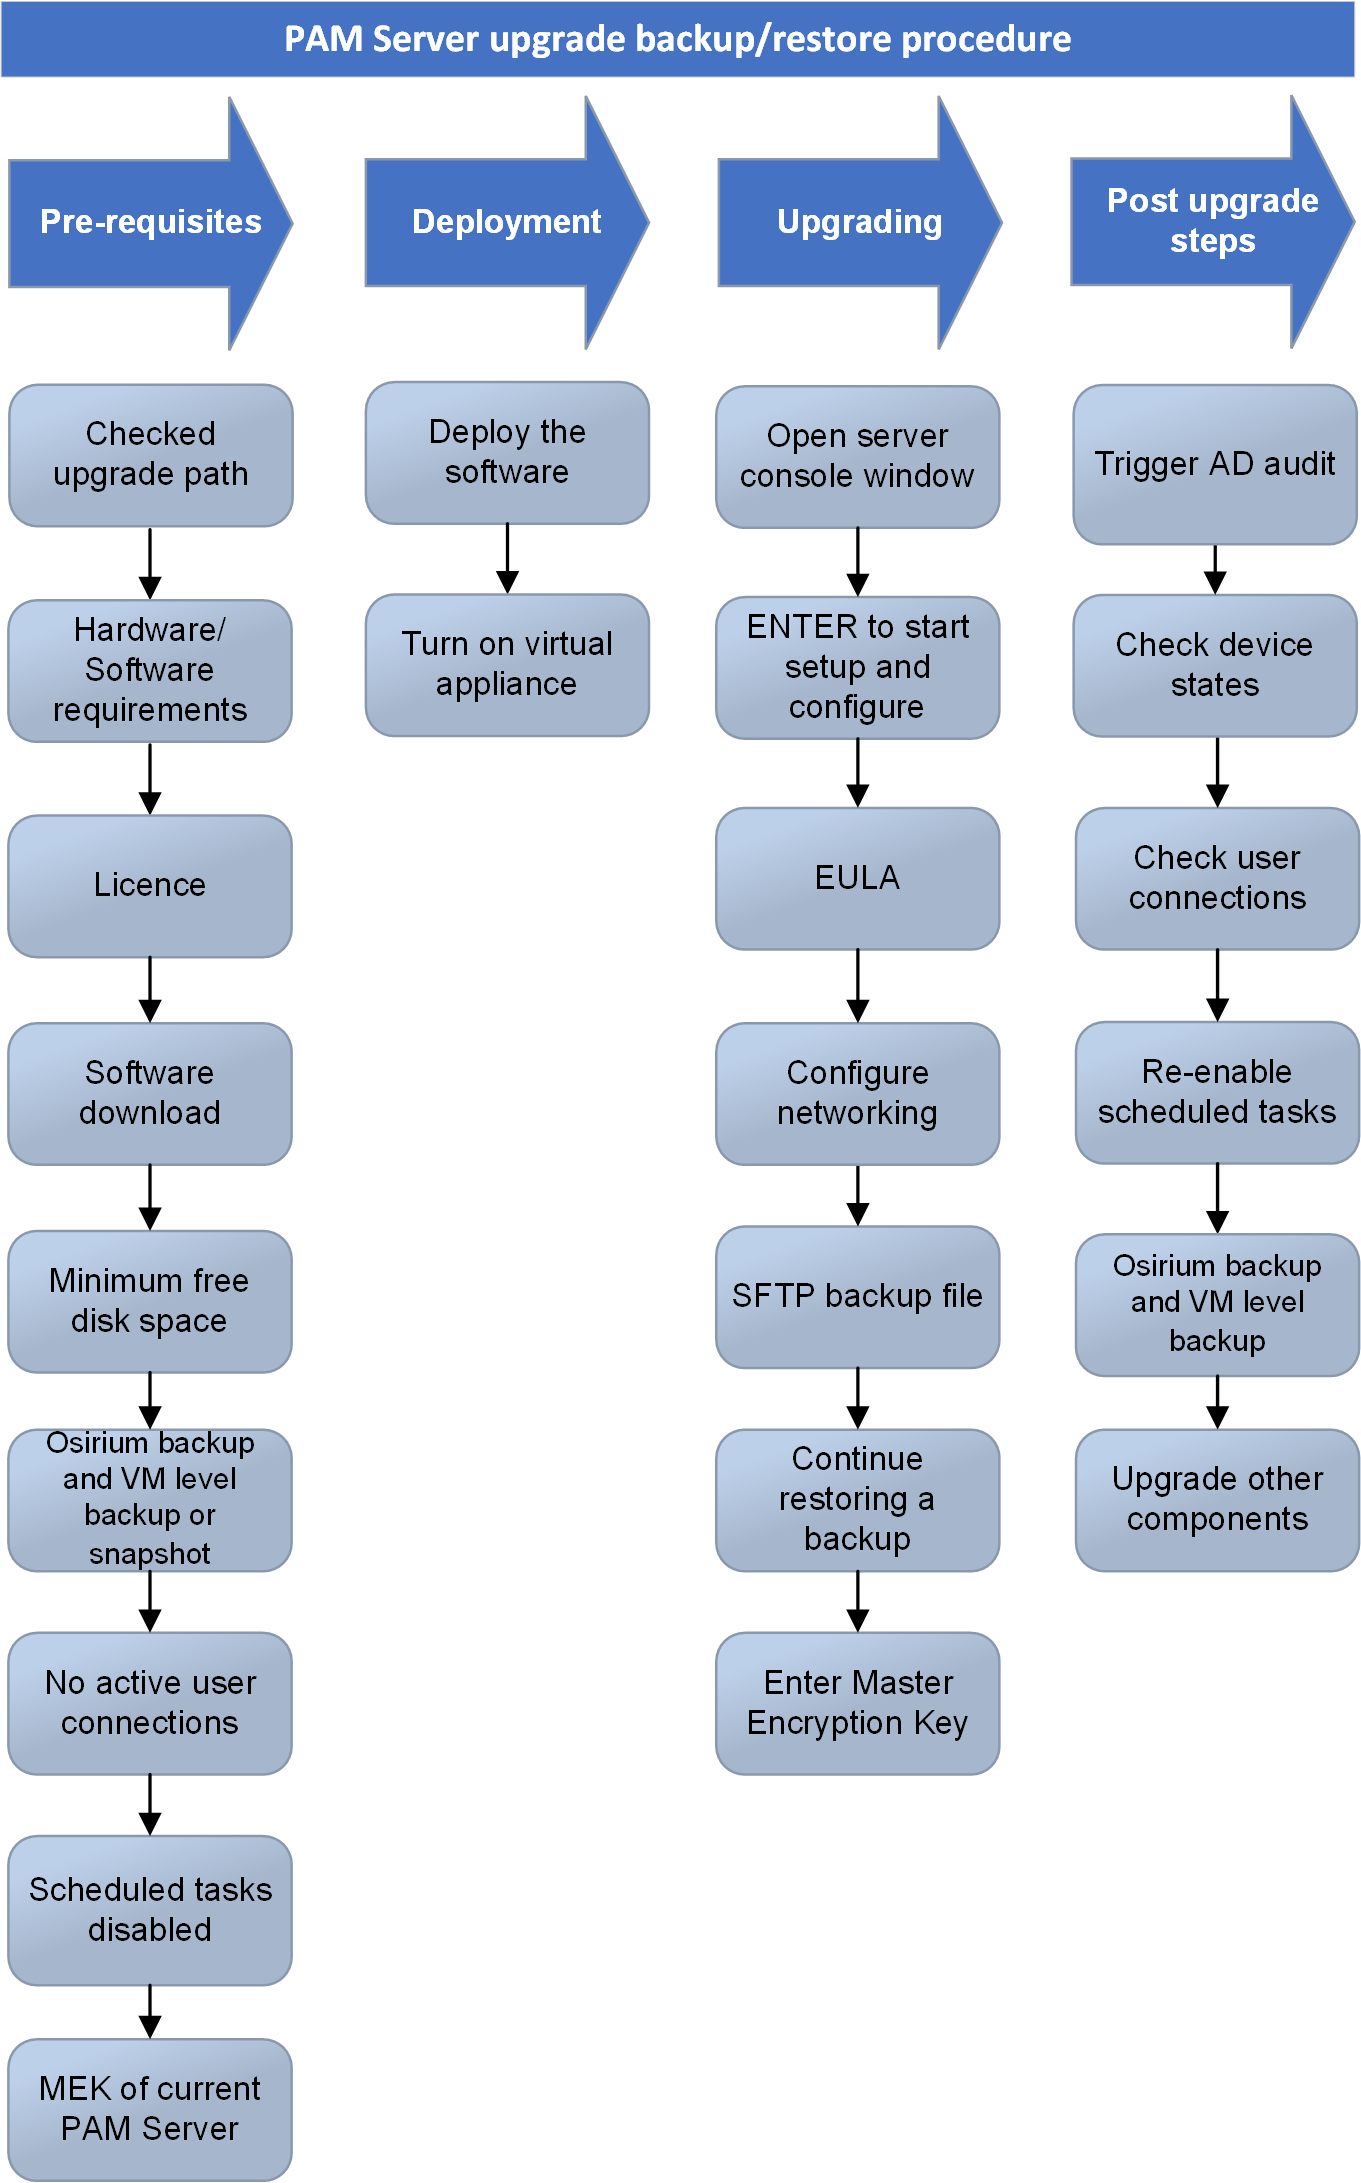
The diagram provides a high-level overview of the process for upgrading your PAM Server using the backup restore method.
Backup/restore upgrade procedure flowchart
Warning
Before starting your upgrade make sure that all Prerequisites have been met.
Deploying the PAM Server
Firstly you will need to deploy a new PAM Server using the latest software version.
Deployment into the different supported infrastructures may vary, therefore click on a link below to be navigated to the correct deployment steps.
- Deploy using VMWare vSphere
- Deploy using Microsoft Azure
- Deploy using Microsoft Hyper-V
- Deploy using Amazon Web Services
- Deploy using Nutanix Prism Central
Upgrading using the backup file
Once the PAM Server has been successfully deployed you will need to run through the setup and configuration.
-
Within the Console window, press ENTER when prompted to start the setup and configuration.
-
Read and accept the EULA to continue and press ENTER.
-
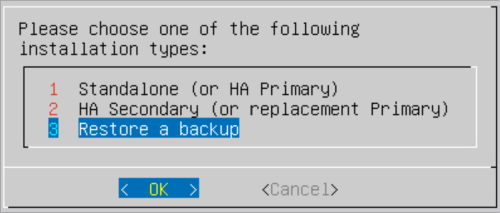
Select Restore a backup installation type and press ENTER.
-
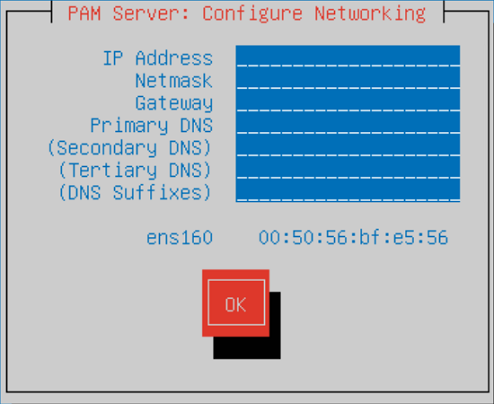
Within the Configure Networking screen, configure the following virtual appliance settings. Press TAB to navigate between the fields.
- IP Address: Enter the IP Address which will be used to connect to the virtual appliance.
- Netmask: Enter the network mask.
- Gateway: Enter the network default gateway IP address.
- Primary DNS: Enter the network primary DNS IP address.
- (Secondary DNS): Enter the secondary DNS IP address if relevant, else leave blank.
- (Tertiary DNS): Enter the tertiary DNS IP address if relevant, else leave blank.
- (DNS Suffixes): Enter the DNS Suffixes if relevant, else leave blank.
-
Once completed TAB down to the
OKbutton and press ENTER. -
On the PAM Server Restore screen, SFTP onto the virtual appliance using IP Address, username and password shown on the screen.
-
Copy the PAM Server backup file onto this new PAM Server. Once successfully copied, the screen will update and the copied backup file will appear in the list.
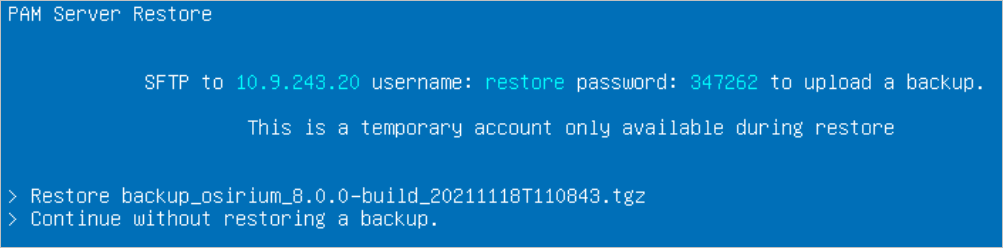
-
Select the Osirium backup file and press ENTER.
-
When prompted, TAB to the
OKbutton and press ENTER to continue. -
Enter the Master Encryption Key (including dashes) of the PAM Server that the Osirium backup was taken from.
-
Once entered TAB to the
OKbutton and press ENTER. Wait while the system is configured.From release v7.2 the PAM Server and PAM UI have been integrated to provide a single unified installation.
Make a note of the https address if you want to connect to the server via the unified PAM UI.
If you wish to install and configure a separate PAM UI Server click here for instructions.
Post upgrade tasks
Once the Osirium backup has successfully installed, logon to Osirium PAM and check the following before allowing users to reconnect:
| Post upgrade task | Description |
|---|---|
| Trigger AD audit | Before opening any device connections that use an Active Directory account, an audit needs to be manually triggered on all provisioned Active Directories. You can do this by right clicking the Active Directory on the Manage Active Directory page, and select Trigger audit from the menu. |
| Check device states | Check device status to ensure they are running successfully. |
| Check user connections | Check users can connect to devices. |
| Re-enable scheduled tasks | Re-enable scheduled Regenerate Account Credentials for all devices tasks. |
| VM level backup | Take an Osirium backup and a VM level backup. See Backup & Recovery for further details. |
| Upgrade PAM UI | If you are using a standalone PAM UI Server then use the PAM Component Compatibility Matrix to check if the PAM UI Server needs updating inline with the PAM version you have upgraded to. Upgrade as appropriate.. |
| Upgrade MAP Server | If you are using a MAP Server then use the PAM Component Compatibility Matrix to check if the MAP Server needs updating inline with the PAM version you have upgraded to. Upgrade as appropriate. |