Installing the PAM Client
This section is intended for PAM users who want to install the PAM Client and covers:
Before you start
Make sure you have your logon details from your Osirium PAM SuperAdmin:
- Osirium PAM Server Address.
- Username.
- Password.
Installing
To download and install the PAM client:
-
Open a web browser window and enter the following: https://(Osirium_PAM_Server_Address)/downloads.
-
On the Osirium PAM Client Download page, click the
Download for Windowsbutton. -
Within the Client Download window you will also find:
-
Checksum: used to verify the correct file has been downloaded.
-
Host Key Fingerprint: used to verify you are connecting to the correct Osirium PAM server address during your first login to the server.
-
-
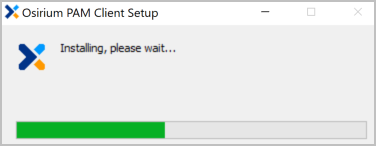
When the download is complete, double click the executable to start the installation.
The PAM Client is installed into the following folder:
C:\Users\username\AppData\Local\Osirium\. The following folders and files can be found here:-
PAM Client folder contains the:
- Application files: including the Osirium.exe, Uninstall.exe and debug.log files.
- Resources folder: contains the default applications that will be used to launch your device tools. -
Logs folder will store the Trace.log files when created. These log files will keep a log of your connections and authentication attempts.
-
-
When the installation has finished, an Osirium PAM Client desktop shortcut will be added and the Osirium PAM login window be presented.
Logging on
-
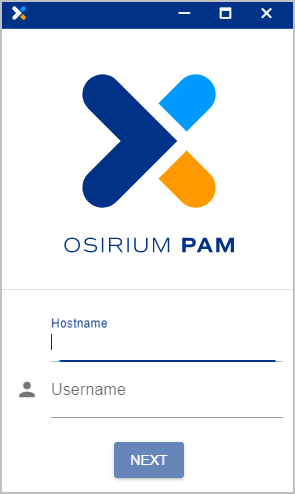
Click on the Osirium PAM Client shortcut on your desktop.
-
Enter your login details:
Field name Description Hostname Enter the address (IP Address or hostname) of the Osirium PAM. Username Enter your PAM username. -
Click
NEXT. -
Now enter the following:
Field name Description Password Enter your password. Token code If your Osirium PAM SuperAdmin has provided a token code then enter it here. Only after successful verification of both the password and token code will you be logged in. -
Enter the login details you have been provided.
Note
If you are using a Token code then following information maybe be helpful:
RADIUS token code authentication
If you are using RADIUS authentication that requires you to enter a RADIUS code which is received via SMS or email, then you will be prompted with a secondary Osirium PAM window in which to enter your code. Enter the code and clickSEND.
TOTP (time-based one time password) token code authentication
If you are using TOTP authentication, then you will be prompted with a secondary Configure multi-factor authentication window and will be required to complete the verification before continuing. For more details see
- Local username and password then TOTP
- Active Directory username and password then TOTP -
Click
LOG IN. -
You will be asked to verify the PAM Server fingerprint. This can be found on the Client Download window. Once verified, click
ACCEPT. -
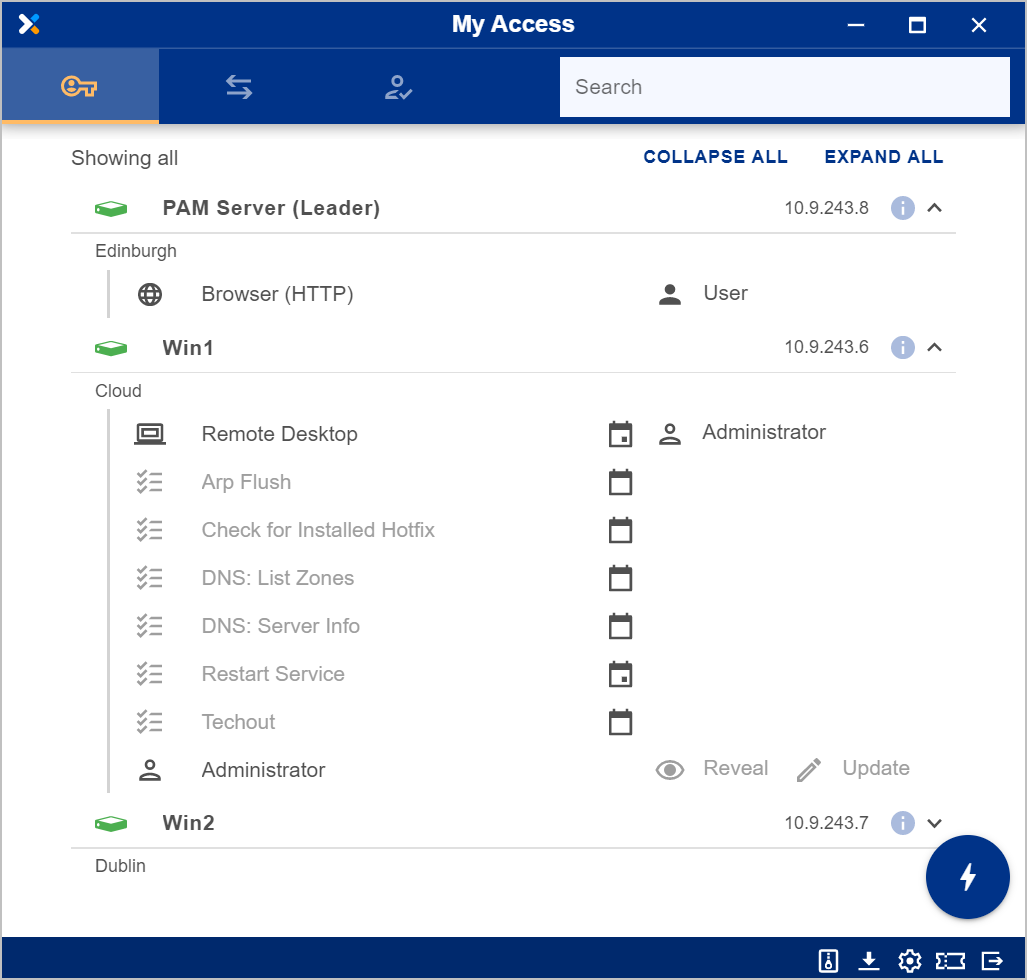
When successfully authenticated you will be presented with the PAM Client interface.
Settings OPTIONAL
There are optional settings that can be configured to customise your PAM Client.
The Settings window can be accessed by clicking on the ![]() icon located in the bottom right-hand corner.
icon located in the bottom right-hand corner.
Within the Settings window you can configure:
-
Your download file location.
-
The launch tools you want to use.
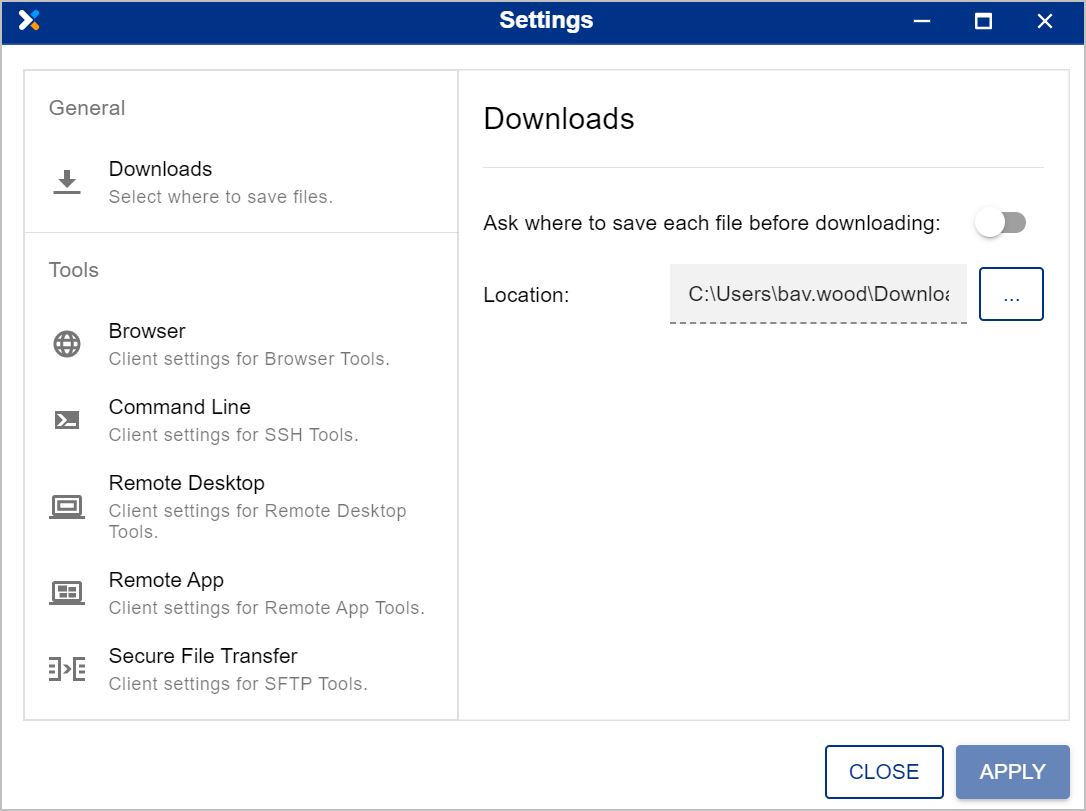
Download file location
You can configure your download settings to either prompt you to select a download location or you can set a default location for where all files you download will be saved to.
Select device tools
Default launch tools can be configured and you can select your preference from the compatible tools listed. If the executable of the selected tool is not found then you can browse to find the location or you may need to install the tool first if that is the one you want to use.
To configure a launch tool option:
-
Within the interface, click on the
 icon located in the bottom right-hand corner.
 -
Within the Settings window select a tool listed in the left-hand menu.
-
Then on the right-hand side, use the drop-down list to select the tool you want to launch your device connection with.
-
If an executable path has not been found then browse and select the location of the executable on your workstation.
-
Click
APPLYto save your selection. -
Click
CLOSEwhen you have finished.
Pinning the PAM Client
When you log on to PAM you will be asked to enter a hostname. The hostname of the PAM Server that you will be using can be pinned through the registry. When the hostname is pinned, the hostname field will no longer be visible in the login window.


To pin the hostname:
-
Open the Registry Editor on your workstation.
-
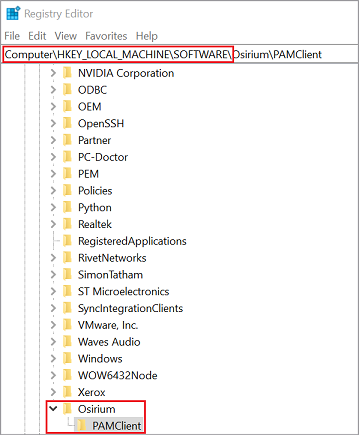
Within the Registry Editor window, navigate to HKEY_LOCAL_MACHINE\Software.
-
Within the Software key create a a new key called Osirium.
-
Within the Osirium key create a new key called PAMClient.
-
Click on the PAMClient key, in the right-hand pane, right-click and select New > String Value. Name it PAMHost.
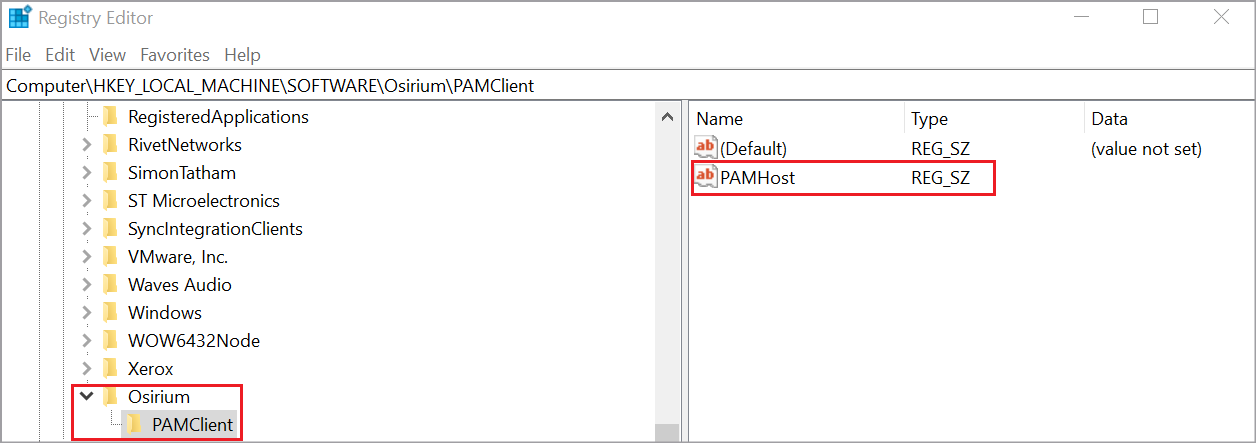
-
Right-click the PAMHost entry and select Modify from the menu.
-
Within the Edit String window, enter the PAM hostname into the Value data field.
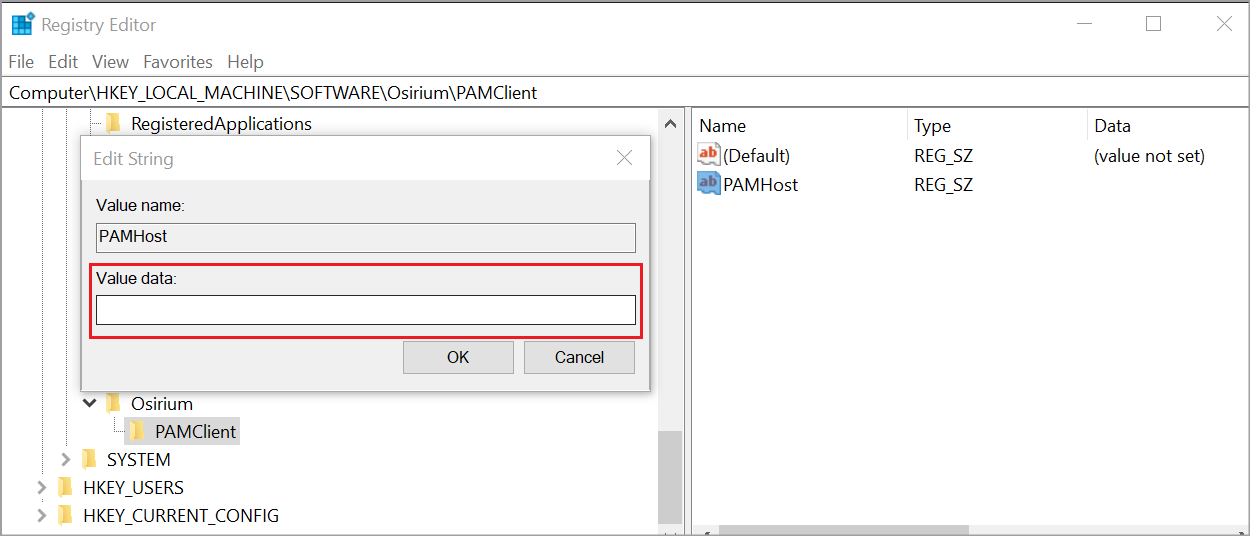
-
Click OK. The PAM Client hostname is now set.
-
Close the Registry Editor window.
Note
To update or remove the hostname, edit the PAMHost string data value.
Upgrading
When the Osirium PAM system has been upgraded, the first time you logon to the PAM Client, you will be prompted to upgrade.
To upgrade:
-
Open the Osirium PAM Client.
-
Enter your login details:
Field name Description Hostname Enter the address (IP Address or hostname) of the Osirium PAM. Username Enter your PAM username. -
Click
NEXT. -
Now enter the following:
Field name Description Password Enter your users password. Token code If your Osirium PAM SuperAdmin has provided a token code then enter it here. Only after successful verification of both the password and token code will you be logged in. Note
If you are using a Token code then following information maybe be helpful:
RADIUS token code authentication
If you are using RADIUS authentication that requires you to enter a RADIUS code which is received via SMS or email, then you will be prompted with a secondary Osirium PAM window in which to enter your code. Enter the code and clickSEND.
TOTP (time-based one time password) token code authentication
If you are using TOTP authentication, then you will be prompted with a secondary Configure multi-factor authentication window and will be required to complete the verification before continuing. For more details see
- Local username and password then TOTP
- Active Directory username and password then TOTP -
Click
LOG IN. -
You will be prompted with the Software Upgrade window, click
UPGRADE. You will see a download progress.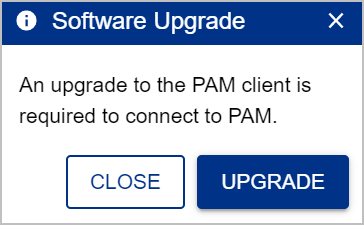
Note
If you click
NOthe Software Update window will close and you will be taken back to the PAM Client login window. You won't be able to logon to the Osirum PAM until you have upgraded your PAM Client. -
When the download is ready you will be prompted to continue with the upgrade, click
RESTART. The PAM Client will close during the upgrade and reopen once it has completed.