Template library
This sections explains the Osirium PAM Template library, the role they play and how they are managed. The following topics are covered:
- What are templates?
- Template structure
- Working with templates
- Template versioning
- Template release notes
- Managing templates
- Uploading the templates
- Uploading an individual template
- Show template
- Edit a template
- Uploading a web driver
- Downloading a template
- Download bulk import template
- Delete a template
What are templates
Templates are an interface between Osirium PAM and a device. Templates provide Osirium PAM with the necessary access control and account provisioning information to communicate with the device.
Templates are:
- XML or AutoIt files.
- External to the Osirium PAM system so can be easily edited, changed and new ones created and uploaded.
- Required per device but can be used by multiple compatible versions of the device.
- Easily uploaded through the Admin Interface individually or using a template library.
Provisioning a device means adding a device into Osirium PAM so it can be managed. To provision a device a template must be available.
Templates allow Osirium PAM to:
- Interact with and manage the device using it's native management interfaces.
- Define single sign-on access to the device.
- Delegate tasks to users.
Currently, Osirium PAM supports the following protocols:
- SSH
- TELNET
- HTTP
- HTTPS
- RDP
- vSphere
- MSSQL Management Studio (using sql authentication)
Template structure
Templates can be broken down into three main areas:
- Configuration
- Action Tasks
- Data Collection Tasks
Configuration
The device configuration information includes:
- Connection critical configuration: required in order for Osirium PAM to connect and communicate with the device: hostname, IP address, port etc.
- Device access: details how the device can be accessed by Osirium PAM and through single sign-on for users.
- Access tokens: defines the access levels supported by the device and which can be used for user single sign-on.
- User tools: lists the access protocols that are supported by the device and can be used to access the device.
Action tasks
Device tasks configured within a template include:
- User add/delete/set password.
- Set device parameters.
Data Collection tasks
Data collection tasks with a template include:
- User show.
- Device version.
- Read-only parameters.
Working with templates
Before adding tasks to an existing template, we recommend a number of best practices be implemented when editing and updating Osirium PAM templates.
There are two ways that templates can be edited:
- Using the Admin Interface inline editor.
- Downloading the template and editing locally on your workstation.
Inline editor
You can create a template file or edit a template or template library containing several files from the Template Editor page in the Admin Interface.
To create a template file:
-
Go to the Template library page.
-
Click the
NEW TEMPLATEbutton. The Template Editor opens in a new browser window.
To edit a template:
-
Go to the Template library page.
-
On the table, click a template. The Template detail page opens, displaying a summary of the template details.
-
On the Template detail page, click
EDIT. The Template Editor opens in a new browser window.
The inline template editor has a built-in auto-completion feature displaying the available tags and parameters.
Download
You can download a template or template library (contains several files) from within the Admin Interface in System > Template library.
To download a template/template library:
-
On the Template library page, right-click a template. Best practice is to select the latest template.
-
Select
Downloadfrom the context menu.If the PAM Server Browser (HTTP) tool is being session recorded, then you will need to use the Shared Drive mechanism for downloading files. For further details see Downloading a file using Shared Drive.
Sub template files
The best way to add an additional task into an existing template is to create a sub template file. To use sub template files follow the followings rules:
-
Open the Inline Editor.
-
If one does not already exist, create a folder next to the main template file and name it the same as the main template file minus the .xml extension.
-
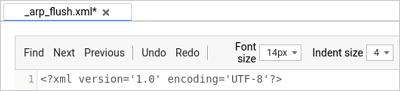
Create a file inside this folder that begins with an underscore and ends with the extension .xml.
-
Add a
<devicetemplate>open tag at the beginning of the file. -
Add a
</devicetemplate>closure tag at the end of the file.
You can then add any of the following tags inside the sub template file to create your task:
<release\_note><parameters><tasks>
If you are downloading and editing files locally, then:
-
Create the file within the saved location of the downloaded template/template library.
-
Once created, .zip or .tgz the template/template library and upload into Osirium PAM.
If the PAM Server Browser (HTTP) tool is being session recorded, then you will need to use the Shared Drive mechanism for uploading files. For further details see Uploading a file using Shared Drive.
Tip
Best practice is to create separate sub template files for your own custom user tasks. This allows them to be easily moved into other Osirium PAM releases of core templates.
Template versioning
Templates are continually evolving and tasks can be edited and added at any time. It is therefore important to manage the version number of the templates so they can be easily tracked.
The templates attribute contains the following version control elements:
Version_major
- The major version number of the template that is being released.
- This number is for Osirium PAM use only and is incremented whenever we formally release new versions of templates.
- Formally released templates have a major version of 1 and above.
Version_minor
- The minor version should be incremented for edits and additions being made to the template.
- This number is for customer use and is used to control changes to release templates.
- All Osirium PAM released templates have a minor version of 0.

This information is displayed on the Template library page under the Version column in the Admin Interface when a template is uploaded.
Templates that have not yet been formally released (but can be made available for experimental use) have a template version of below v1.0.
When making changes and developing templates within Osirium PAM use the version_minor increments with additional zero’s so you can differentiate between versions, but leave the version_major as this relates back to the release template the edited template is based on.
Template release notes
The <release_note> tag is used to track changes made to a template. This information is then made visible in the Admin Interface when managing templates.
The <release_note> tag can be placed anywhere in the template, although generally Osirium PAM released templates have them placed at the start of the template.
Additional <release_note> tags can be added before any additional tasks to provide useful information and comments about the added task.
Additional Release Notes comments will also be made visible in the Admin Interface.
If you are using the inline template editor to add a release note tag, use the following steps:
-
Press the < less than key and you’ll get the auto correct list of options. Select
release_note. The editor will auto fill the tag name. -
Press Spacebar and it will auto fill the
timestampparameter (as this is the only parameter available in the release_note tag). -
Select the
timestampparameter and press equals = key. -
Press double quotes " key and the editor will automatically fill in the timestamp for you.
-
Press double quotes " key again to complete the
timestampparameter. -
Close the tag with > greater than key.
-
You will now be placed on the next line ready to enter your release note text. The editor also automatically adds the closure tag
</release_note>on the next line too.
Managing templates
The Template library page lists all the templates that have been uploaded into Osirium PAM.
Note
When upgrading the PAM Server, new templates will be automatically uploaded and customised templates will be retained.
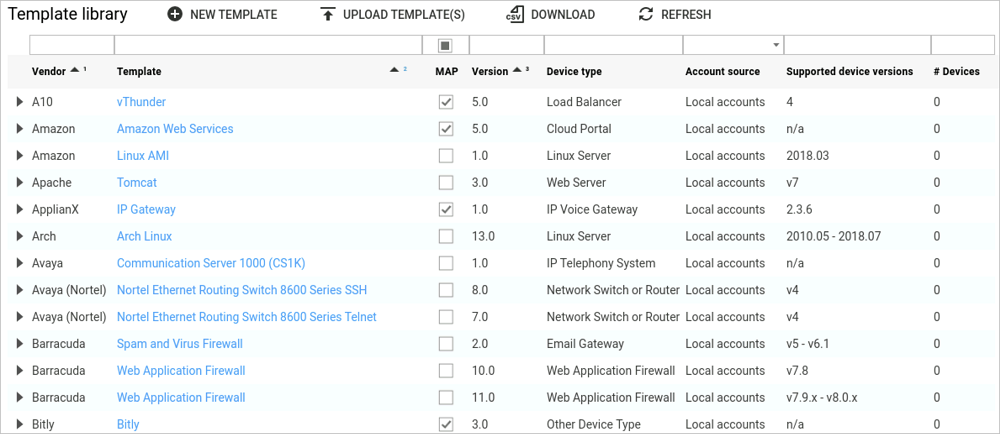
The following information is presented on the Template library page:
| Heading | Description |
|---|---|
| Vendor | The name of the vendor that manufacturers the device. |
| Template | The display name given to the template. |
| MAP | If checked  , indicates that a MAP Server is required for full functionality. , indicates that a MAP Server is required for full functionality. |
| Version | The version number of the template. |
| Device Type | Shows the device type defined in the template. Each device type has it's own icon. Icons are shown on device detail pages. |
| Account source | Indicates the type of account source used by this template. |
| Supported device versions | Details the device versions that are supported by the template. |
| Devices | Shows the current number of devices currently using this template. |
| Shows the release notes inside the template. |
By default, the templates are sorted by vendor, then template name, then version.
To configure the sort:
-
Click on
Template libraryin the left-hand menu. -
Within the Template library page, click on a column heading, and then select
Configure Sort…from the context menu.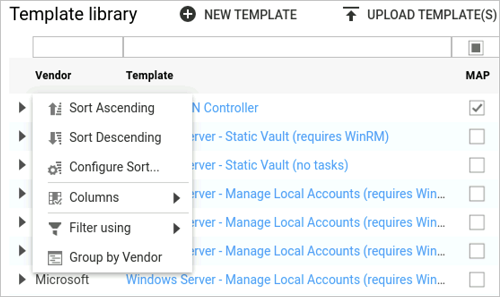
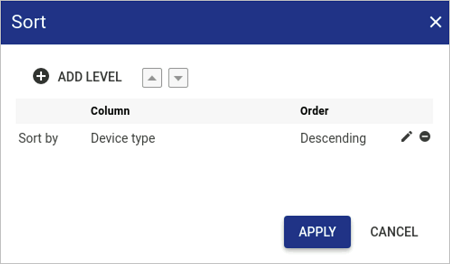
-
Within the Sort window, you will see the default sort which has been configured. Amend the sort configuration as required.
-
Click
APPLYwhen you have finished. -
The columns which the table is being sorted by will contain a number in the heading to indicate what order the sort is being done.

Uploading the templates
Note
When upgrading the PAM Server, new templates will be automatically uploaded and customised templates will be retained.
To download and upload the template library:
-
Click
Template libraryfrom the left-hand menu. -
Go to Latest Template Bundle.
-
In order to download the template library you have to be a registered user with a valid username/password. Login and download the latest template library.
-
Back on the Template library page, click
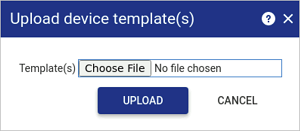
UPLOAD TEMPLATE(S). -
Within the Upload device template(s) window, click
Choose Fileto select the Template library.If the PAM Server Browser (HTTP) tool is being session recorded, then you will need to use the Shared Drive mechanism for uploading files. For further details see Uploading a file using Shared Drive.
-
Click
UPLOAD. The templates will be uploaded. -
The Device template(s) upload result page appears listing the status of each template. Click
DISMISSto see the templates listed within the Template library page.Note
If your template is not available in the current template library then please contact Osirium Ltd for advice and help with creating a template.
Uploading an individual template
New or updated templates can easily be uploaded into Osirium PAM.
To upload a new template:
-
On the Template library page, click
UPLOAD TEMPLATE(S). -
Browse and select the new template or template library to be uploaded.
If the PAM Server Browser (HTTP) tool is being session recorded, then you will need to use the Shared Drive mechanism for uploading files. For further details see Uploading a file using Shared Drive.
-
To overwrite any existing templates click on the checkbox. Only changes/additions to the tasks will take effect during the overwrite.
-
Click
UPLOAD.
Show template
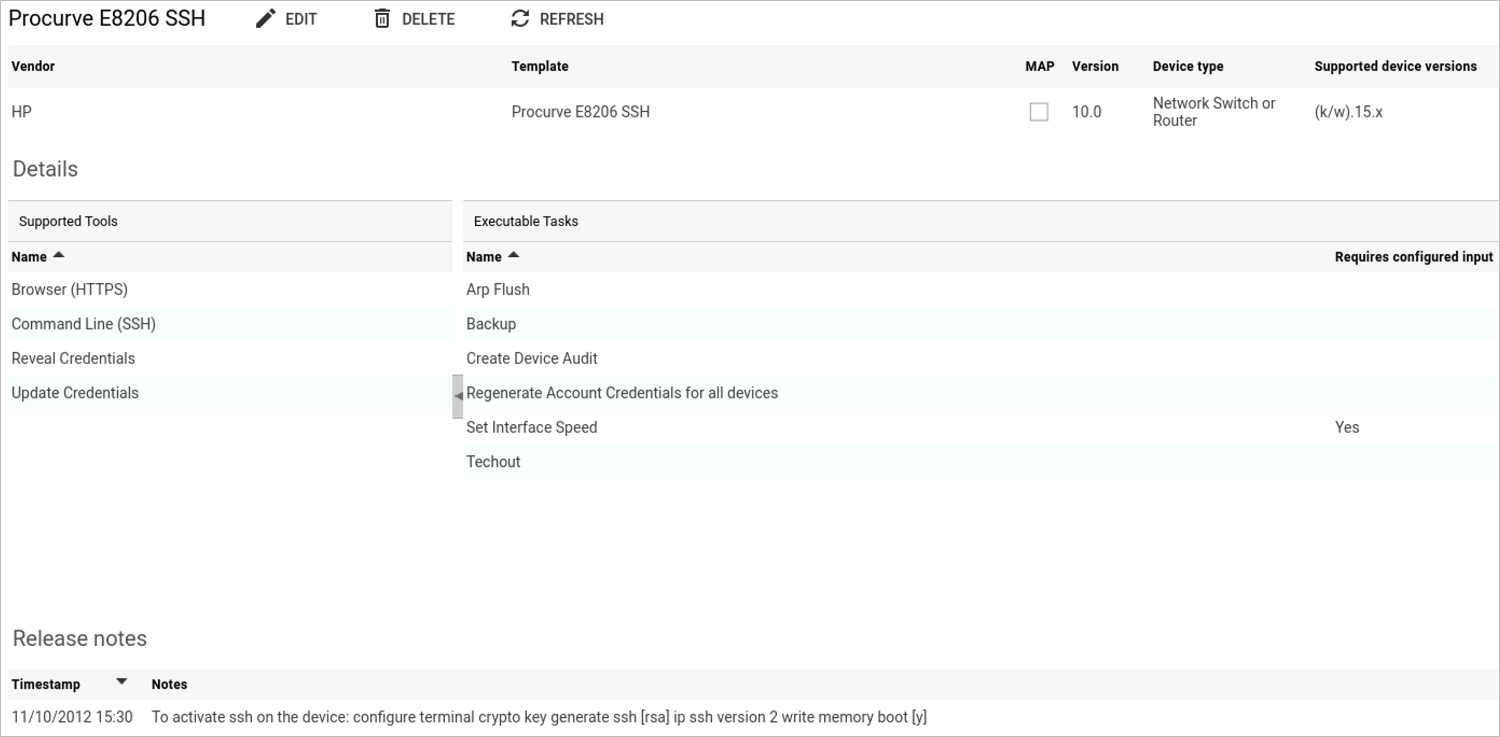
The Template detail page provides an overview of the tools and tasks that have been configured in a template. It also displays any release notes defined in the template.
To view a template:
-
On the Template library page, right-click a template and then click
Show. -
You will be navigated to the Template detail page.
Edit a template
Templates can either be updated using the Inline Editor or Downloaded and updated using an external editor.
To edit a template using the inline editor:
-
On the Template library page, right-click a template and then click
Show. -
On the Template detail page, click
EDIT. The template will open in a new browser window within the Inline editor.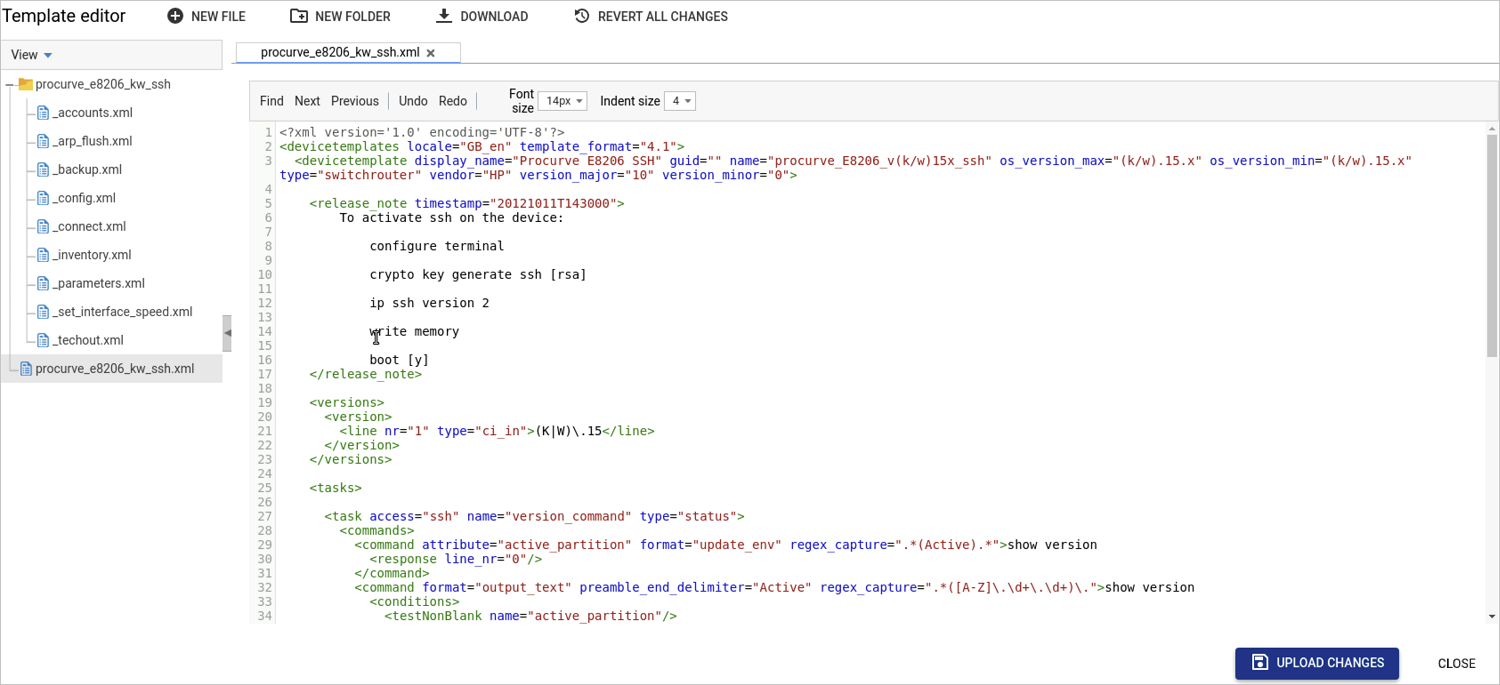
-
Before you start making any changes to the template you need to update the template version.
These updates are classed as Customer updates so the version_minor should be incremented and NOT the version_major. This is to prevent any clashes between released templates in the future, as Osirium PAM increments the version_major when updating and releasing new or updated templates.
-
Now we have updated the version we can now start to add our task. The best way to add your own additional task into the template is to create a sub template file.
Right-click the
 folder and select
 New filefrom the context menu.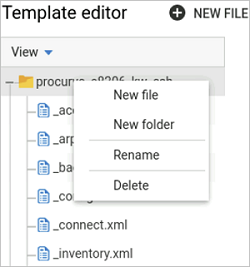
-
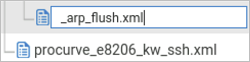
Give the task file a name which must start with an _ underscore and end with a file extension of .xml.
-
Press ENTER to save the file. The file should now be listed in the left-hand pane, within the template
folder. -
Click the new file and then click in the right-hand pane which should be blank.
-
You can start building your task. Firstly you need to add the file definition tag which you will see at the start of every template file.
This is important as it sets the character encoding to UTF-8.
-
Then add a
<devicetemplate>tag. The main template file has a<devicetemplates>tag and all sub-files which start with an _ underscore filename must contain a<devicetemplate>tag for them to be included in the overall template when loaded into Osirium PAM.Within the right-hand pane start by entering an opening tag with a < less than symbol and typing
device. The auto-completion displays matching results. -
Select
devicetemplateand close the tag with a > greater than symbol. The auto-completion will add in the closing tag.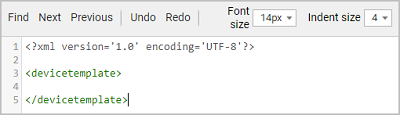
-
Now start to build your task. For help, see Tutorial Adding User Tasks guide.
-
Before uploading the changes, ensure your syntax is correct. Any issues can be identified by the proceeding code turning red.
-
The task is now complete. Click the

UPLOAD CHANGES.Note
More information on creating templates can be found here Template Guide Documenation.
Uploading a web driver
New web drivers can now be uploaded through Osirium PAM templates. The new web driver can then be used to single sign-on to devices.
To upload a new web driver using the inline editor:
-
On the Template library page, click the link on the template name. The Template detail page will open.
-
On the Template detail page, click
Edit. The template will open in a new browser window within the Inline editor. -
Before you start making any changes to the template, you need to update the template version. These updates are classed as Customer updates so the version_minor should be incremented and not the version_major. This is to prevent any clashes between Osirium PAM released templates in the future, as Osirium PAM increments the version_major when updating and releasing new or updated templates.
-
Now create a new sub template file.
Right-click the
folder and select New filefrom the context menu. -
Give the file a name http_{vendor_name}.py or https_{vendor_name}.py .

-
Press
ENTER to save the file. The file should now be listed in the left-hand pane, within the template folder. -
The new file will be open, click in the right-hand pane which will be blank.
-
Copy the contents of the web driver file provided by Osirium PAM into the new file created.
-
Click the
UPLOAD CHANGES. The new web driver file will be stored with the new version of the template.If the PAM Server Browser (HTTP) tool is being session recorded, then you will need to use the Shared Drive mechanism for uploading files. For further details see Uploading a file using Shared Drive.
Devices provisioned with the updated template will use the new web driver file when single sign-on to the device.
Downloading a template
Templates can easily be downloaded so they can be amended and updated.
To download a template:
- On the Template library page, right-click a template, click
Download.If the PAM Server Browser (HTTP) tool is being session recorded, then you will need to use the Shared Drive mechanism for downloading files. For further details see Downloading a file using Shared Drive.
Download bulk import template
Devices of the same type can be bulk uploaded by downloading and populating the bulk import device CSV (comma separated value) template format for that device.
To bulk import devices:
-
On the Template library page, right-click a template and click
Download bulk import template.If the PAM Server Browser (HTTP) tool is being session recorded, then you will need to use the Shared Drive mechanism for downloading files. For further details see Downloading a file using Shared Drive.
-
Save the bulk import template to a specified location. See Bulk Uploading.
Delete a template
Deleting a template permanently removes it from Osirium PAM.
A template which is currently in use by a provisioned device can’t be deleted. To delete the template you would have to first unprovision all devices using the template or migrate the devices to another template.
To delete a template:
-
On the Template library page, right-click a template and then click
Delete. -
The Question window opens. Click
YES.