Working with Templates
This section covers:
Welcome to the world of Osirium PAM templates!
Before you get stuck in, there are a few things you will need to know about when handling and managing templates within PAM Servers.
Inline editor
The Admin Interface has a built-in inline template editor which is the primary and recommended way to edit and manage templates.
To edit a template inline:
-
Within the Admin Interface, click on Template library in the left-hand menu.
-
Within the Template library page, click on a template.
-
On the Template detail page, click
Edit. The Template editor will open in a new browser window showing the selected template.- The left-hand menu lists the sub folders and files that make up the template.
- When a file is selected the main workspace displays the contents of the file which can then be updated.
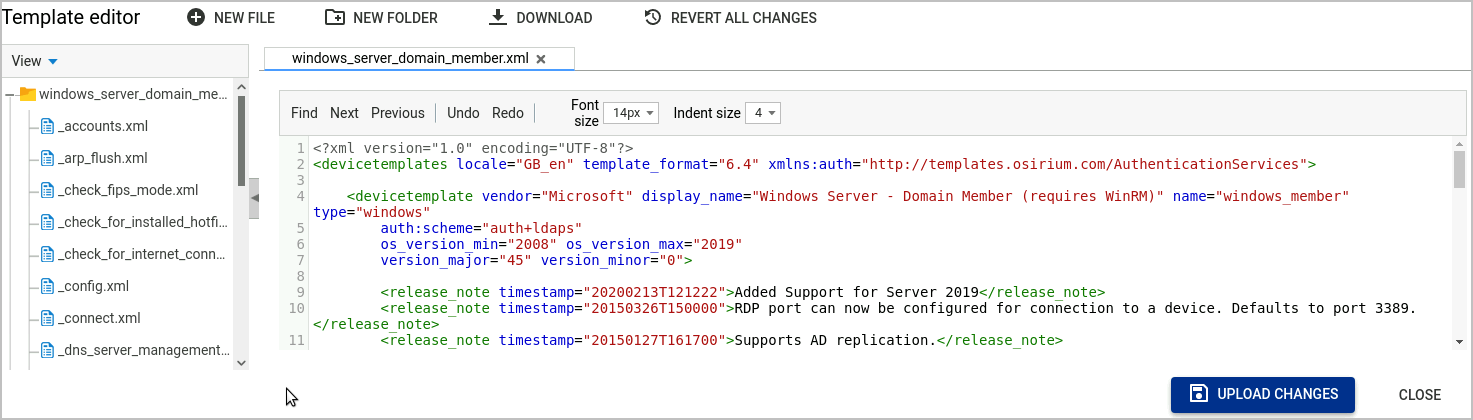
Using the editor
The following provides some useful information about the editor and its features:
Highlighting
Template code is displayed in different colours to highlight the parameters and parent/child tags.
Auto completion popup
When you open a tag (<) the editor will display all tag names applicable to that part of the template. You can then choose the tag you want from the list.
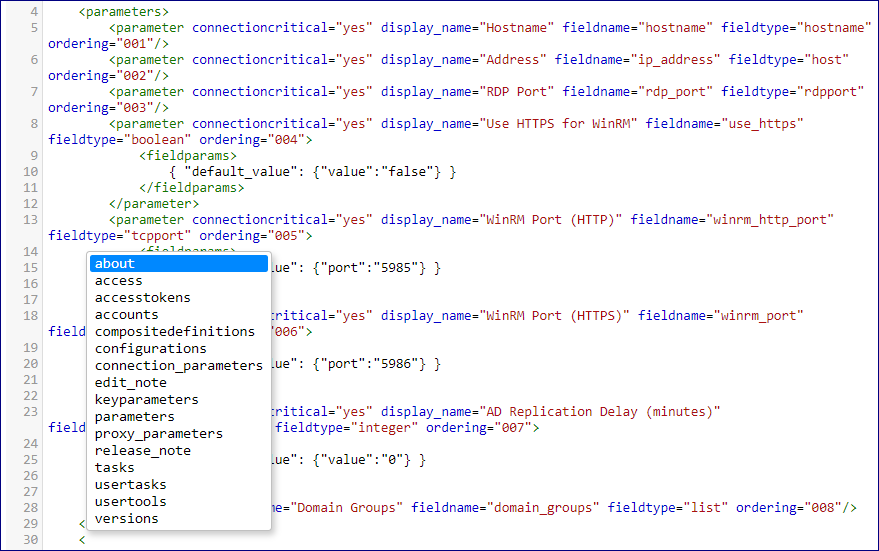
Once the tag is selected, pressing Spacebar will display all the attributes applicable to that tag.
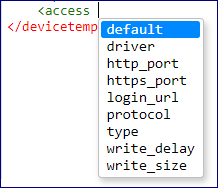
If there is only one attribute left, i.e. you've already used all the others (you can only have one instance of each attribute in an XML tag), the editor will auto fill that last remaining attribute name for you.
When you close the tag (>) the editor will automatically place the corresponding closure of that tag on the next line.
If you self close the tag (/>) then the closure tag won't be automatically added.
When you've finished working on a template you can upload your changes back into the system by clicking on the Upload changes button at the bottom of the Template editor window.
Note
Any errors or warnings will appear in the center of the editor window.
Downloading and uploading
Templates can also be downloaded and then edited locally on your workstation.
Note
It is advisable to always work from the latest template.
To download a template:
-
On the Template library page, left-click a device template and then click
Downloadfrom within the context menu. The template and all its subfolders and files will be downloaded in zip format.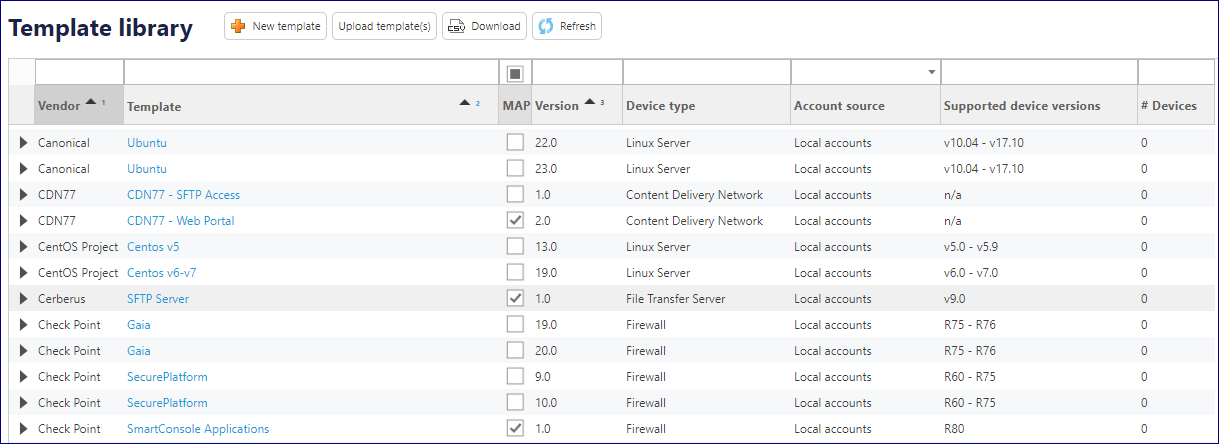
-
Edit the template files locally.
-
Once you have finished editing, zip the template files back up so you can upload them. On the Template library page, click the
Upload template(s)button and select the updated template.
Note
The upload will fail if the template version already exists so make sure you update the template versions.
Template split files
The example at the start of this page shows all the relevant tags listed in one template file. However it is recommended to separate templates out into sub template files.
XML sub templates
There are a number of rules to using XML sub template files, these are:
- Split template files MUST be placed inside a folder next to the main template file and the folder must be named the same as the main template file minus the .xml extension.
- Split template file names MUST begin with an underscore and end with the extension .xml.
- It MUST have a
<devicetemplate>opening tag at the beginning of the file. - It MUST have a
</devicetemplate>closure tag at the end of the file.
An example of an empty split template file looks like:
1 2 3 4 | |
In summary you can only have one <devicetemplates> tag but you can have multiple <devicetemplate> tags, containing any applicable child tags, placed in multiple files.
When Osirium PAM loads a template before running a task, it looks for any relevant split template files, and merges them into the main template to create a single XML document.
AutoIt scripts for MAP servers
For MAP AutoIt scripts, the following rules apply:
- Split template files MUST to be placed inside a folder next to the main template file and the folder must be named the same as the main template file minus the extension.
- The split template file must be saved as an .au3 file.
- The split template MUST include a reference to the Osirium.au3 file.
1 | |
When Osirium PAM loads a template before running a task, it looks for any relevant split template files, and merges them into the main template to create a single XML document.
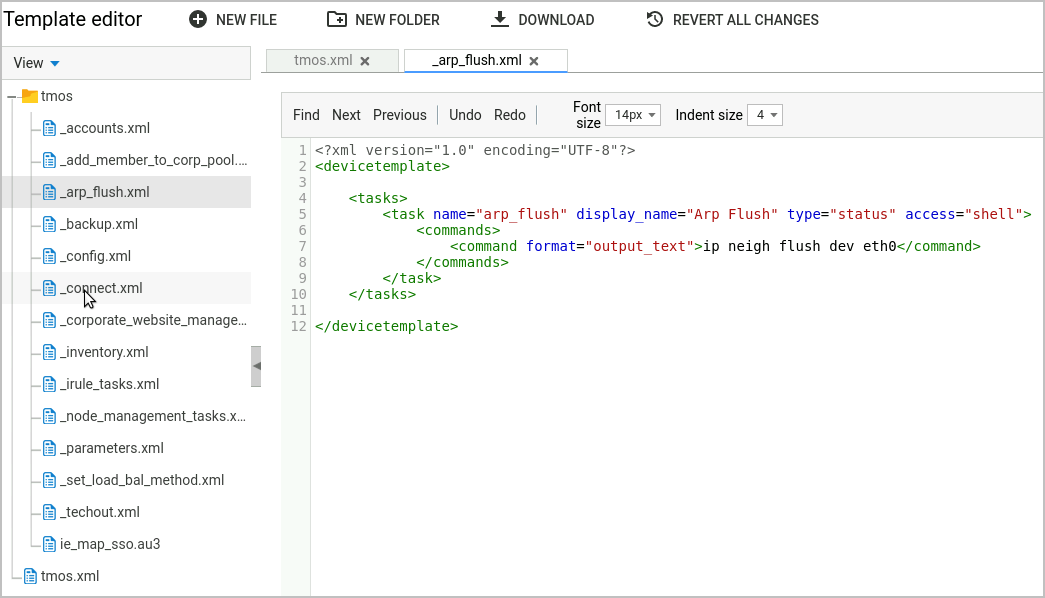
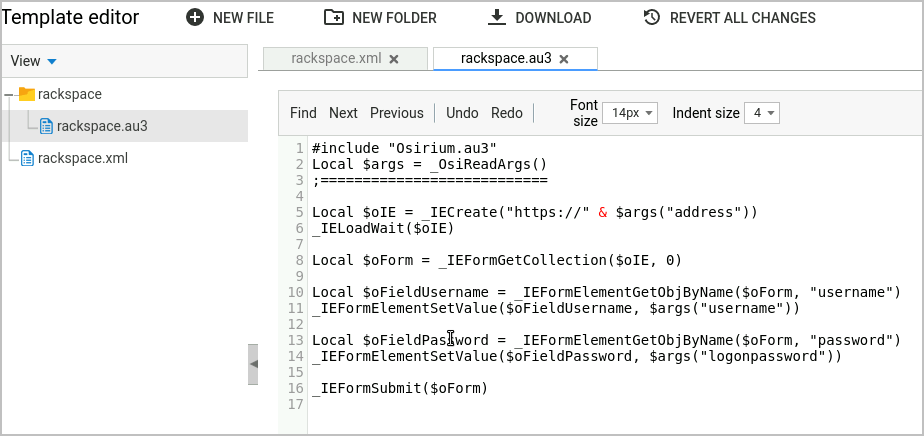
Below are examples of how split template files will look within the inline editor:
Template versions
When working with templates it is best practice, before making changes to an existing template, to increment the template version so changes can be better tracked and managed.
The template attributes contain the following version control elements:
version_major
- The major version number of the template that is being released.
- This number is reserved for Osirium PAM released templates and is incremented whenever a new version of a template is formally released.
- Formally released templates have a major version of 1 and above.
version_minor
- The minor version should be incremented for edits and additions being made to the template.
- This number is for customer use and is used to control changes to release templates.
- All Osirium PAM released templates have a minor version of 0.
Once the changes are tested and working against a suitable test device, live devices can be migrated to the new template.
In the below example, the minor version of this template is 14 and is based on the major template version 3.
1 | |
This version information is then displayed in the Admin Interface as shown below:

Release notes
The <release_note> tag helps the management of templates as it allows functional information to be added to a specific version of a template. This information is then made visible in the Admin Interface when managing templates.
Some templates have important release note information already in them, but you can add your own if required:
1 2 3 4 5 6 7 | |
<release_note>