Inventory
This section provides a list of provisioned devices and inventory information relating them. The topics covered in this section are:
Introduction
The Inventory report shows the hardware, software and patch information retrieved from the device during the device audit task.
To view the Inventory report page, click Inventory in the left-hand menu.

The following information is presented in the Inventory report:
| Heading | Description |
|---|---|
| Device | Name of the device that the inventory was run against. |
| Hardware version | The hardware version of the device. |
| Software version | The software version of the device. |
| Patch | The current patch revision on the device. |
| Device checked at | The date/time the inventory was last audited on the device. |
| Meta-info | The Location of the device Team it belongs to. |
| Custom field 1-5 | Up to 5 additional custom device inventory audits can be configured through a devices template. |
Updating the inventory report
To update the inventory information, a device audit task needs to be run against the device.
To manually run the an audit on a device you can use the TRIGGER AUDIT button on the Named device page.

Alternatively, you can schedule a Device audit as follows:
-
In the left-hand menu, click
Profiles. -
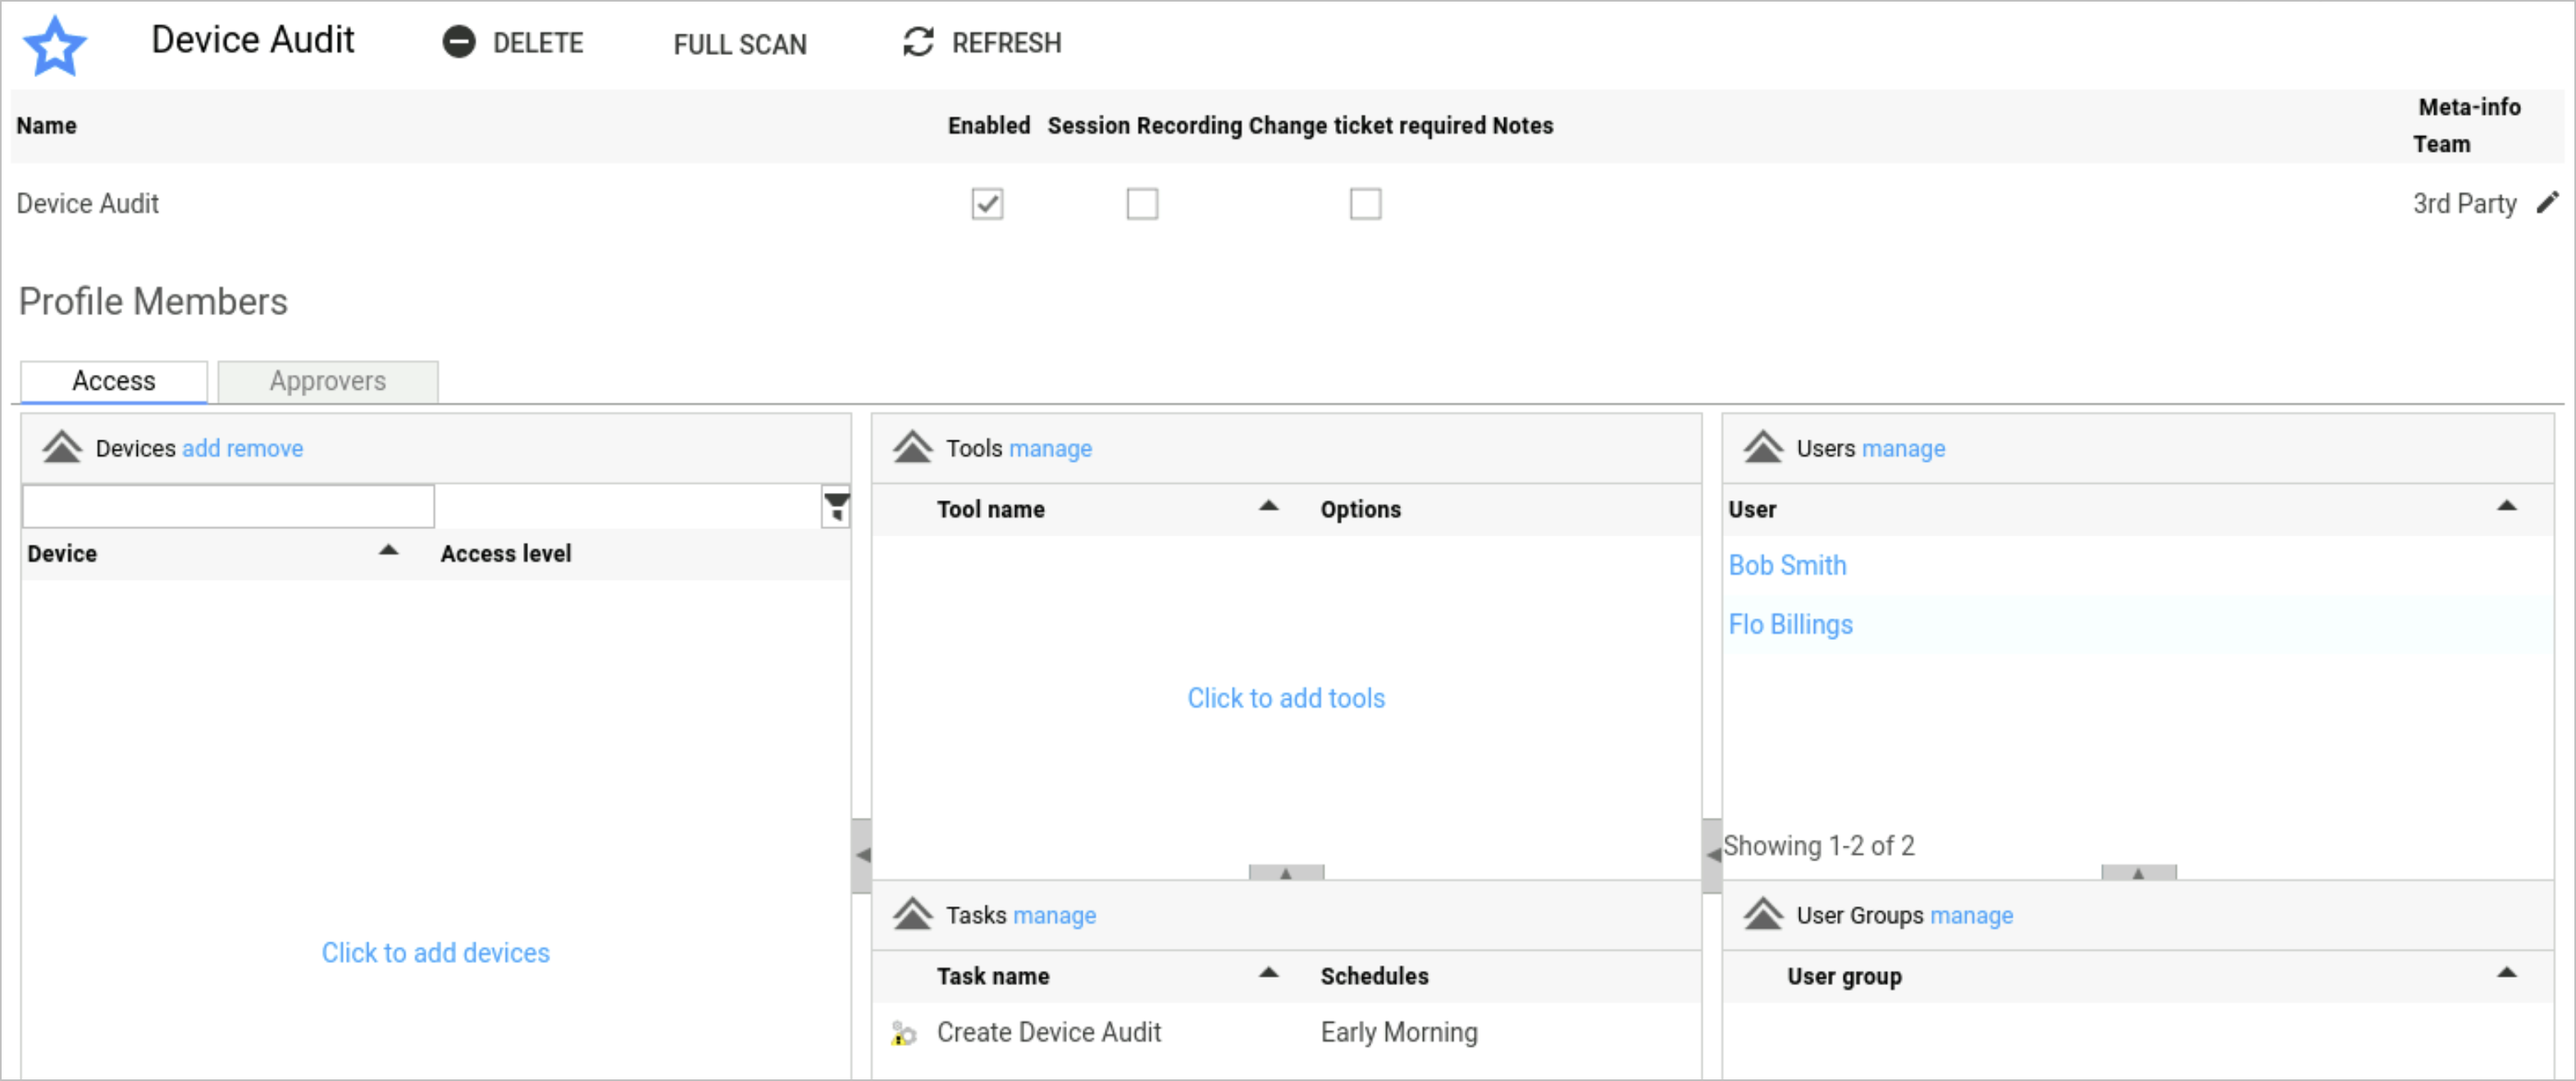
On the Manage profiles page, click the
Device Auditprofile name. The Device Audit profile is a default profile, created during the Osirium PAM installation. -
You are navigated to the Device Audit profile page. You will see that the Create Device Audit task has already been added and a schedule set.
-
To change the schedule, click
managenext to Tasks. -
Within the Manager: tasks window, the Create Device Audit task will be highlighted. Click on the
 icon at the end of the row and select tick the checkbox to select the schedule to be implemented to the task.
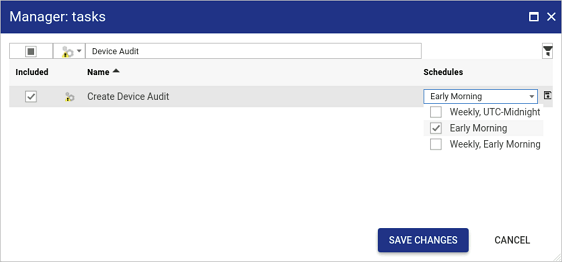
-
Click the
 icon. The schedule is updated.
 -
Click
SAVE CHANGES. -
Click
addnext the devices you want the scheduled device audit to run against. -
Within the Add devices to profiles window tick the checkbox next to each device you want to add to the profile.
-
For each device, select the access level that will be used to run the task on the device.
-
Click
Addto save and add the devices to the profile. The Device audit task will now run against the listed devices at the scheduled time and the Inventory report updated to reflect any changes.
Custom inventory fields
Up to 5 additional custom device inventory audits can be configured through a devices template.
To add a custom field for a device:
-
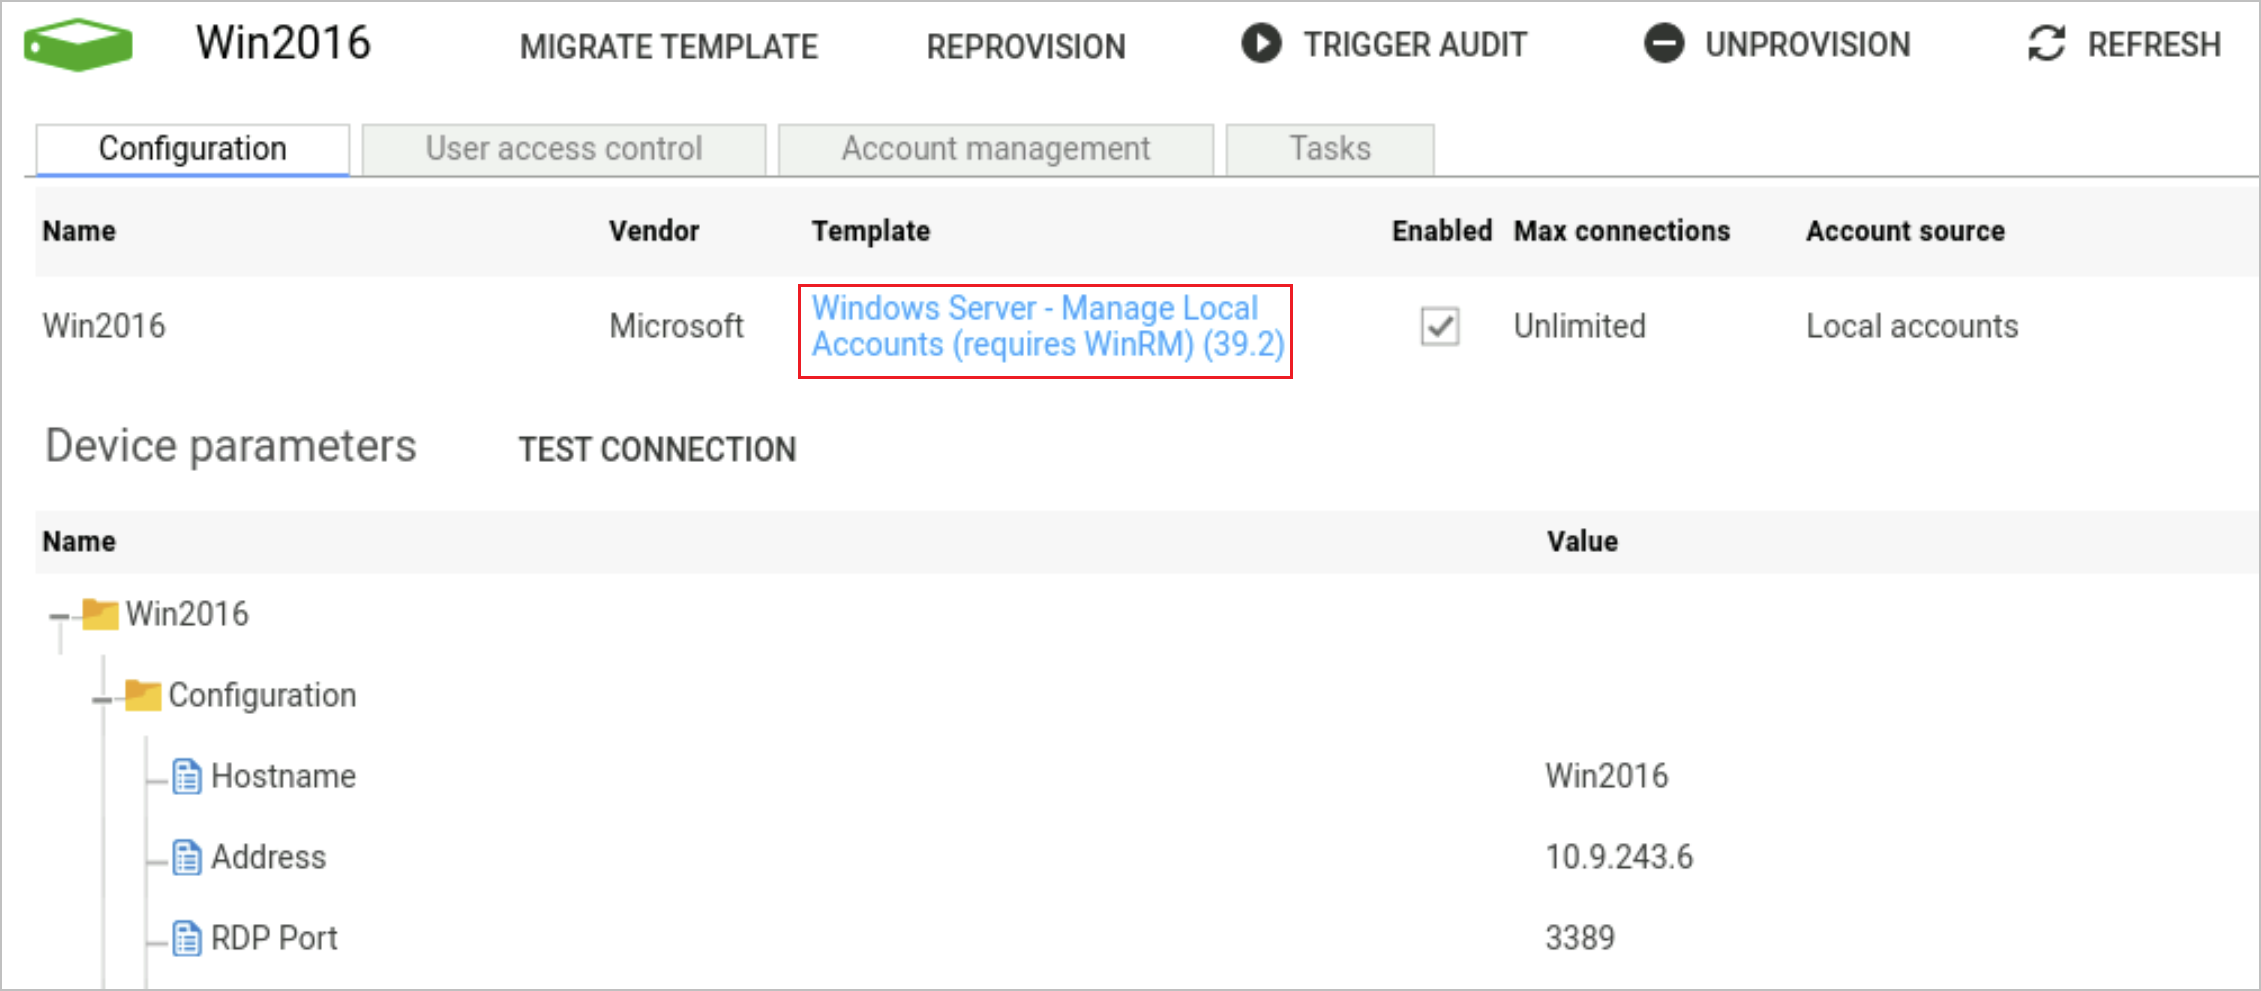
On the Manage devices page, click the device name of the device you wish to add custom fields.
-
You are navigated to the Device details page. Click the template name link.
-
You are navigated to the Template details page. Click the
EDITbutton.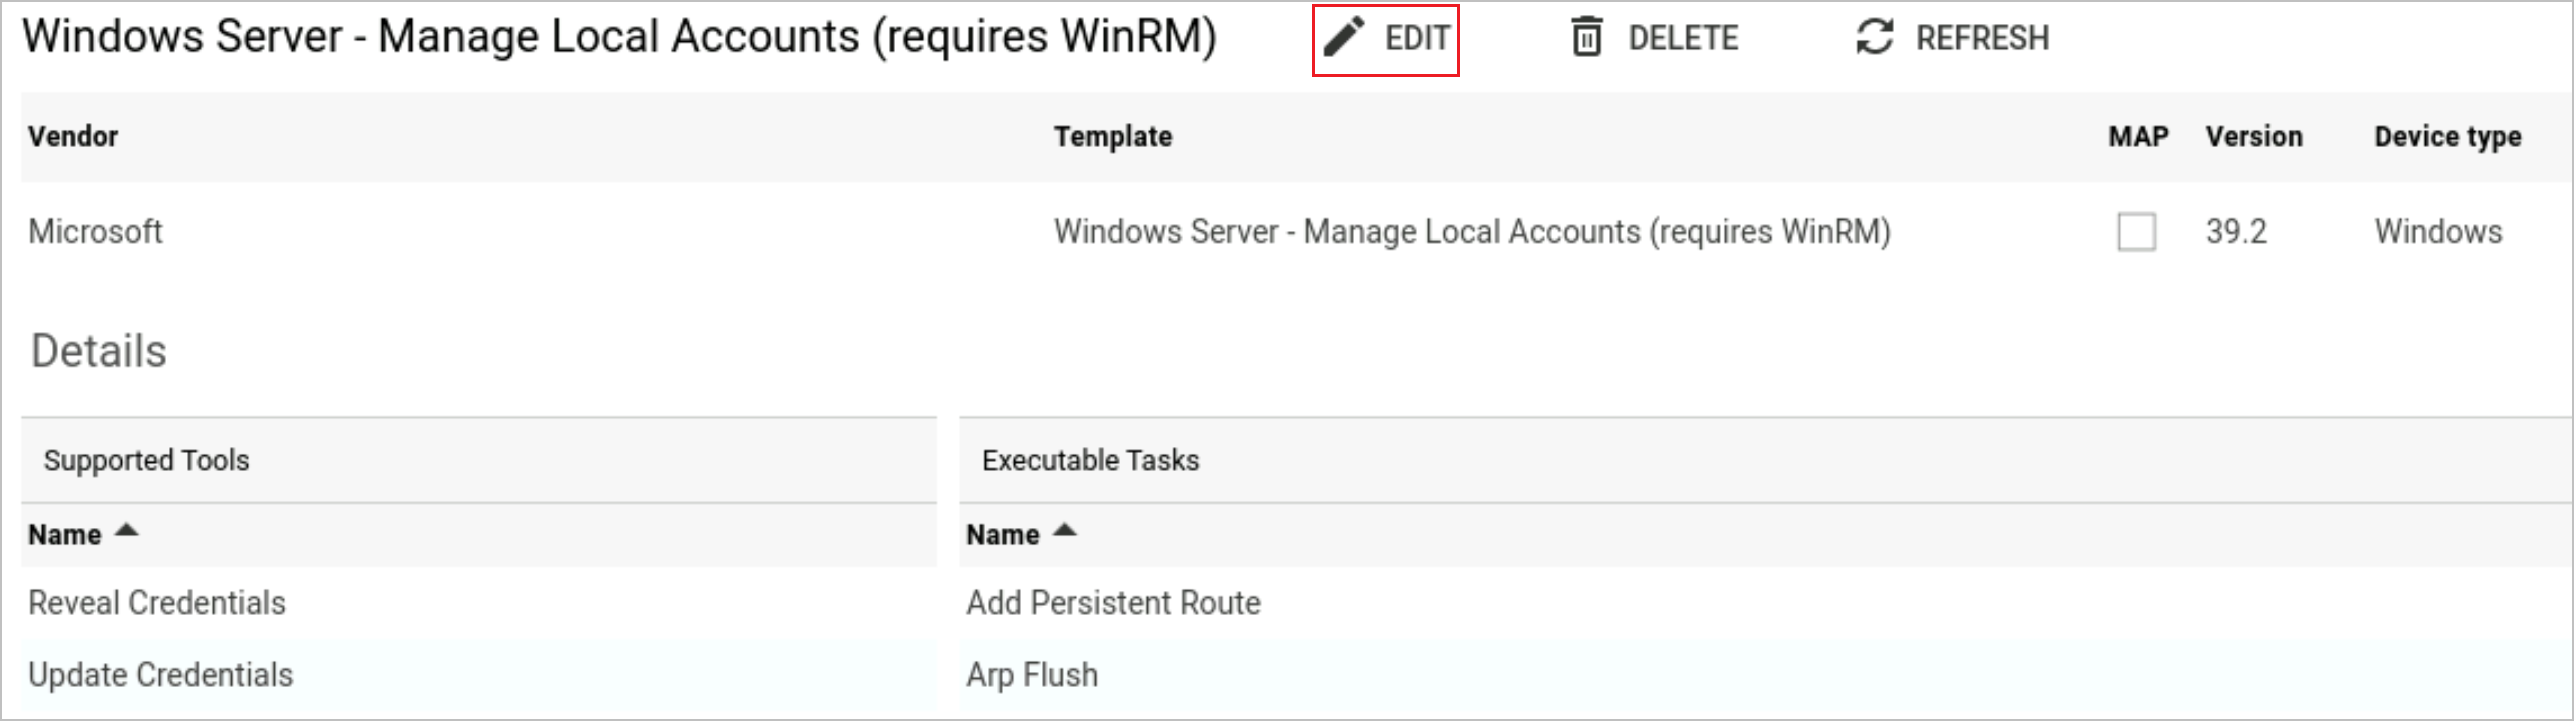
-
Below is an example of how to update the template to include the custom fields.
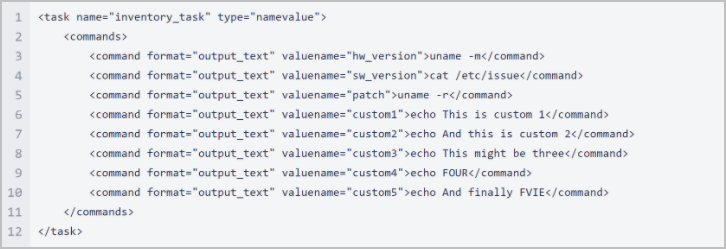
-
On the Inventory report page click
 on a table heading, select
 Columns >and enable the required custom columns.