System configuration
The System configuration page provides information relating to Osirium PAM and allows you to configure a number of different settings.
The following tabs are available:
- Licencing tab
- Certificates tab
- Fingerprints tab
- Clustering tab
- SAML2 tab
- System settings tab
- Client settings tab
- Connection settings tab
- Network Settings tab
- Mesh tab
Licencing tab
The licencing page provides an overview of the licence you have bought and the features that have been activated as part of your licence.
It can help you manage your allowance limits against your current configurations and when you are in need of an upgrade to your licence limits.

The following information is presented on the page:
| Heading | Description |
|---|---|
| Product usage | Osirium PAM version: The version that has been installed and is currently running. Users: Displays the total number of created user accounts against the total number of allowed user accounts. The support account and the Primary SuperAdmin account will not be included in this count. Devices: Displays the total number of provisioned devices managed by against the total number of allowed devices. The PAM Server device will not be included in this count. MAP servers: Displays the total number of provisioned MAP Servers used with Osirium PAM against the total number of allowed MAP Servers. Cluster nodes: Displays the total number of provisioned cluster nodes against the total number of allowed cluster nodes. |
| Enabled features | Features available under this licence are displayed here, which may include: MAP servers Session recording Service accounts Change tickets Device group separation |
| Active licence(s) | Licencee: Name of the organisation or individual which the licencing has been assigned to. Expiry: The date/time the license is due to expire and the number of days remaining. |
Licence limits
When a licence total for Users, Devices or MAP Servers has been reached, if you attempt to add more, a message will be displayed stating that the licence limit has been met.
When the cluster nodes licence total has been reached, the DOWNLOAD CLUSTER JOINING BUNDLE will no longer be available, preventing any further nodes being added.
Licence expiration
When a licence is within 30 days of expiry a countdown warning message will appear in the banner on the Admin Interface.
A licence will expire at midday UTC of the expiry date. Once expired:
- The only access available to Osirium PAM will be to the product licencing upload page on the Admin Interface.
- Only the PAM Server will be displayed in the Device list. All other device tasks will be hidden.
If a new licence is uploaded before the current licence has expired, the existing licence will be superceded by the new licence.
Uploading a license
To load a licencing:
-
Click the
LOAD NEW LICENCEbutton. A Question window opens. -
Click
YESto proceed. -
Within the Upload licence window, click
Choose File.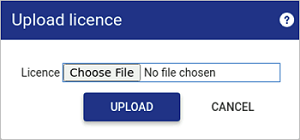
-
Within the File upload page navigate to and select a valid Osirium PAM licence file.
If the PAM Server Browser (HTTP) tool is being session recorded, then you will need to use the Shared Drive mechanism for uploading files. For further details see Uploading a file using Shared Drive.
-
Within the Upload licence window, click
UPLOAD. The new licencing file will be loaded. The licencing information is updated to reflect any changes.
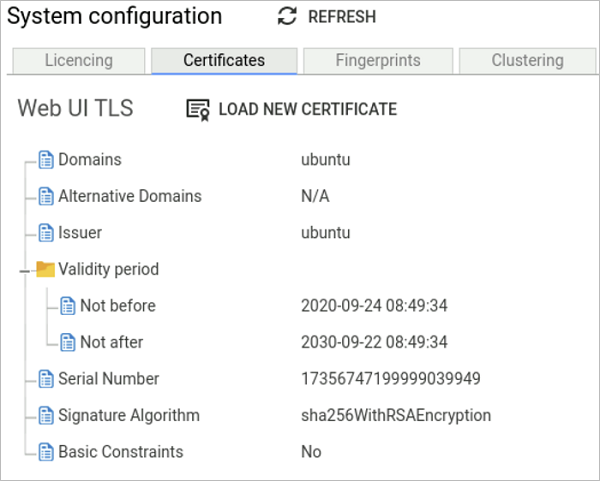
Certificates tab
By default, Osirium PAM provides a generic certificate to allow secure web connections to the UI and Admin Interface. On this page you will see information about the current certificate that is being used.
We recommend that you upload a trusted certificate valid within your organisation.
Certificates are used to protect the data being sent between Osirium PAM by encrypting the data before it is sent and then decrypting the data when it reaches its destination.
Upload a certificate
To upload a new certificate:
-
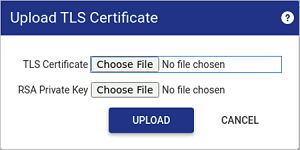
On the Certificates tab, click
LOAD NEW CERTIFICATE. -
In the Upload TLS Certificate window, upload your trusted certificate and RSA private key. Both are required for a successful upload.
If the PAM Server Browser (HTTP) tool is being session recorded, then you will need to use the Shared Drive mechanism for uploading files. For further details see Uploading a file using Shared Drive.
TLS Certificate: Uploaded certificates will be verified to ensure they are an X.509 certificate with a .pem file format.
RSA Private Key: Uploaded keys are verified to ensure they are an rsa key with a .key file format. Passwords/passphrase are NOT supported on the the rsa key.
-
Click
UPLOAD. The certificate is uploaded.
Fingerprints tab
Fingerprints help guard against man-in-the-middle attacks on devices, in which attackers can secretly redirect network traffic between Osirium PAM and the device to monitor and manipulate the flow of information.
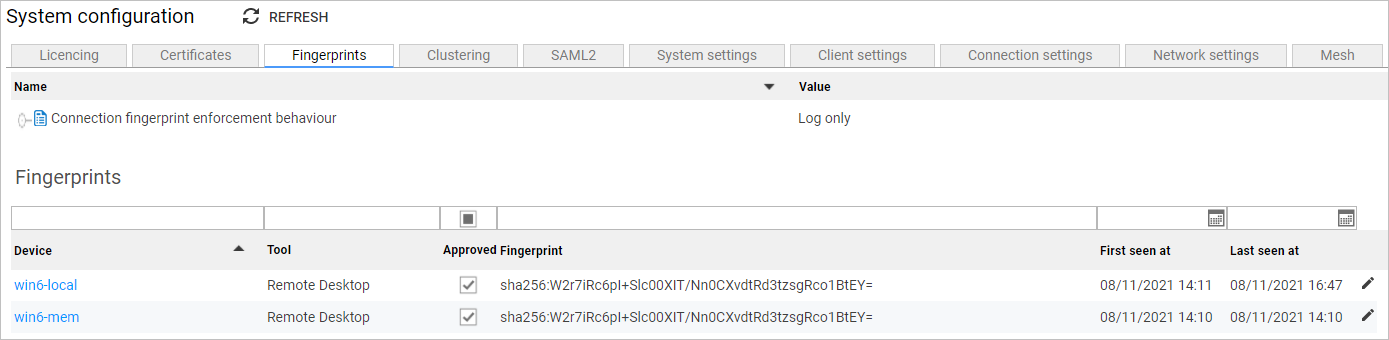
When a device is deployed on Osirium PAM, a fingerprint is generated which Osirium PAM associates with the device. When connecting, Osirium PAM checks that the fingerprint of the device matches the fingerprint Osirium PAM associated with that device. By default, if the device fingerprint is not approved, Osirium PAM notes the discrepancy in the Logs page, but does not block the connection.
Connection fingerprint enforcement behaviour
If you want Osirium PAM to block connections to devices with unapproved fingerprints, you can configure the Connection fingerprint enforcement behaviour.
To configure the Connection fingerprint enforcement behaviour:
-
On the table, click the
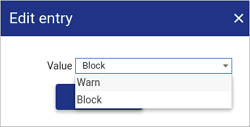
 icon for Connection fingerprint enforcement behaviour. The Edit entry window
appears.
icon for Connection fingerprint enforcement behaviour. The Edit entry window
appears.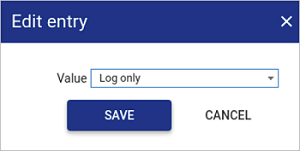
-
From the Value drop-down, select one of the following options.
Value Details Log only - Osirium PAM allows connections to devices with unapproved fingerprints.
- Connection details are logged in the Logs page on the Key Verifier tab.Block - Osirium PAM blocks connections to devices with unapproved fingerprints.
- Users attempting the connection receive an error message.
- Connection details are logged in the Logs page on the Key Verifier tab. -
Click
SAVE. The Connection fingerprint enforcement behaviour value is applied.
Fingerprints table
The Fingerprints table allows you to select fingerprints to associate with designated devices. The following details are available:
| Column | Details |
|---|---|
| Device | Provisioned device on your PAM Server. |
| Tool | Tool the fingerprint is attached to. |
| Approved | If selected  , the fingerprint is associated with the corresponding device. , the fingerprint is associated with the corresponding device.If deselected  the fingerprint is not associated with the corresponding device. the fingerprint is not associated with the corresponding device.You can configure the PAM Server to block connections to devices with unapproved fingerprints using the Connection fingerprint enforcement behaviour above. |
| Fingerprint | The fingerprint generated for the device. The PAM Server generates fingerprints from the device SSH key or certificate. |
| First seen at | The first time the PAM Server connected to, or ran a task on, the device. |
| Last seen at | The last time the PAM Server connected to, or ran a task on, the device. |
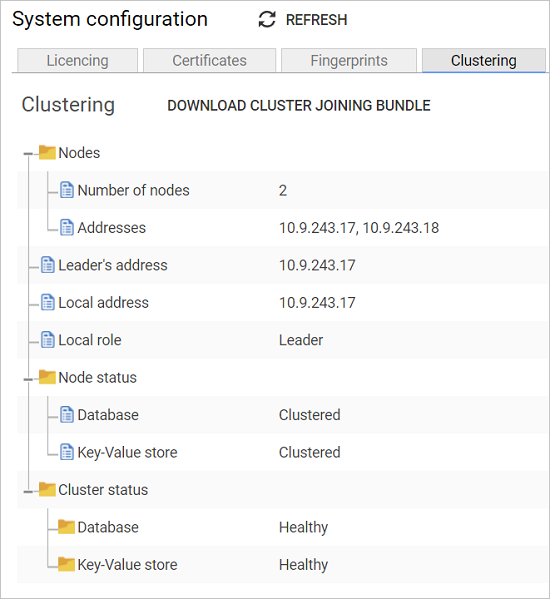
Clustering tab
On the clustering tab you will find information related to your clustered environment.
| Heading | Details |
|---|---|
| Nodes | Number of nodes: Includes the leader and all followers. Addresses: FQDN or IP Address of all the nodes in the cluster. |
| Leader's address | Address of the PAM Server that is the leader of the cluster. |
| Local address | Address of the PAM Server you are logged into. |
| Local role | The role (leader or follower) of the PAM Server you are logged into within the cluster. |
| Node status | Database status provides a status of the database for the PAM Server you are connected to based on the following: - Standalone: this PAM Server is operating as a standalone and therefore a cluster with a single node for which it is the leader. A standalone PAM Server can be configured to use the clustering feature by adding additional nodes using the cluster joining bundle. The correct licence will be required to enable clustering. - Clustered: there is more than one PAM Server which has a minimum of a leader node and a follower node. Data is replicated between the nodes. - Unknown: the cluster service is unable to retrieve data from the back-end services of this node. Key-Value store provides a status on the accessibility of node related data and provides a status based on the following: - Standalone: this PAM Server is operating as a standalone and therefore a cluster with a single node for which it is the leader. A standalone PAM Server can be configured to use the clustering feature by adding additional nodes using the cluster joining bundle. The correct licence will be required to enable clustering. - Clustered: there is more than one PAM Server which has a minimum of a leader node and a follower node. The node will make a connection to each node in the cluster to access specific data. - Unknown: the cluster service is unable to retrieve data from the back-end services of this node. |
| Cluster status | This section relates to the state of your entire cluster. The following states will be displayed based on the response received from the checks carried out by the cluster service: Database provides a status of the database for each node in the cluster. Each node subscribes to every other node, each node then publishes its database tables to the subscribers. Each subscriber is then notified when a change occurs on a node and receives the updates. This ensures configuration data is synchronised and kept up-to-date between all the nodes. The status is assigned as follows: - Healthy: each node in the cluster can be contacted successfully. - Partitioned: local node is considered as having issues. - Degraded: this node is unable to stream to a node. This could be due to network issues or the node being taken off line. Key-Value store provides a status on the accessibility of node related data for each node in the cluster. The cluster service connects to each node in the cluster and a status is assigned as follows: - Healthy: each node in the cluster can be contacted successfully. - Partitioned: local node is considered as having issues. - Degraded: other nodes in the cluster are not contactable, this could be due to network issues or issues with services on the node itself. |
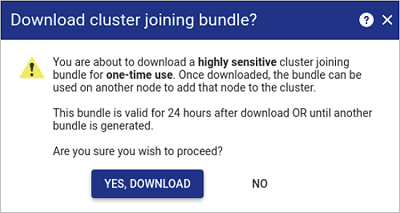
Cluster joining bundle
The cluster joining bundle is required during the setup and configuration phase of the installation process and only available for download from the cluster leader node.
The bundle should only be downloaded when required as they will only be valid for 24 hours from the time of download or until the next bundle is downloaded.
A separate cluster joining bundle is required to join each PAM Server follower node to an existing cluster. The cluster joining bundle contains the following:
- Configured address of the cluster leader node during installation (IP address or FQDN).
- Client certificate that is used to make a connection identification and verification between the leader node and follower node. The certificate is revoked once the identification has been made.
- Public half of the certificate authority so that the cluster may trust it.
- Ability to generate a new certificate which contains the cryptographic keys signed by the certificate authority on the node joining the cluster.
Note
If you are configuring the node address using an IP address then ensure dns A records have been created.
NTP is recommended to ensure the clocks are synchronised for certificate times.
Note
If the PAM Server Browser (HTTP) tool is being session recorded, then you will need to use the Shared Drive mechanism for downloading files. For further details see Downloading a file using Shared Drive.
SAML2 tab
You can configure Osirium PAM to use a third-party identity provider (IdP) using Security Assertion Markup Language v2.0 (SAML2) to authenticate user logon credentials.
Setting up this configuration will enable Osirium PAM, the service provider, to delegate authentication to an external third party, the identity provider (IdP).
When a user logs on, Osirium PAM will request authentication from the identity provider. The identity provider is then responsible for authenticating the user credentials and notifying Osirium PAM. If the authentication has been successful, Osirium PAM will authorise the user and permit access.
The service provider configuration is used to construct the SAML2 metadata which will allow the Osirium PAM service to communicate and interact with the IdP.
Configuring SAML2
To configure:
-
Click on the
next to Service provider configuration. -
Witin the Edit entry window enter the details as follows
Note
The details entered will depend upon the Identity Provider that you will be delegating authentication to. Click here for instructions for configuring Osirium PAM SAML2 Authentication with Azure.
Also click here for details on the limitations and troubleshooting when using Microsoft Azure.
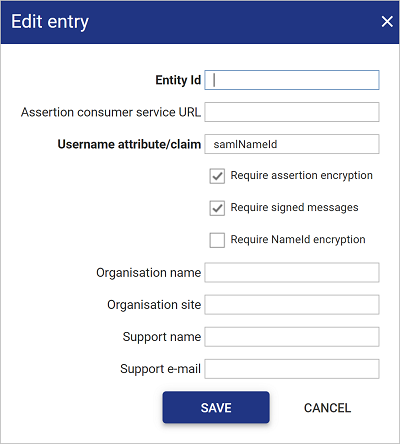
Heading Description Entity Id Enter a name or url to identify the service provider. This id will be used when configuring the IdP. Assertion consumer service URL The Assertion Consumer Service URL is the FQDN address where the SAML Assertion is HTTP POSTed by the users browser. This could be the PAM Server or a PAM UI instance but it must be accessible by the user’s browser.
Username attribute/claim Default is samlNameId. This name needs to match the name of the attribute/claim once configured on your IdP. This is required for Osirium PAM to authorise the user once the IdP has authenticated the user. The username extracted from the SAML Assertion will be used to match an existing local user with the same username within Osiruim PAM user list.
NOTE: As Osirium PAM does not permit the ‘@’ character in usernames if the value is an e-mail address the portion before the ‘@’ is extracted and used.
Require assertion encryption Requires the Identity Provider to encrypt the whole SAML Assertion. Require signed messages Requires the Identity Provider to sign SAML messages. Require NameId encryption Requires the Identity Provider to encrypt the NameId element of the SAML Assertion. Organisation name Enter your organisation details that will be used by the IdP to identify you. Organisation site Enter your organisation details that will be used by the IdP to identify you. Support Name Enter the name of the support person/group that will manage IdP related issues. Support e-mail E-mail address of the support person/group that will manage IdP related issues. -
Click
SAVE. -
Click
DOWNLOAD SERVICE METADATA. This file is required by the IdP to construct the SAML2 metadata.If the PAM Server Browser (HTTP) tool is being session recorded, then you will need to use the Shared Drive mechanism for downloading files. For further details see Downloading a file using Shared Drive.
-
Once you have configured your IdP, you will need to upload the signing certificate to complete the configuration in Osirium PAM. This will then allow the Osirium PAM service to communicate and interact with the IdP to authenticate users with an Auth type set to SAML2.
If the PAM Server Browser (HTTP) tool is being session recorded, then you will need to use the Shared Drive mechanism for uploading files. For further details see Uploading a file using Shared Drive.
For instructions on configuring Osirium PAM SAML2 Authentication within Microsoft Azure click here.
SAML2 with clustering
Osirium PAM cluster nodes share a certificate and private key for SAML, which is generated at installation time on the cluster Leader, so that SAML Assertions can be encrypted by the IdP and decrypted by any receiving node.
When configured, the Assertion consumer service URL is shared between nodes. However, if no Assertion consumer service URL is configured then the fall-back behaviour is for each node to use its cluster public address. It is recommended to only change the Assertion consumer service URL when using standalone PAM UI instances or proxies.
The Entity Id is also shared by cluster nodes; in essence the cluster is the SAML service.
Download Service Metadata
Click the DOWNLOAD SERVICE METADATA button to download the Osirium PAM service SAML metadata file that will be required when configuring the IdP.
If the PAM Server Browser (HTTP) tool is being session recorded, then you will need to use the Shared Drive mechanism for downloading files. For further details see Downloading a file using Shared Drive.
Upload Identity Provider Metadata
Click the UPLOAD IDP METADATA to upload the IdP metadata file that will be required by Osirium PAM to communicate and interact with the IdP.
If the PAM Server Browser (HTTP) tool is being session recorded, then you will need to use the Shared Drive mechanism for uploading files. For further details see Uploading a file using Shared Drive.
System settings tab
The following can be configured on the System settings tab:
- Support account
- PAM Server local password policy
- Active Directory password generation complexity
- Enable pass-through
- Debug task logging
- Debug API logging
- Debug UI logging
- External filestore
- Scheduled session archive
- Scheduled file removal
- User group synchronisation interval
- Active Directory user group sync new user authentication type
- Backup schedule
- Backup breakglass passphrase

Support account
The support account (osirium_support) is a PAM Server Ubuntu server administrative account. It is created during the installation of the PAM Server. This account is useful if you are unable to access the Admin Interface and want to troubleshoot issues through the command line.
The default setting is disabled and no password set.
Note
It should always be enabled and a password set when upgrading or carrying out a system restore.
To enable:
-
Click on the
next to Support account (User name: osirium_support). -
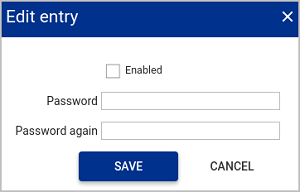
Check the Enabled box and type in a password.
-
Click
SAVE.
PAM Server local password policy
If you are creating users that will be authenticated by Osirium PAM this setting will allow you to create and set a password policy to implement a greater complexity and stronger authentication on the passwords set for user accounts. Only passwords that meet the password policy will be allowed ensuring all passwords met the required criteria.
Note
This will not apply to externally authenticated Active Directory or RADIUS users.
To configure:
-
To the right of PAM Server local password policy, click the
icon.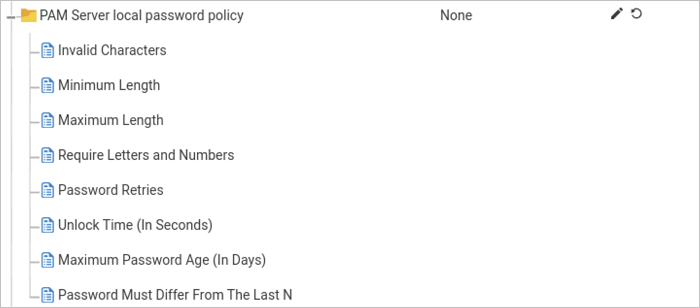
-
Set the appropriate policy using the fields described below.
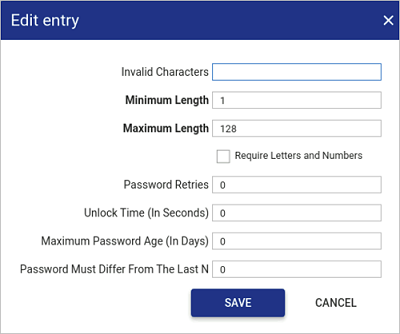
Field name Description Invalid Characters Enter any characters you don't want used in a password.
Any password containing these characters will be disallowed.Minimum Length The password must be equal to or greater than the minimum length set. Maximum Length The password must be less than or equal to the maximum length set. Require Letters and Numbers If true (tickbox checked), the password must contain both letters and numbers. Password Retries The user will be locked if an incorrect password is entered this many times.
If set to 0, the user will be allowed infinite retries to enter their password.Unlock time
(In Seconds)Time the user will have to wait before the account is automatically unlocked. Maximum Password Age
(In Days)From the moment a password is changed, it starts aging. When the maximum age is exceeded, the user will be forced to change their password at next logon. If set to 0, the password will not expire.
Password Must Differ From The Last N When the user sets a new password, it must be different from the last N passwords they have used. If left as the default 0, the password does not have to differ from any passwords used before.
-
Click
SAVE.
Active Directory password generation complexity
The password complexity of an Active Directory account managed by Osirium PAM can be set here. You can set the length of the password as well as any special characters that can used within the password.
To update the complexity settings:
-
Click on the
icon. -
Set the password length and special characters that should be used when setting a password for an Active Directory managed account.
-
Click
SAVE.
Enable pass-through
The pass-through feature allows users to single sign-on to devices using personalised accounts that preexist on the device. When a user logs onto the UI their credentials (username/password) are cached and encrypted to an instance on the PAM Server.
Then, when the user connects to a device which has been configured to use an access level of pass-through (see Creating a New Profile), the cached credentials are used to single sign-on to the device.
Note
Only the following authentication types can be used with pass-through:
- Active Directory: The password is cached.
- Active Directory then RADIUS: only the password is cached (not token).
- Active Directory then TOTP: only the password is cached (not token).
Cached pass-through credentials are saved as case sensitive. To ensure successful pass-through the username/password must match the users pre-existing device account (username/password).
When a user logs out or disconnects from the UI, their credentials are removed from the cache. Also, if the PAM Server is restarted (specifically the userauth service) all cached pass-through credentials are removed.
The pass-through feature is Enabled as default which means all user credentials will be cached when logged onto PAM.
If this feature is Disabled at anytime, profiles that have devices with pass-through access levels will show as greyed out in the UI for all user in the profile.
To change the setting:
-
Click on the
icon. -
Check or uncheck the
Enabledbox as per the setting required. -
Click
SAVE.
Debug task logging
If you want more detailed debug messages from your PAM Server you can turn on the debug logging level. It can be helpful and provide more clues if you come across issues.
When enabled, the debug logging messages will be available on the System configuration > Logs page on the Admin Interface.
To enable:
-
Click on the
icon. -
Check the
Enabledbox. -
Click
SAVE.
Debug API logging
If you require more detailed messaging and logging of the API function then you can turn on the debug level for the API. It can be helpful and provide more clues if you come across issues.
To enable:
-
Click on the
icon. -
Check the
Enabledbox. -
Click
SAVE.
Debug UI logging
If you require more detailed messaging and logging of the UI you can turn on the debug level for the UI. It can be helpful and provide more clues if you come across issues.
To enable:
-
Click on the
icon. -
Check the
Enabledbox. -
Click
SAVE.
External filestore
We recommend that you attach an external filestore to avoid disk space issues and to hold some of the larger files. This will ensure that the internal disk does not fill up too quickly allowing for a smoother running of system services and tasks.
Enabling and attaching a filestore will allow your PAM Server to save the following files directly onto the attached filestore:
- Backups.
- Techouts.
- Session recordings.
- Session archives if configured.
Note
If your virtual appliance is Generation 1 the external disk needs to be mounted to the IDE controller.
If your virtual appliance is Generation 2 the external disk needs to be mounted to the SCSI controller.
To add an external filestore:
-
Firstly, you will need to add a virtual hard drive to your PAM Server which should be done in accordance with your company policy.
-
Click on the
icon. -
Check the
Enabledbox. -
Click
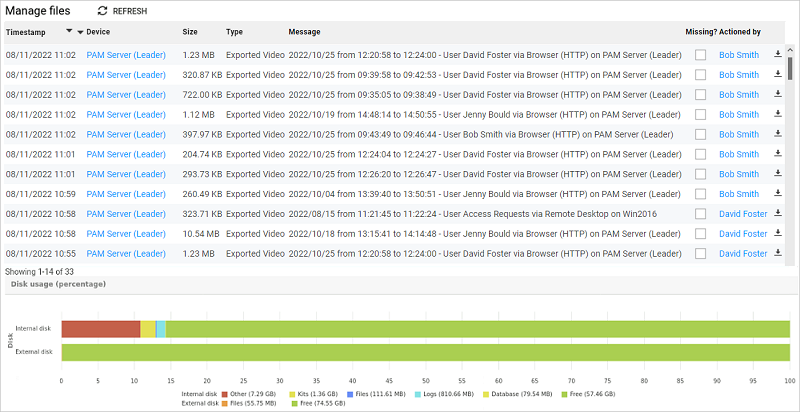
SAVE. Osirium PAM will now partition, format and map to the external drive. Once successfully mapped, the disk usage bar on the Manage files page will be updated and display both the internal and external disks.From here you can monitor your disk status to manage your storage levels and take precautions if you disk space is getting full.
Note
The external filestore may take a little time to appear on Admin Interface, depending on the size of the disk that is being configured.
Scheduled session archive
If you are session recording all your users on a daily basis then you will be creating a lot of recorded files on your system. This setting will allow you to manage the recordings being saved and help you with archiving the older session recordings for storage and backup.
Implementing a scheduled archive of session recordings will also allow you to manage disk space on your system or external disk. The schedule is based on the age of the recording and will automatically be archived when they reach the age limit set.
When a scheduled session archive setting has been configured it will:
-
Run the Archive Session task everyday at midnight and archive any UI sessions that are older than the age (days) set.
When a session has been archived it will be marked as archived on the Device access report page on the PAM UI sessions section.
-
Store the archived file in the filestore. Will default to the external filestore if one has been configured.
-
List the archived session file on the Manage files page from where it can be downloaded.
-
Copy the archived file to a remote backup server if one has been configured. See Remote Backup Server Configuration.
-
Delete the session recordings from the Osirium PAM filestore and database once successfully archived.
To configure:
-
Click on the
icon.
-
Check the
Enabledbox.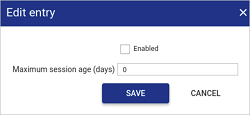
-
In the Maximum session age (days) field, type in the number of days before a session is to be archived.
-
Click
SAVE.
Scheduled file removal
The number of device files created can grow rapidly so to help easily manage older files you may want to configure a schedule that will automatically delete files when they reach a certain age. This will also help you manage your disk space, ensuring stored files don't fill up your disk space which could slow your system down.
The deletion of files will be based on their age. But before you enable this schedule make sure you have any backup requirements in place, especially if you need to archive the files before they are deleted.
To configure:
-
Click on the
icon.
-
Check the
Enabledbox.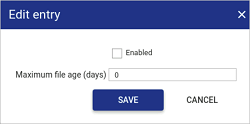
-
In the Maximum file age (days) field, type in the number of days before a file is deleted.
-
Click
SAVE.
The File removal task is run everyday at midnight and will now remove any files that are older than the age (days) set.
User group synchronisation interval
This setting should be used to create an automated synchronisation between the user groups in Osirium PAM linked to user groups on your Active Directory. This will help ensure that the Active Directory users within the group are kept up to date and any changes (removed/added users, password changes etc) are reflected in Osirium PAM.
Define in minutes how often you want Osirium PAM to synchronise user groups with your Active Directory.
To configure:
-
Click on the
icon. -
The default value is set to 15 minutes. The value must be greater than or equal to 5.
-
Click
SAVE. The User Group Synchronisation task will be run against each Active Directory user group listed on the Manage user groups page and make any necessary updates.
Active Directory user group sync new user authentication type
This setting should be used to automate the authentication type setting of all new users that are synchronised through an Active Directory user group. See Managing user groups.
To select the authentication type setting that will be applied to new users that are synchronised through an Active Directory group:
-
Click on the
icon. -
The external authentication type values that can be set for the synchronised Active Directory user are:
- RADIUS: this authentication type setting means that the user will use their RADIUS username to logon. The user doesn't need to enter a password as the existing RADIUS user password will be used to authenticate them into Osirium PAM.
- SAML2: this authentication type setting means that the user will use their Active Directory username/password to logon . Osirium PAM will then request authentication from the identity provider. The identity provider is then responsible for authenticating the user credentials and notifying Osirium PAM. If the authentication has been successful, Osirium PAM will authorise the user and permit access.
- Active Directory: this authentication type setting means that the user will use their Active Directory username/password to log on. Osirium PAM will consult with the Active Directory to verify the user logon before logging the user on.
- Active Directory then TOTP: this authentication type requires a multi-factor login meaning a user will have to enter their Active Directory username/password as well as generate and enter a TOTP (Time-based One Time Password) to log on.
- Active Directory then RADIUS: this authentication type requires a multi-factor login meaning a user will have to enter their Active Directory username/password as well as a RADIUS token to log on.
-
Click
SAVE.
Backup schedule
This setting allows you to configure scheduled backups of the PAM Server.
To configure scheduled backups:
-
Click on the
icon. The Edit entry window opens. -
In the Value field, select an option. You add additional options by creating a new schedule. See Manage Schedules for details.
-
Click
SAVE. The backup schedule is applied.
Backup breakglass passphrase
This setting allows you to configure a passphrase to protect the KeePass file containing your device credentials. A passphrase must be configured in order for the KeePass file to be stored in the archived backup file that is created when you run a backup task on Osirium PAM.
To set a backup breakglass passphrase:
-
Click on the
icon. The Edit entry window opens. -
In the Passphrase field, type a passphrase.
-
Click
SAVE. The backup breakglass passphrase is applied.
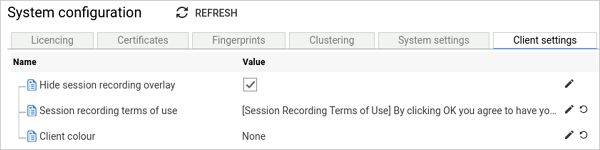
Client settings tab
The following can be configured on the Client settings tab:
Client colour
The colour option allows you to specify a colour for the UI. This is useful when you want to distinguish the connections made to different Osirium PAM.
To change the colour:
-
Click on the
icon. -
Enter a HEX colour code; or
Click the icon to use the Select a Color window:

-
Click
SAVE. Now when a user logs onto the UI, the browser tab icon will contain the colour configured.
Connection settings tab
The following can be configured on the Connection settings tab:

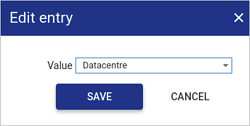
Device group separation identifier
Device group separation allows you to restrict access to device tools from multiple customers, to ensure that workstations don’t become a bridge point for data.
Before creating a group separation identifier, you need to create a meta-column entry of type Device. See Configure meta-info.
The meta-column values define the groups that are available. When a user connects to device tools through the UI, the group separation identifier controls which sets of device tools they can use at the same time.
To configure the group separation identifier:
-
Click on the
icon. -
Choose the appropriate option from the drop-down box.
-
Click
SAVE. Now the values in the device type meta-column will determine which device tools can be accessed after the first device tool connection has been made.
For example:Device Meta-column value Device A Group 1 Device B Group 1 Device C Group 2 Device D Group 2 From the UI, if a user opens a tool from Device A which belongs to Group 1, the tool opens successfully. Then, whilst Device A is open, if the user opens a tool from Device B, then this will be allowed.
In the default block mode, if the user has a device tool from Group 1 open and then tries to open a tool on Device C which belongs to Group 2, then the user will be unable to access the tool and an error message will be shown:

Only when all Group 1 connections have been closed can the user open device connections from Group 2.
Note
This only applies to device tools, NOT to device tasks. Tasks can still be run at any time for any device.
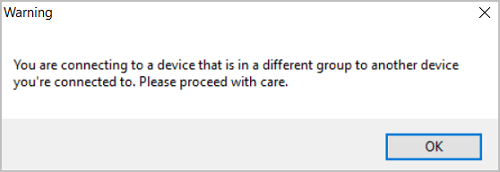
Device group separation behaviour
Device group separation behaviour can be changed from the default Block setting (meaning devices from multiple groups can't be accessed at the same time) to a Warn setting. Selecting Warn means that a warning message appears when a user tries to connect to two devices from different groups, but the user can still continue to access both devices.
To configure the separation:
-
Click on the
icon. -
Select the Warn value from the drop-down box.
-
Click
SAVE.Now when a user opens up two connections to a device in different device separation groups, they won't be blocked but will be presented with a warning:
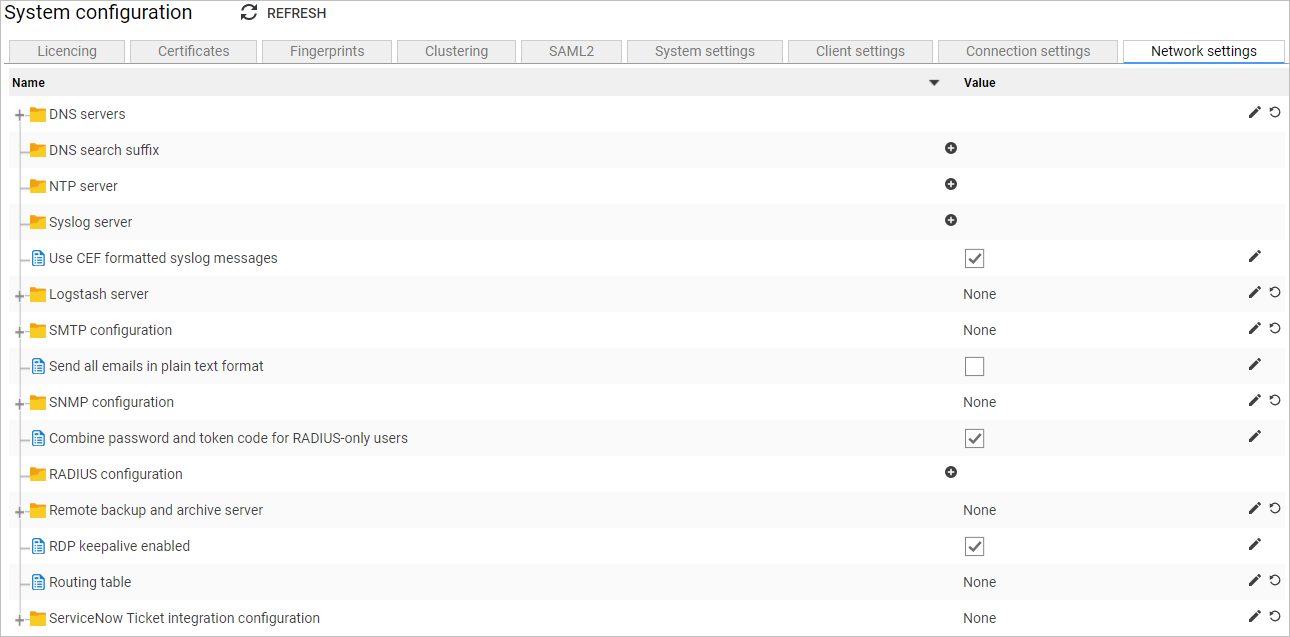
Network settings tab
The Network settings tab allows you to configure the following settings on Osirium PAM:
- DNS servers
- DNS search suffix
- NTP server
- Syslog server
- Use CEF formatted syslog messages
- Logstash server
- SMTP configuration
- Send emails in plain text format
- SNMP configuration
- Combine password and token code for RADIUS-only users
- RADIUS configuration
- Remote backup and archive server
- RDP keepalive enabled
- ServiceNow ticket integration configuration
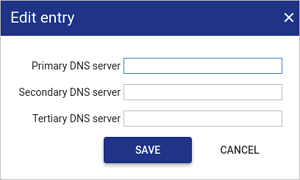
DNS servers
To set DNS servers:
-
Click on the
icon.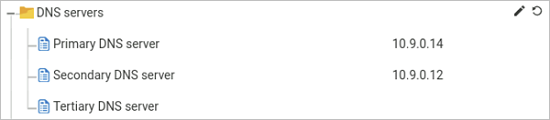
-
Set the primary, secondary and tertiary servers as required.
-
Click
SAVE.
DNS search suffix
Adding DNS search suffix entries will help resolve IP addresses when adding new devices.
To add a DNS search suffix:
-
Click on the
 icon next to DNS Suffixes. DNS search suffix 1 will be added.
 -
Fill in the suffix:
-
Click
SAVE.
NTP server
To set an NTP server:
-
Click on the
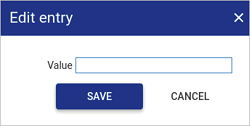
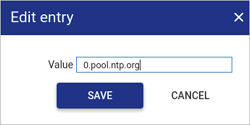
icon next to NTP server. NTP server 1 will be added. -
Click the
icon for NTP server 1. -
Enter the IP Address or pool of the NTP servers.
-
Click
SAVE.Tip
You can add multiple NTP servers by clicking the
icon several times.
Syslog server
Osirium PAM can send copies of its syslog messages to as many external syslog servers as you wish.
To add an external Syslog server:
-
Click on the
next to Syslog server. Syslog server 1 will be added.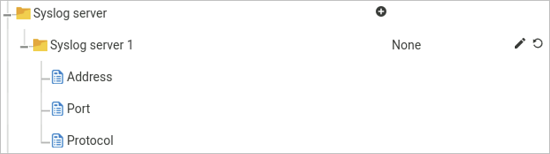
-
Click the
icon for Syslog server 1. -
Enter the IP Address of the Syslog server Osirium PAM will be communicating with.
-
Click
SAVE.
Use CEF formatted syslog messages
Enabling this setting allows Osirium PAM to use the CEF formatting standard when displaying syslog messages.
To enable:
-
Click on the
icon. -
Check the Enabled box.
-
Click
SAVE.
Logstash server
Enter your logstash server details to allow Osirium PAM to push events to your logstash server.
To add a logstash server:
-
Click on the
icon.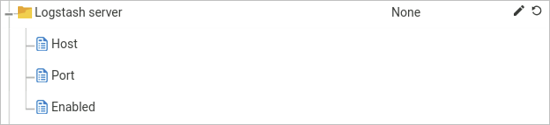
-
Fill in the details.
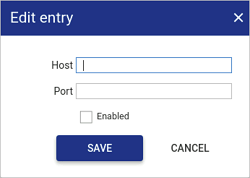
Field name Description Host: Enter the host name or IP address of the logstash server. Port Enter the port number assigned to the logstash server. EnabledEnabling will allow Osirium PAM to connect to the logstash server. -
Click
SAVE.
SMTP configuration
Configure the SMTP to allow emails to be sent from the PAM Server. SMTP is required if you want to setup Email subscriptions, see Managing Email Subscriptions.
Note
The SMTP server should support TLS (Transport Layer Security) otherwise there is a risk that a password will be sent in plain text.
To configure SMTP:
-
Click on the
icon.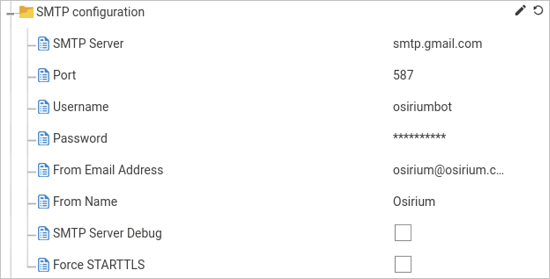
-
Fill in the details.
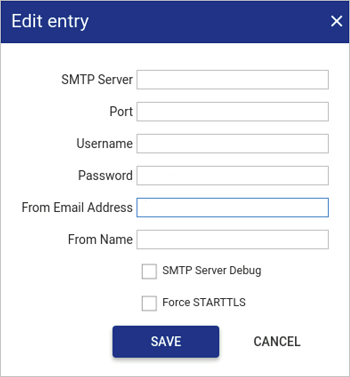
Field name Description SMTP Server IP address of the SMTP server. Port Enter the port number assigned to the SMTP server. Username Enter the username that will be used to authenticate onto the SMTP server. Password Enter the password that will be used to authenticate onto the SMTP server. From Email Address Used to set the Reply-To and Sender headers user@domain of the outbound email. From name Used to set a text description in the Reply-To and Sender headers of the outbound email. SMTP Server Debug This allows email server transaction messages to be directed to the mail.log file Force STARTTLS If checked, will force Osirium PAM to use STARTTLS. If the remote server does not support STARTTLS then an error will be logged in mail.log file. -
Click
SAVE. All members of the Owner and Admin roles will receive an email to confirm that email has been successfully configured.
Send emails in plain text format
By default all emails sent from Osirium PAM are in HTML format. Osirium PAM can be configured to send all emails in plain text.
To configure all emails to be sent in plain text format:
-
Click on the
icon.
-
Check the Enabled box.
-
Click
SAVE.
SNMP configuration
Configure SNMP to allow Osirium PAM to be monitored on your network.
To configure SNMP:
-
Click on the
icon.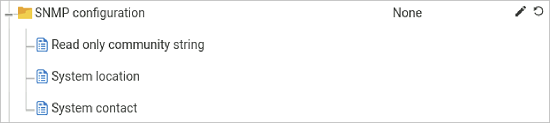
-
Fill in the details.
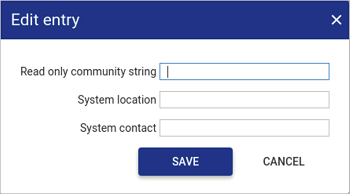
Field name Description Read only community string Enter a valid read-only community string to allow SNMP requests to be sent. System location Enter the location of Osirium PAM. System contact Enter a valid contact name for Osirium PAM. -
Click
SAVE.
Combine password and token code for RADIUS-only users
Enabling this setting combines the password and token code. This only applies to RADIUS only users.
When users login, they will be presented with: a Password field; and a Token code field. If the user is only configured for RADIUS authentication (i.e. they are not using Local then RADIUS or Active Directory then RADIUS, see Manage users, then the way in which the Password and Token code fields are presented to the RADIUS server can be controlled here.
By default this setting is ENABLED (checkbox ticked) which means the Password and Token code fields will be joined together and sent as one RADIUS Access-Request. For example: With a Password of p4ssw0rd and a Token code of 12345, the RADIUS Access-Request will contain the combined User-Password of p4ssw0rd12345.
This setting will also be useful if:
-
Your RADIUS server is expecting the two parts concatenated e.g. an RSA RADIUS server expecting the user's password and token code in the same Access-Request.
-
Users only enter a secret. Not all RADIUS configurations will require a user to authenticate using both a password and a token code. Users may also not be familiar with the authentication mechanism and therefore they will either think of their one secret as a password or a dynamic token. By enabling this setting, the user can enter their one secret into either the Password or Token code field and the RADIUS server will still be sent the correct Access-Request.
Not combining the fields will be necessary if it is known that the RADIUS server will issue a follow-up Access-Challenge.
DISABLING (checkbox unticked) this setting will mean that only the Password will be sent in the initial RADIUS Access-Request. If the RADIUS server replies with Access-Challenge, then the Token code in the subsequent RADIUS Access-Request.
Note
Microsoft Azure Multi-factor authentication (MFA)
It is possible to configure RADIUS access to Azure MFA by setting up a Network Policy Server. With Azure MFA, users can choose whether they set up push-based or token-based MFA.
For token-based MFA, a Network Policy Server will issue a follow-up Access-Challenge, we therefore recommend DISABLING (checkbox unticked) the Combine password and token for RADIUS-only users setting to provide compatibility for both push-based and token-based users.
To enable:
-
Click on the
icon. -
Check the Enabled box.
-
Click
SAVE.
RADIUS configuration
For Osirium PAM users to be authenticated through RADIUS, configure the RADIUS settings.
To configure Radius:
-
Click on the
next to RADIUS configuration. RADIUS configuration 1 will be added.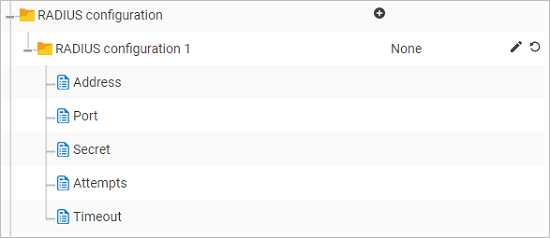
-
Click the
icon for RADIUS configuration 1.
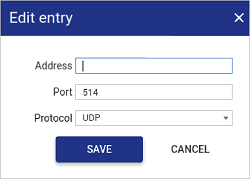
Fill in the following details: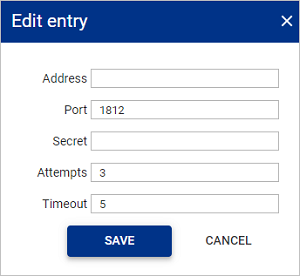
Field name Description Address Enter the IP Address of the RADIUS server. Port Enter the port number assigned to the RADIUS server service. Secret Enter the RADIUS Secret that will be used to authenticate onto the RADIUS server. Attempts Enter the number of times you want a user to attempt the connection before it fails. Timeout Enter the minutes allowed before the connection is timed out. -
Click
SAVE.
Remote backup and archive server
If the remote backup and archive server is configured, Osirium PAM will automatically push Osirium PAM backups to the specified server at the end of the backup task. If session recording is enabled, session recording archives will also be pushed automatically at the end of the archive task.
Supported protocols are SCP, SFTP and SMB.
To setup remote backup:
-
Click on the
icon.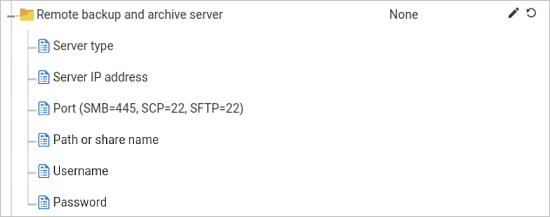
-
Within the Edit entry window, fill in the following details:
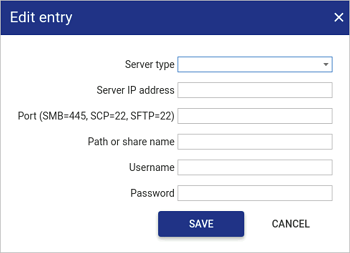
Field name Description Server type Select the method to be used to copy the backup file.
Options available from the drop-dwon listbox are:
SMB, SCP and SFTP.NOTE If None is selected from the drop-down list then the settings will be saved but the backup file will not be copied to the remote server.
Server IP address Enter the IP address of the remote backup server. Port (SMB=445, SCP=22, SFTP=22) Enter the port number for the Server type selected. Path or share name Enter the path where the file will be saved to on the remote backup server. Username Enter a valid username with access to the remote backup server. The user must have the correct permission to write to the path specified. Password Enter a valid password. -
Click
SAVE.
RDP keepalive enabled
Enabling this setting prevents the screensaver from being activated.
To enable:
-
Click on the
icon. -
Check the Enabled box.
-
Click
SAVE.
ServiceNow ticket integration configuration
ServiceNow ticket integration in Osirium PAM allows tickets entered in the Change Management Tool to be validated against an existing ServiceNow configuration management database (CMDB), providing the following benefits.
- Accountability: ability to see when, why and how tickets are allocated.
- Security: attackers require a valid change ticket on top of privileged credentials.
Prerequisites
-
Osirium PAM must be configured as an OAuth provider on the ServiceNow CMDB. When configured, a Client ID and Client Secret are created. Make a note of these credentials as they will be required to identify Osirium PAM to ServiceNow.
-
Obtain a ServiceNow refresh token by running the relevant command on your workstation, as detailed in the ServiceNow documentation. The client ID and client secret created above, as well as the ServiceNow CMDB URL, are required, as per the example below.
Example command:
$ curl -d "grant_type=password&client_id=be3aeb583ace210011c15b24a43e25d8
    &client_secret=client_password
    &username=admin&password=admin"
    https://instancename.service-now.com/oauth_token.do
Make a note of the obtained refresh token.
Note
The refresh token has a lifespan designated in ServiceNow. When the refresh token expires, Osirium PAM automatically generates a new token.
To integrate ServiceNow:
-
On the left-hand menu, under System, click
System configuration. The System configuration page appears. -
Click the
Network settingstab. -
On the table, click the
icon to the right of ServiceNow Ticket integration configuration.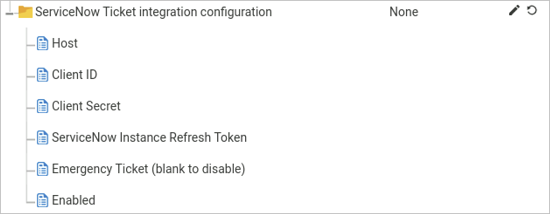
The Edit entry window appears.
-
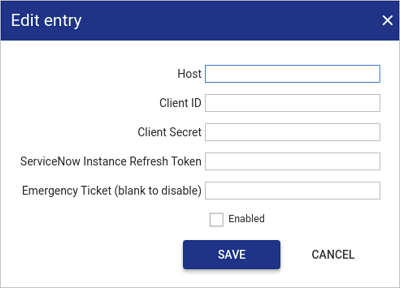
Within the Edit entry window, provide the following details to allow ServiceNow the integration:
Field name Description Host URL of the ServiceNow CMDB. Client ID Client ID generated when Osirium PAM was configured as an OAuth provider. Client Secret Client secret generated when Osirium PAM was configured as an OAuth provider. ServiceNow Instance Refresh Token Refresh token obtained when Osirium PAM was configured as an OAuth provider. Emergency Ticket (blank to disable) In the event that an incident or change ticket number does not exist on the ServiceNow CMDB, or if you are unable to access the ServiceNow CMDB, you can provide an emergency ticket. Osirium PAM does not check the emergency ticket against ServiceNow. NOTE This feature should only be used in an emergency and should otherwise be left blank.
EnabledBy default, ServiceNow integration is disabled. Select the checkbox to enable ServiceNow integration. -
Click
SAVE. The ServiceNow integration details are added to the table.
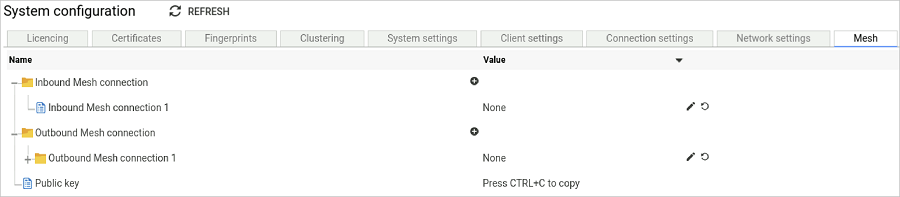
Mesh tab
Info
In v7.x a Mesh backup can only be used to restore the leader onto a new PAM Server. All other PAM Servers in the cluster will have to be manually re-added. For this reason, we strongly recommend that VM level backups are performed on all PAM Servers.
Further information regarding backing up and restoring a PAM Cluster can be found here.
The Mesh mechanism will allow an Active virtual appliance primary to push a copy of its backup file to a Mesh secondary virtual appliance. The Mesh secondary virtual appliance does not contain any live configurations. A public key is used between the Active primary virtual appliance and the Mesh secondary virtual appliance to validate the mesh connection.
The stored backup file on the Mesh secondary virtual appliance can then used to restore an Active primary virtual appliance in a disaster recovery situation.
See How to: Restore PAM Server using a Mesh backup.
Important
When you build a mesh or upgrade a mesh server:
-
Ensure you don't delete or move the install files that are in /data/kits/latest/ as these are required for the restore process to work.
-
Ensure that the DNS servers are configured the same on the primary and secondary virtual appliances. This will ensure that a restored server is able to successfully resolve devices.
To setup:
-
Within the Active primary virtual appliance, click on the Mesh tab within System Configuration.
-
Click the
icon for Outbound Mesh Connection 1.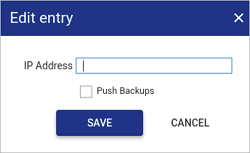
Fill in the following details:
Field name Description IP Address IP address of the Mesh secondary VM where the backup will be stored. Push Backups Check to enable. This will allow the backup to be copied to the Mesh secondary VM. -
Click
SAVE. -
Now click on the
Public keyand copy. -
Log onto the Mesh secondary VM and open up the Admin Interface.
-
Click
System Configurationin the left-hand menu. -
Within the System configuration window, click on the
Meshtab. -
Click the
icon for Inbound Mesh Connection 1.
-
Enter the API Key copied from the Active primary VM.
-
Click
SAVE.Now, an outbound connection can be made from the Active primary VM to the Mesh secondary VM. The Mesh secondary VM will now accept file transfers from the Active primary VM.
-
Now you need to configure a scheduled backup of the Active primary.
To configure a backup to run on a scheduled basis create a Schedule and enable Scheduled backups.
Once the scheduled backup has been created, it is automatically transfered to the Mesh secondary VM using SCP file transfer.
Note
Any Osirium PAM backup files created through manual execution will also be pushed to the Mesh secondary VM.