Configure meta-info
This section explains how meta-columns can be created and applied to Manage users, Devices and Profiles pages. The following topics are covered:
Important
We recommend that meta-columns are added before you start adding users, devices and profiles.
A meta-column is a new column that can be added to the table on the Manage users, Devices and Profiles pages. They give you the flexibility to attach additional content to better organise your data inline with your business, departments and organisational structures. Meta-columns can then be used to group information, increase searching capabilities within the Admin Interface and User Interface, and help when adding users and devices to a profile.
Once default meta values are configured, members of the Admin and Owner roles can easily select from the list and apply the values to an entry within the Admin Interface. Providing a predefined list also ensures consistency, allowing better search results.
| Type | Benefits |
|---|---|
| User | Adding meta-columns to the Manage users page allows you to group your users so they can be easily: - Searched for by specific values, e.g. Team, Manager, Department. - Added to user groups using searches on meta-column values. - Identified as belonging to a specific group to ensure everyone in a specific team is given the access levels to devices. |
| Devices | Adding meta-columns to the Manage devices page allows you to group your devices so they can easily: - Be identified by specific values, e.g. Location, Team that manages it, application owner, department, customer it is used by, etc. - Used by the Device Group Separation Identifier. - Be identified as belonging to a specific group when adding devices to profiles, ensuring the right devices are allocated to the correct teams. - Can be used to quickly search for a device within the PAM User Interface. |
| Profiles | Add meta-columns to the Manage profiles page allows you to group profiles so they can be easily: - Identified as belonging to a specific group, team or department. - Searched to ensure changes are made to the right profile groups. |
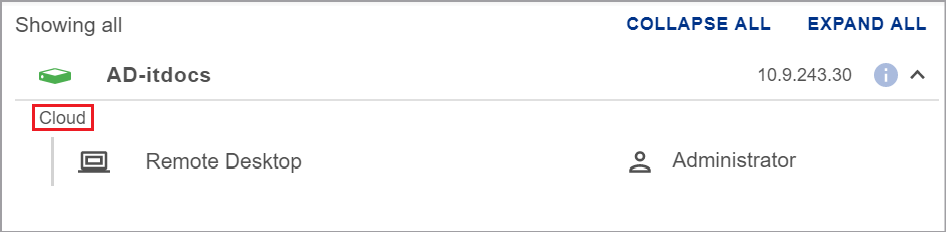
Meta-column data for devices will also be visible on the PAM User Interface as follows and can be used by users to search for devices by their meta-info.
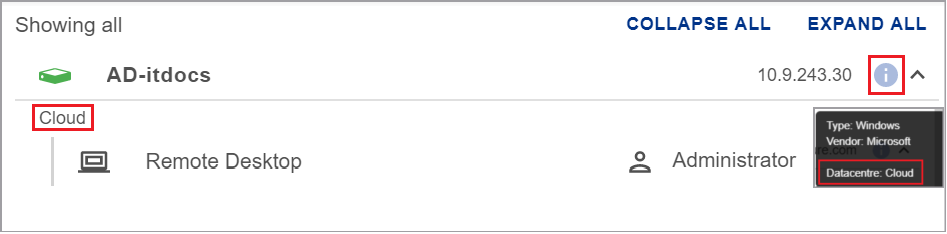
Clicking on the information icon will also give you the name of the meta-column and the meta-value assigned to the device.
Adding a meta-column
Tip
If you want to add multiple meta-columns, it would be easier to use a bulk import template.
-
Select the
Configure meta-infofrom the left-hand menu. The Configure meta-columns window will open.
-
Click

NEW ENTRY. A new line will appear in the table.
-
Fill in the details:
Heading Description Name The name of the table column as it will appear on the Manage... page. Default value(s) Enter the value(s) which will be available in the drop-down list. Each value entered should be separated by a comma. Type Select the Manage... page you want to apply the meta-column to. Three options are available: Users, Devices and Profiles. These are the only pages meta-columns can be applied to. 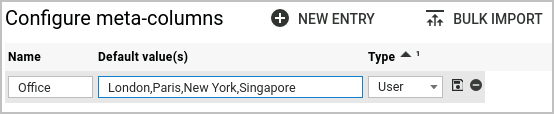
-
Click
 to save your configuration.
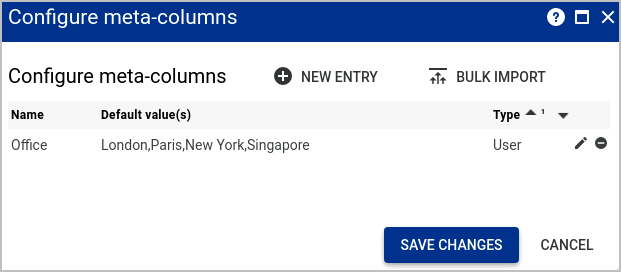
-
Click
SAVE CHANGES. -
Click
OK. The browser will be refreshed and the configuration applied to the Manage... page.Note
If you have any existing entries on the Manage... page that the meta-info will be applied, then the first value in the list will be applied to the existing entries but can be easily updated manually.
-
The Manage... page will now contain the meta-info column added. When you create a new entry, the meta-info columns will be included for configuration.

Bulk importing meta-columns
If there are a number of meta-columns you want to add to your users, devices and profiles pages, then it will be easier to use the bulk import csv template to configure your meta-columns and then import them.
-
Select the
Configure meta-infofrom the left-hand menu. The Configure meta-columns window will open. -
Click

BULK IMPORT. -
Within the Import from CSV window, click
DOWNLOAD CSV TEMPLATE.If the PAM Server Browser (HTTP) tool is being session recorded, then you will need to use the Shared Drive mechanism for downloading files. For further details see Downloading a file using Shared Drive.
-
Open the meta_columns.csv file. You will see an example given to follow the inputs required. Add in your meta-column data. For example:

-
Save the CSV file once your meta-columns have been added.
-
On the Shared Drive window, click Upload your files.
If the PAM Server Browser (HTTP) tool is being session recorded, then you will need to use the Shared Drive mechanism for uploading files. For further details see Uploading a file using Shared Drive.
-
Within the Import from CSV window and click on
Choose File. Select the uploaded bulk import file. -
Click
IMPORT. -
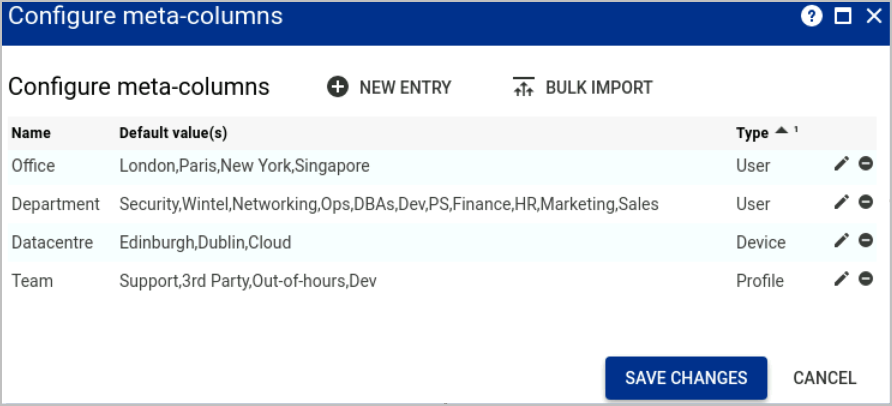
The entries in the CSV file are added and visible in the Configure meta-columns window.
-
Click
SAVE CHANGES. -
Click
OK. The browser will be refreshed and the configuration applied to the Manage... page.Note
If you have any existing entries on the Manage... page that the meta-info will be applied, then the first value in the list will be applied to the existing entries but can be easily updated manually.
-
The Manage... pages will now contain the meta-info columns added. When you create a new entry, the meta-info columns will be included for configuration.
Updating meta-columns
Once the meta-columns have been applied to the Manage... pages, the values can be managed as follows:
- Update meta-column configurations
- Selecting meta values
- Updating a single meta value
- Updating a multiple meta values
Update meta-column configurations
Changes to the configured meta-columns and values can be made at anytime.
If a value is removed from the list then the value next in the list will replace the entry on the Manage.... page.
To edit an existing meta-column:
-
Click
Configure meta-infoin the left-hand menu. -
Within the Configure meta-columns window, click on the
 at the end of a row.
 -
Edit the existing values:
Heading Description Name The name of the table column as it will appear on the Manage... page. Default value(s) Add/delete to the value(s) listed which will be available in the drop-down list. Each value entered should be separated by a comma. Type Select a different type if you want the meta-info to be applied to different Manage... page. 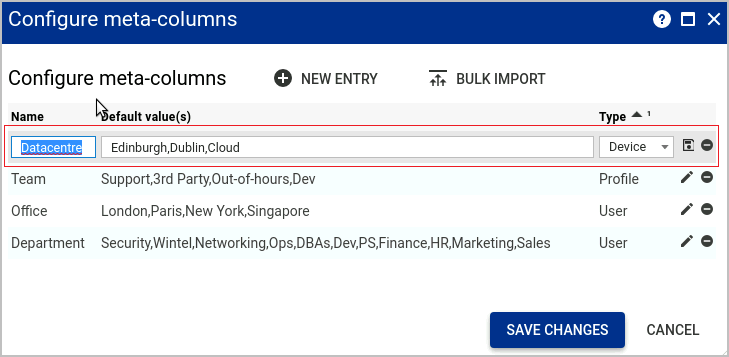
-
Click
when you have finished your edits. -
Click
SAVE CHANGES. -
Click
OK. The browser will be refreshed and the updates made to the relevant Manage... page.
Selecting meta values
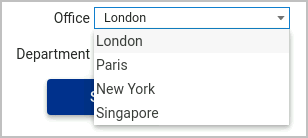
When meta-columns have been configured and the meta-info has been added to the Manage... page, it will appear as a field in the new entry window.
This example shows you how to select the meta-info for a New user.
-
Click
Usersin the left-hand menu. -
On the Manage users page, click
NEW USER. The New user window will open. The meta-info fields will be located after the Auth type.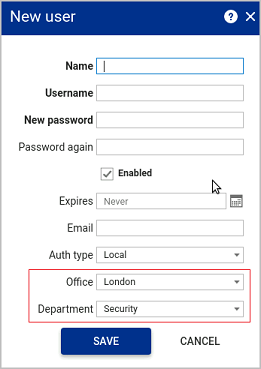
-
Use the arrow within the field selection box to select from the pre-defined meta-column list.
-
Once the meta-info has been selected, it will be applied to the new user when successfully created.
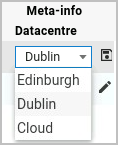
Updating a single meta value
Meta-info values that have been set on a table entry can easily be updated as and when updates and changes occur.
This example shows how to update the meta value of a single entry on the Devices table:
-
Click on Devices in the left-hand menu.
-
Within the Manage Devices window, click on
at the end of the row you want to change the meta-info on.
-
Once in row edit mode, on the Meta-info column, use the drop down list box to select a value from a pre-defined list.
-
Once you have selected the value, click
to save your selection.
Update multiple meta values
If you want to change the value for all table entries that are currently set to a certain value, then it is possible using the multi-row editor.
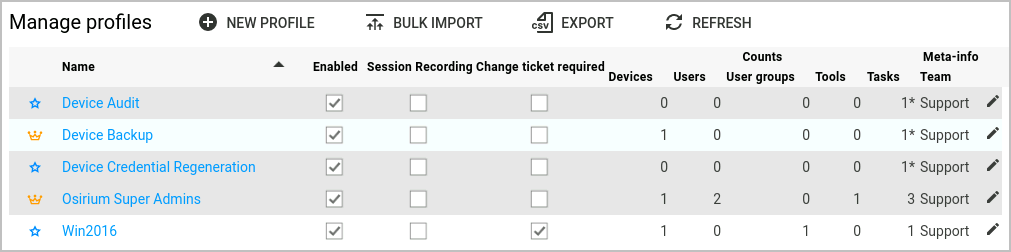
This example shows how to update the meta value of a multi entries on the Profiles table:
-
Click on Profiles in the left-hand menu.
-
Within the Manage Profiles window, select all the rows you want to edit the meta-info on by holding CTRL and selecting the rows. The selected rows will be highlighted.
-
Now right-click and select
Multi-row edit.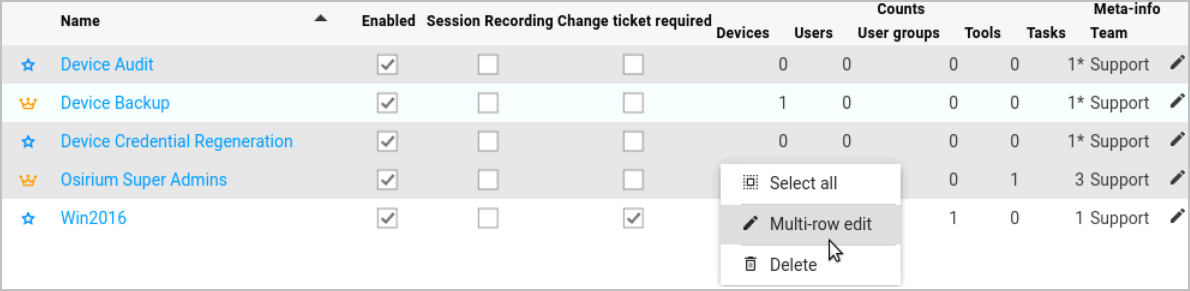
-
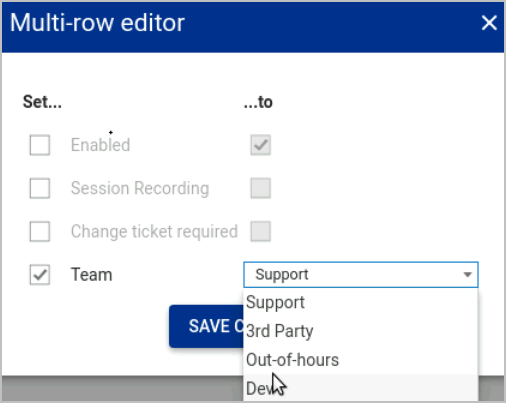
Within the Multi-row edit window select the meta-column checkbox and use the drop-down to select the meta-column value.
-
Click
SAVE CHANGES. -
Within the Question window, click
YESto perform the multiple updates.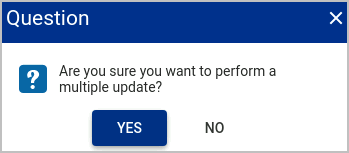
Deleting meta-columns
Deleting meta-columns will remove the meta-info column from the Manage... page it was applied to.
To delete an existing meta-column:
-
From the left-hand menu, click
Configure meta-info. -
Within the Configure meta-columns window, click on the
 icon at the end of a meta-column row. The row will be marked for deletion and greyed out.
 -
Click
Save changes. -
Click
OK. The browser will be refreshed and the updates made to the relevant Manage... page.