AWS
Configuration of Opus should take around 15 minutes.
You will:
- Configure networking.
- Setup an SSH key.
- Set a strong admin password.
- Provide an Active Directory server for user authentication.
Setting a static IP address for AWS
After deploying the virtual machine it is good idea to set a static IP address for the appliance.
Navigate to the Elastic IPs sub-menu in the EC2 Dashboard in AWS.
Allocate a new address or choose an existing address to assign to the Opus appliance.
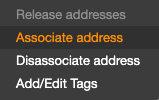
Apply Actions > Associate address to the elastic IP address.
Select the Opus appliance machine from the dropdown.
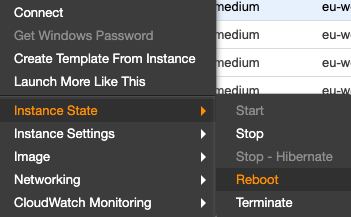
Navigate to the Instances sub-menu in the EC2 Dashboard, and apply Actions > Instance State > Reboot to the Opus appliance machine.
Update the Opus Configuration
Connect to the Opus machine using SSH.
Update the /var/disk/config/fqdn configuration file with your Elastic IP address.
For example, if your Elastic IP address is 10.20.30.40, you can use the following command:
sudo bash -c "echo 10.20.30.50 > /var/disk/config/fqdn"
Securing the appliance
After configuring the network, the next step is to secure it.
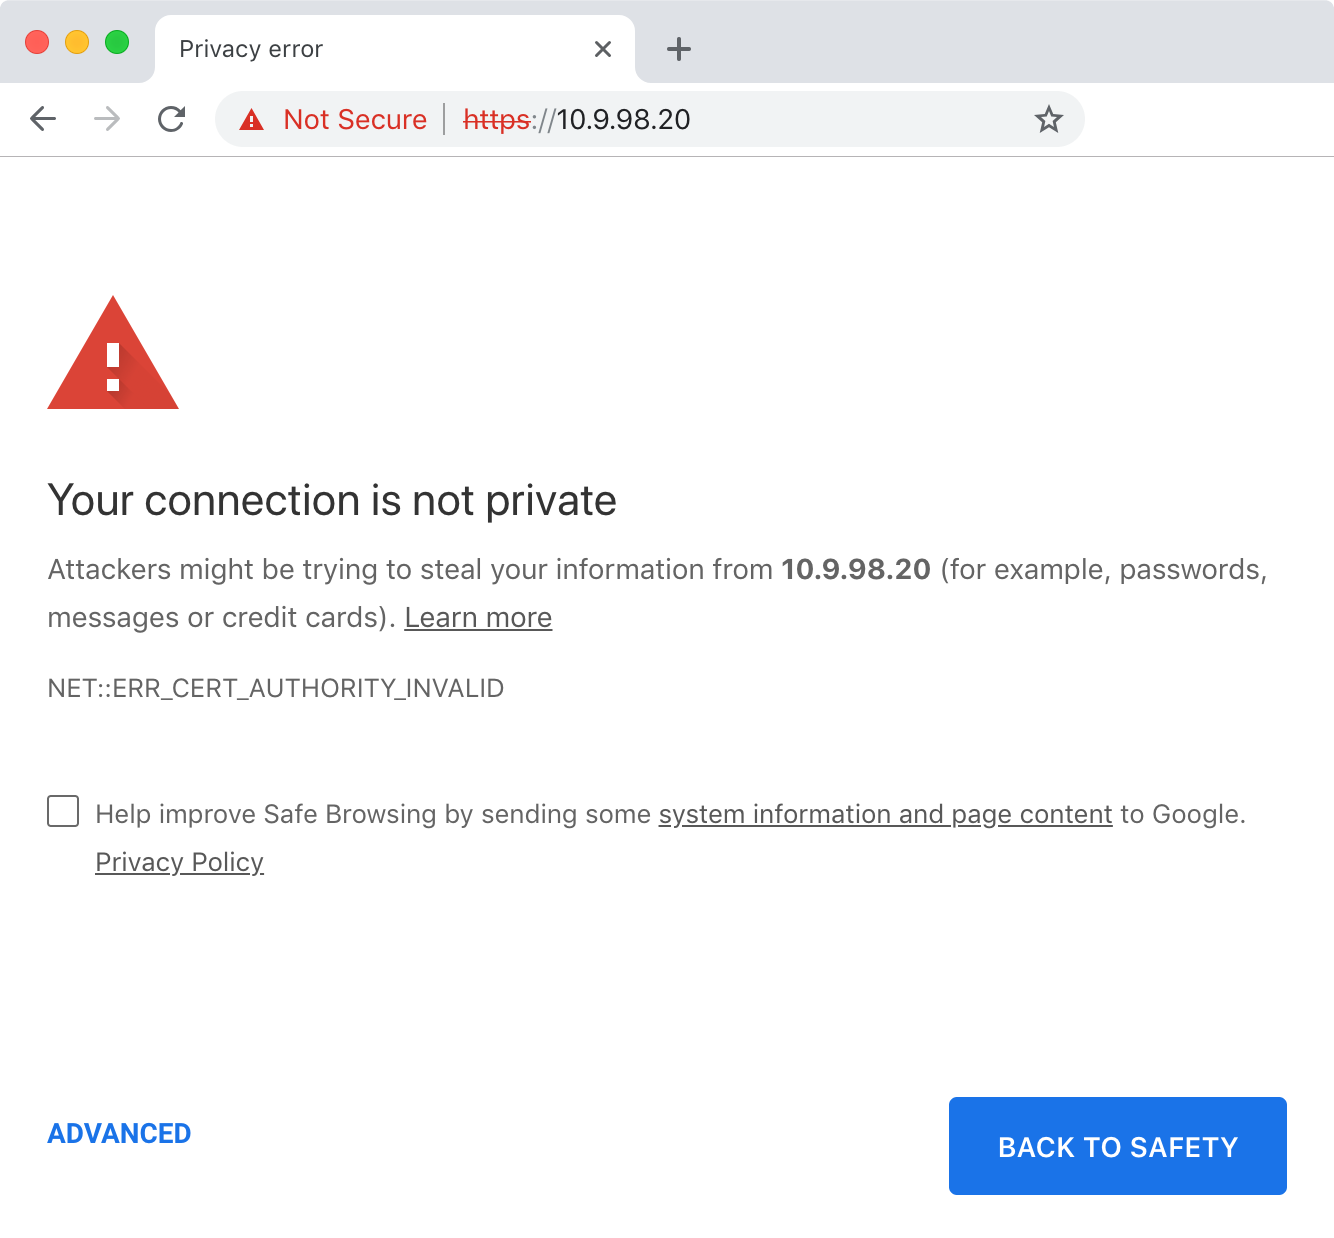
Connect to the appliance with a web-browser using the IP address shown in Vsphere or the cloud provider console.
Opus creates a self-signed certificate on first boot that will be reported as insecure by browsers:
Manually verify that the connection is secure by viewing the certificate:
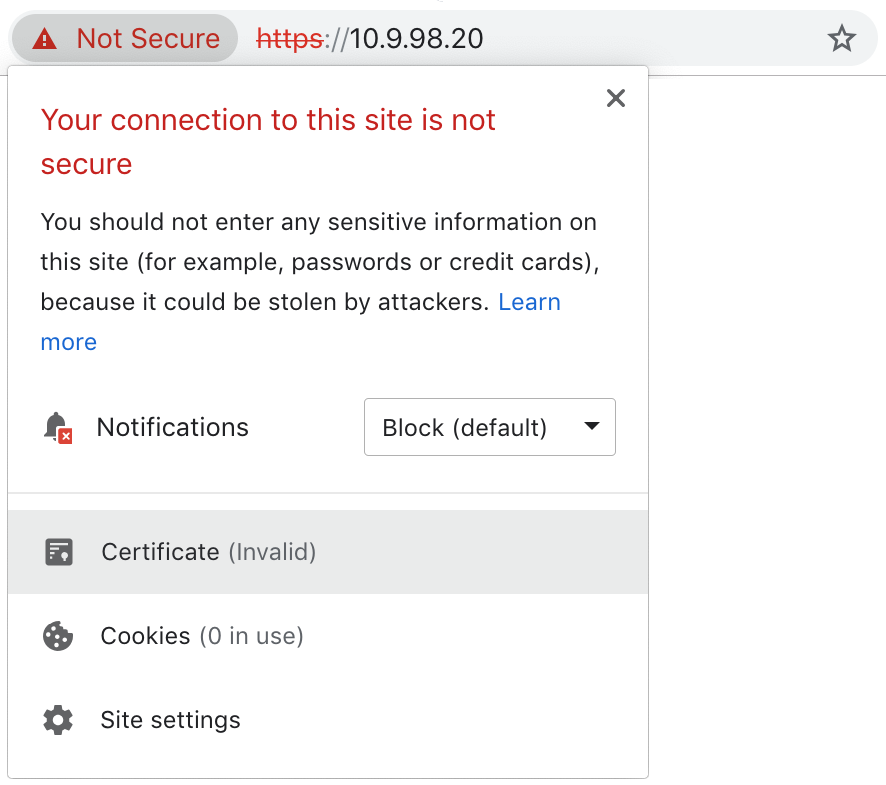
Scroll down and verify that the SHA256 fingerprint:
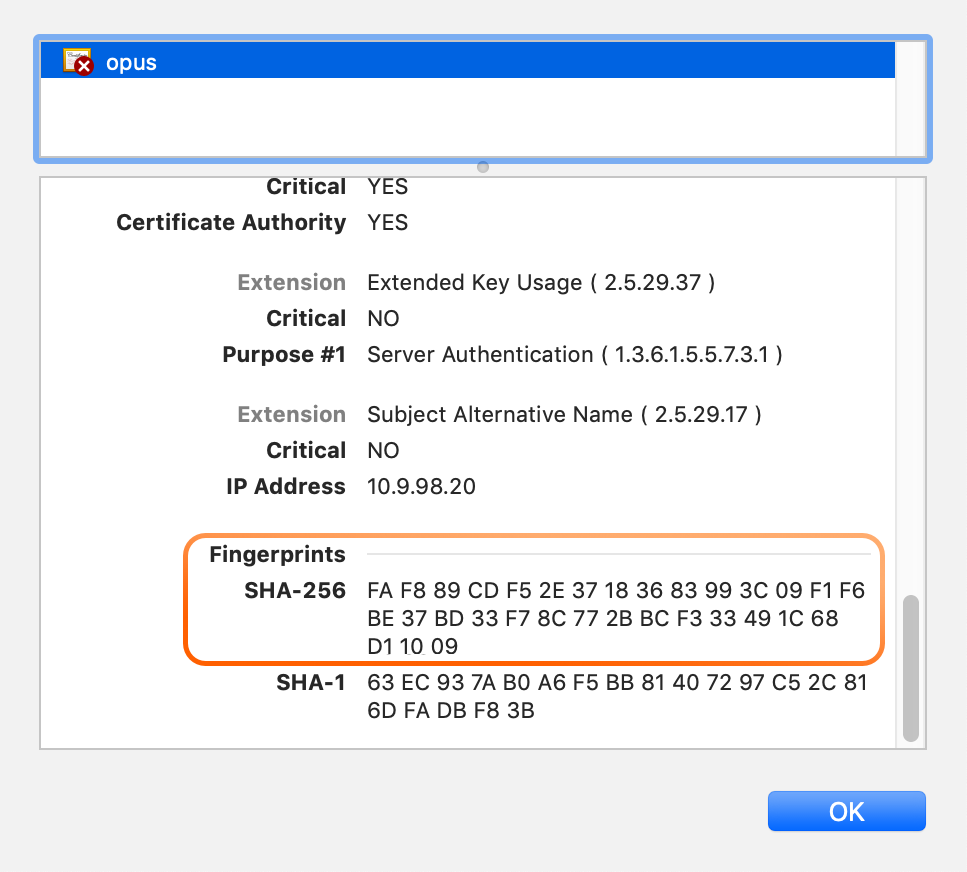
...matches the output of the fingerprint command:

Note
You can run the fingerprint command via the web console for VMware, or via SSH for AWS or Azure.
When you are satisfied that the connection is secure, trust the certificate and proceed to the appliance's web UI.
Master SSH key
Opus does not use a password for SSH authentication, so you will need to use the master key pair that was created during the installation process.
Admin password
Back in the web-browser, Opus will ask you to choose a strong password for the admin local account:
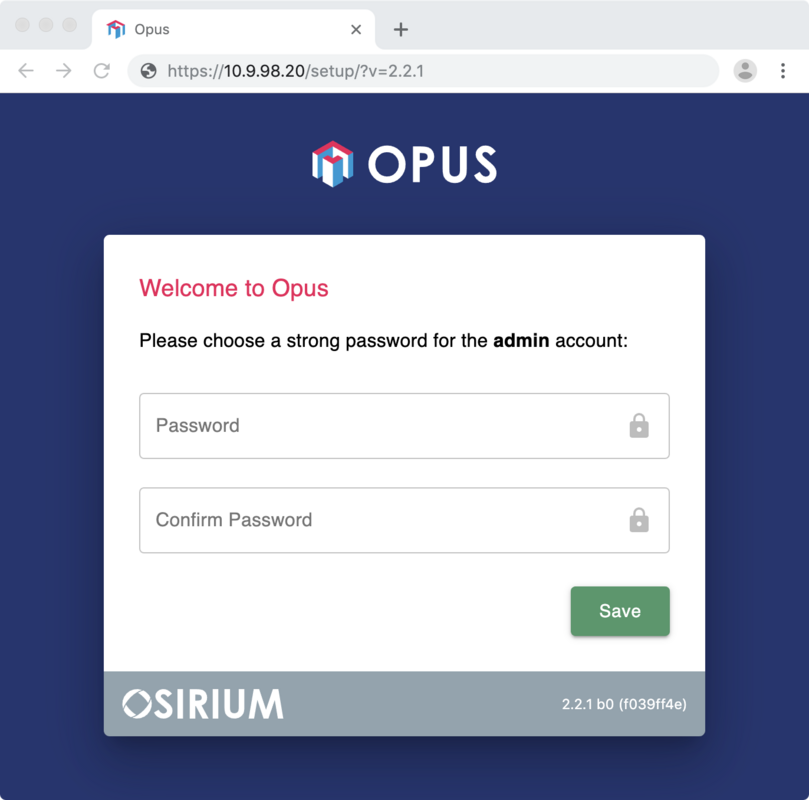
The admin account has complete control over the appliance. It is recommended that you generate a strong password and store it in a vault or password manager, then switch to using an Active Directory account for everyday access to Opus.
Active Directory
[Recommended]
Opus can authenticate Active Directory users using LDAPS.
Note
To complete this step you will require:
- The active directory domain you wish to use for authentication, plus the host and LDAPS port if it is not resolvable
- The sAMAccountNames for list of groups you wish to allow access to Opus, e.g:
All Users
Login to the web interface as admin and then click on the 'Users' tab. Click the 'Configure Active Directory' button:

This will pop-up a web form:
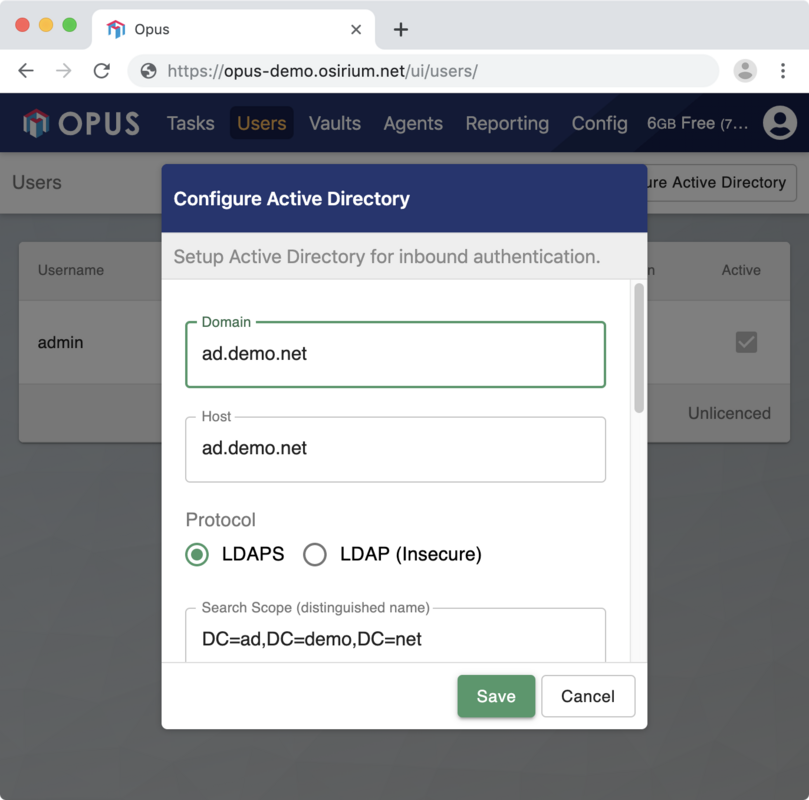
You will need to provide:
| Setting | Description | Default |
|---|---|---|
| Domain | The domain used by Active Directory | None |
| Host | The host and port LDAPS is listening on. | The host returned by a DNS lookup for Domain |
| Server name | The server name presented on the certificate (this may be different to the domain). | The certificate's common name |
| Search scope | A scope to search for users in. | The Domain formatted as a distinguished name |
| Groups | One or more sAMAccountNames of any groups that are allowed access to Opus | All Users |
Installing custom HTTPS certificates
[Advanced, Optional]
Replace the files at /var/disk/certs/https.key and /var/disk/certs/https.crt.
You can use ssh:
tar -c https.key https.crt | ssh support@<address> -C "tar -x --no-same-owner -C /tmp/"

ssh support@<address> -C "sudo mv /tmp/https.* /var/disk/certs/https.*"
or edit the files using vim or nano.
Reboot the appliance.
Configuring HashiCorp Vault
[Recommended, Optional]
Opus comes with a copy of HashiCorp Vault running on port 8200.
Navigating there with a browser will take you to the initial setup wizard.
Here you will create keys that will be required whenever Opus is restarted or the vault is sealed.
Warning
Put your keys in a safe place! Losing your keys will permanently lock you out of the vault.
Recommended configuration:
| Environment | Key Share | Key Threshold |
|---|---|---|
| Development | 1 | 1 |
| Production | 3 | 5 |
Once the initial setup is complete and the vault unsealed you can now add it to Opus.
Back in Opus, click the Vaults section and select Add Vault.
Complete
After setting a password for admin you will be asked to log in.
Setup is now complete.