AWS
An Opus upgrade should take around 20 minutes.
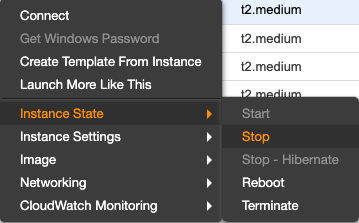
Stop the appliance
You will need to stop the appliance to take a snapshot of the data volume for the upgrade, so there will be a few minutes' downtime. Make sure that there are no tasks running before powering off the appliance.
Navigate to the EC2 Dashboard and then to the Instances screen, and apply Actions > Instance State > Stop to the Opus appliance machine.
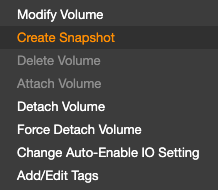
Take a snapshot of the data volume
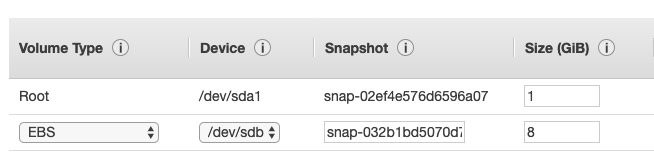
When the Opus instance is in a stopped state, click on the Description tab, and then select the Block device that is not the Root device. It will have a name like /dev/sdb.
Click on the EBS ID link to navigate to the EBS volume, and then apply Actions > Create snapshot to the EBS volume.
Take a note of the snapshot ID. It will have a name like snap-032b1bd5070d7xxxx. You will need to wait for the snapshot to complete before you can upgrade the appliance.
Create a new appliance
Follow the AWS installation instructions to create a new Opus appliance using the latest version on AWS marketplace.
When you get to the Add storage step, you will need to provide the snapshot ID for the EBS volume.
Proceed with the rest of the installation as normal.
Setting a static IP address
Navigate to the Elastic IPs sub-menu in the EC2 Dashboard in AWS.
Instead of creating a new Elastic IP address, you should select Dissociate address to disassociate the elastic IP from your old Opus appliance.
Then apply Actions > Associate address to apply the elastic IP to your new Opus appliance.
Your new appliance will now be accessible from the same IP as the old one.
Complete
Opus will now boot and apply any database migrations automatically.
After a few minutes the new version of Opus will be available. Check the version label on the login screen to confirm.