Deploying and install configuration using Microsoft Hyper-V
This section covers.
Deploying the virtual machine
The following steps walk you through deploying the PAM UI Server within a Microsoft Hyper-V infrastructure.
Info
The PAM UI Server must be deployed on a Generation 1 virtual machine.
-
Download the PAM UI Server ISO file. The latest download can be found here.
-
Within your existing Hyper-V infrastructure, create a New Virtual Machine. The New Virtual Machine Wizard will be displayed. Click
Next >.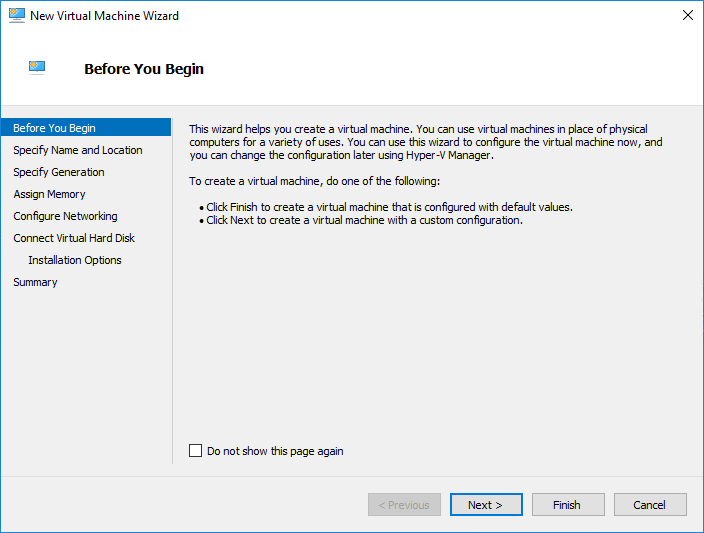
-
Enter a name for the virtual machine and click
Next >.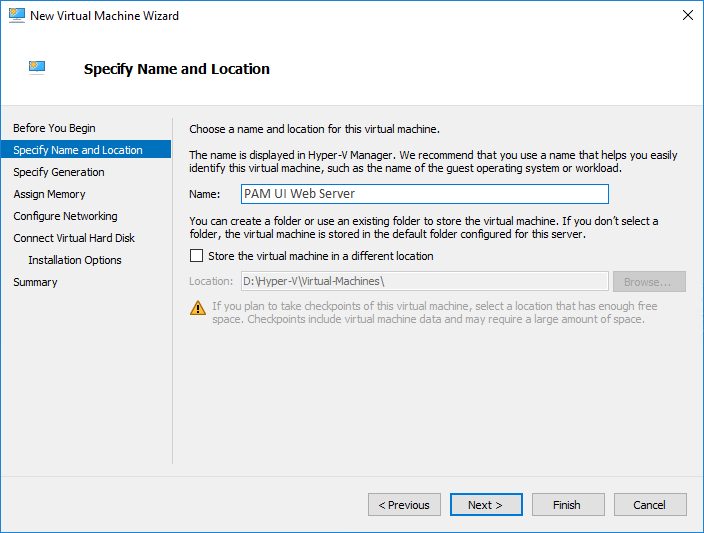
-
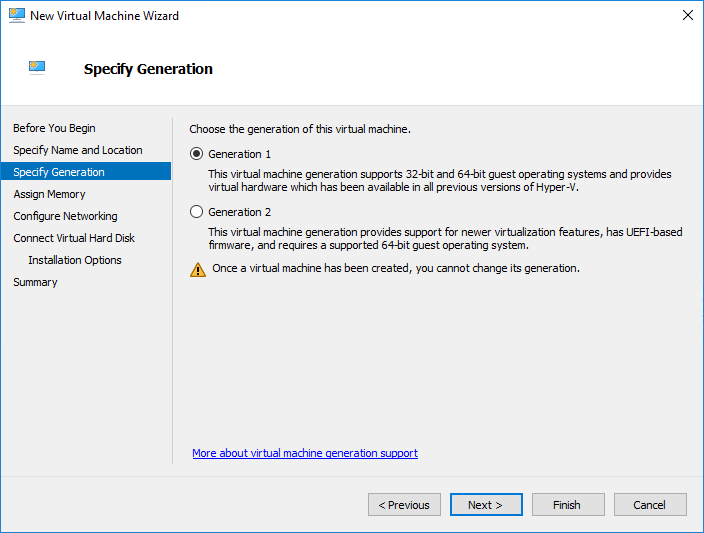
Select Generation 1 and click
Next >.Warning
Do not select Generation 2 as it is not supported.
-
Set the memory to 8192MB and click
Next >.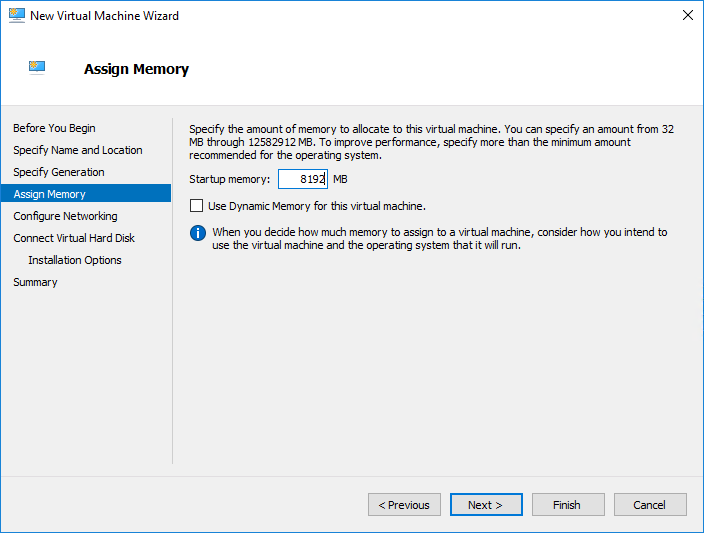
-
Configure the network to connect to and click
Next >.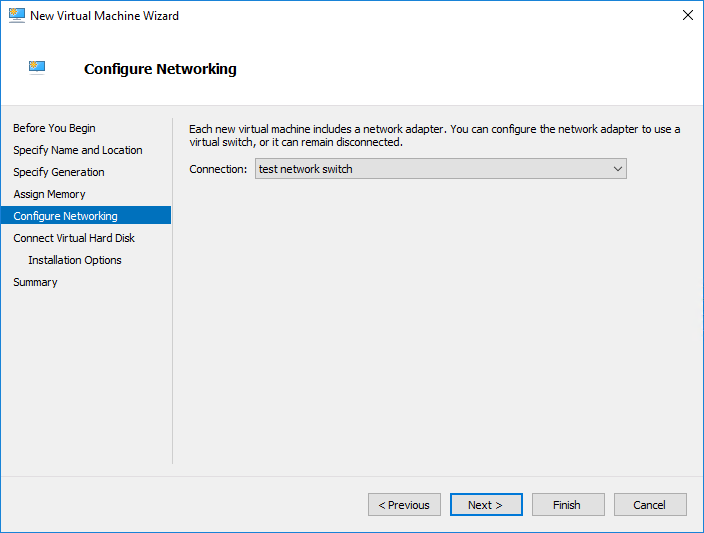
-
Set the virtual hard disk size to 32GB and click
Next >.
-
Set the virtual machine to boot from the downloaded ISO file and click
Next >.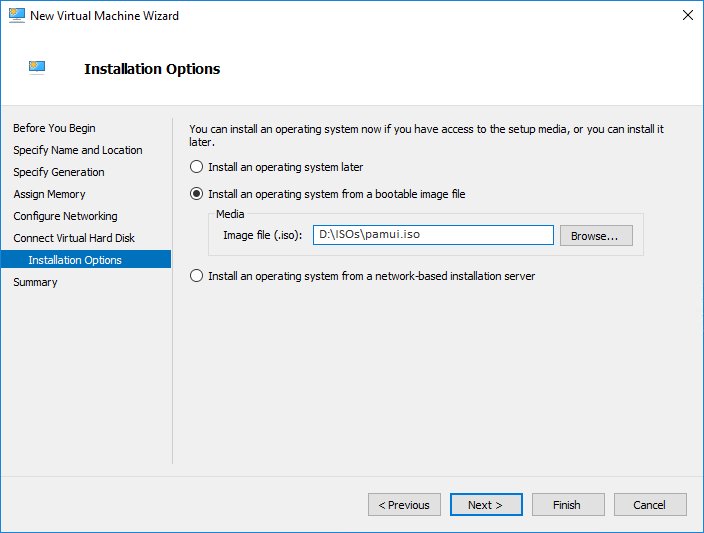
Warning
The ISO file must remain attached to the virtual machine even after the installation has been completed.
The file contains the system OS, and the PAM UI Server will break if it is detached.
-
Review the summary and click
Finish.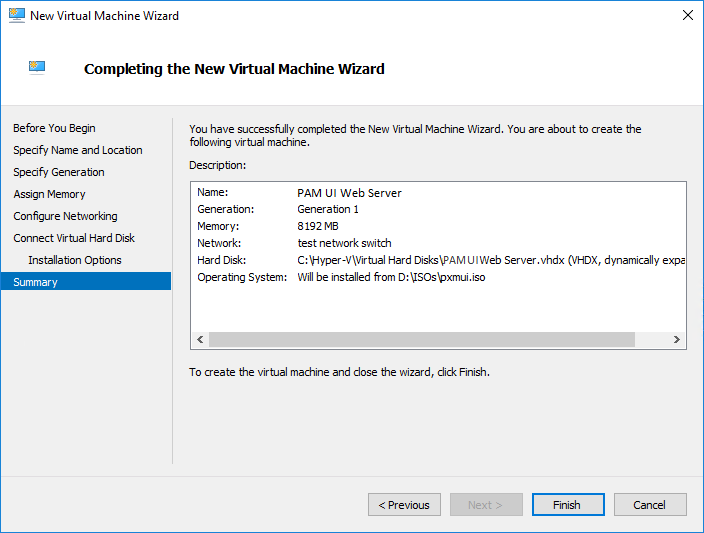
-
By default, the wizard only sets 1 CPU. The virtual machine settings need to be changed to 4 CPUs.
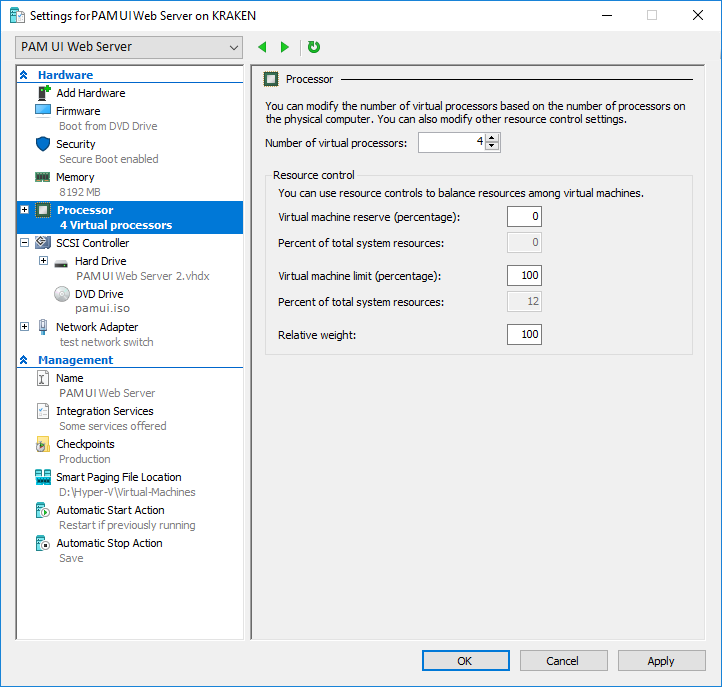
-
Click
OK.
Network Configuration Settings
To setup the network configuration on the PAM UI Server:
-
Once the PAM UI Server has finished deploying, right-click and select
Power On. Wait while the server is booted.Warning
DO NOT turn off the PAM UI Server during the boot stage as this may cause the machine to become corrupted.
-
Within your Microsoft Hyper-V infrastructure open the Console window of the deployed PAM UI Server.
-
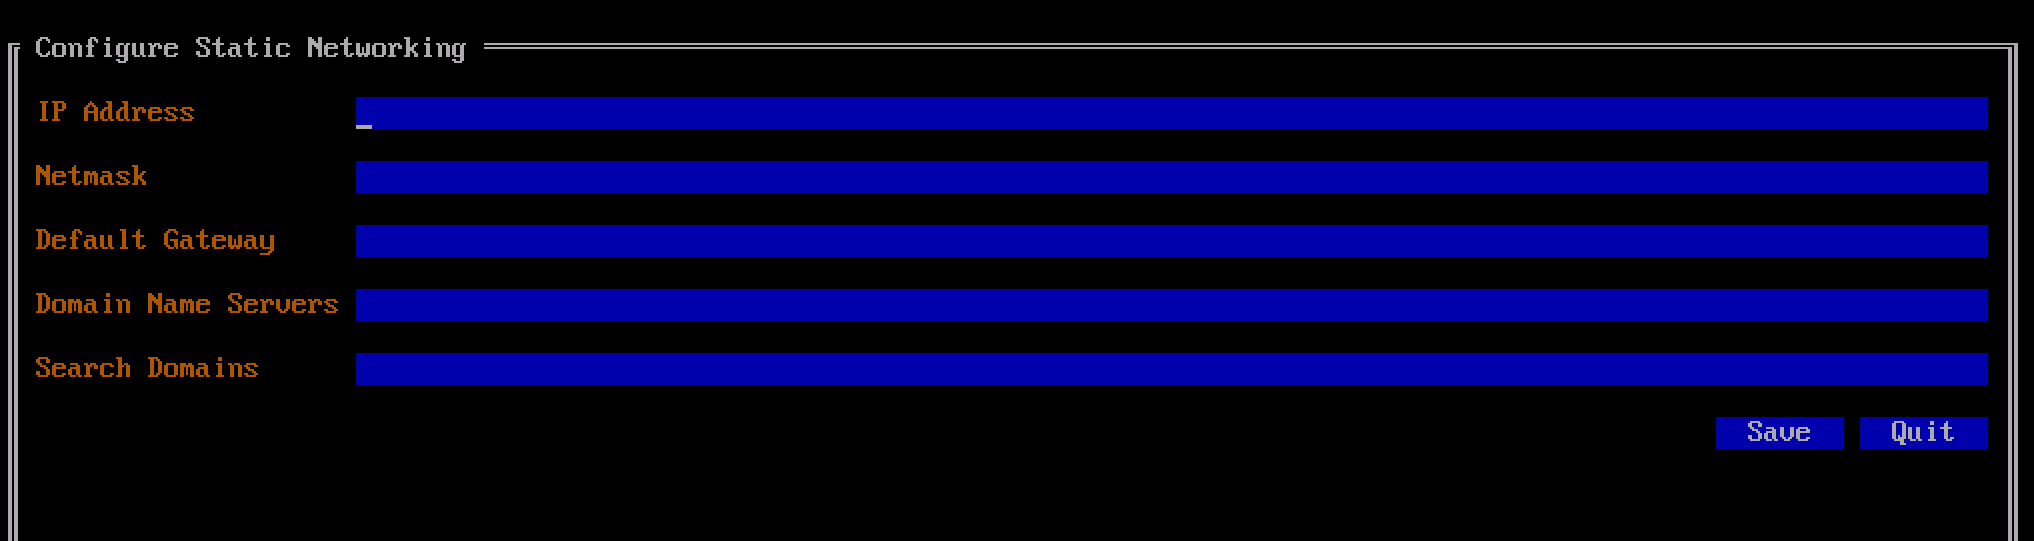
At the command type
sudo netconfand press ENTER. -
Within the Configure Networking screen, configure the following server settings. Press TAB to navigate between the fields.
- IP Address: Enter the IP Address which will be used to connect to the PAM UI Server.
- Netmask: Enter the network mask.
- Default Gateway: Enter the network default gateway IP address.
- Domain Name Servers: Enter the network DNS IP address. Enter multiple servers as a comma separated list.
- Search Domains: Enter the domain to be used as part of a domain search list. Can be left empty.
-
When completed TAB down to the
Savebutton and press ENTER. The network configuration is saved and you are navigated to a confirmation screen. -
When prompted select
Saveand press ENTER.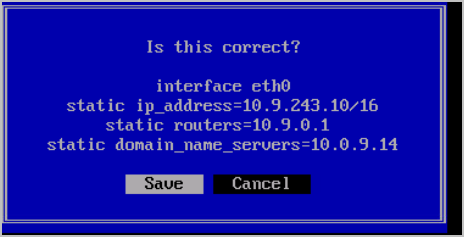
-
You MUST reboot before continuing. At the command prompt type
sudo rebootto apply the configuration. Wait while the system is rebooted.
SSH Access Configuration
SSH access configuration is required to allow administrators to SSH onto the PAM UI Server.
When the first SSH connection is made to the PAM UI Server a private key is set. The server will generate a unique username for this initial connection which will be deleted once the initial setup has been completed.
Note
Additional keys can be added after setup.
Adding the first SSH public key
-
Generate an RSA key pair using your preferred method.
Note
Instructions for generating an RSA key pair using PuTTY can be found here.
-
Open the Console window of the PAM UI Server.
-
At the command prompt type
sshconfand press ENTER. This will display a one-time username that you will use to setup the SSH key for the support user account.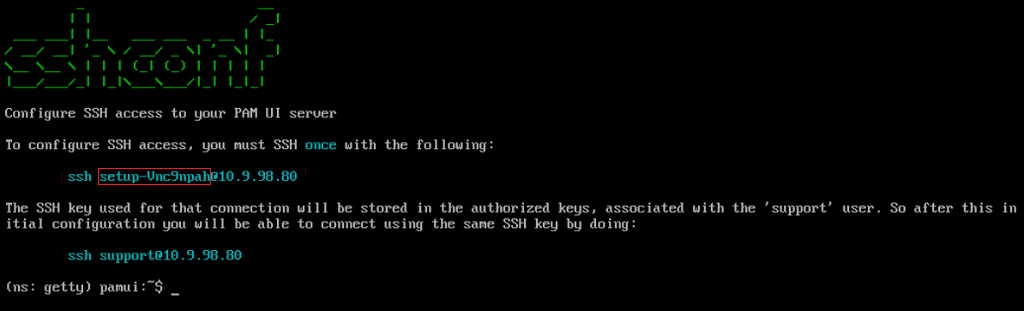
Note
The setup-xxxxxxxx username displayed will be unique to each PAM UI Server install.
-
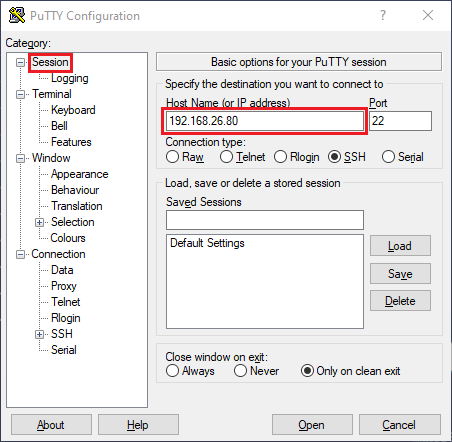
Open PuTTY or your preferred SSH tool and enter the IP address of the PAM UI Server.
-
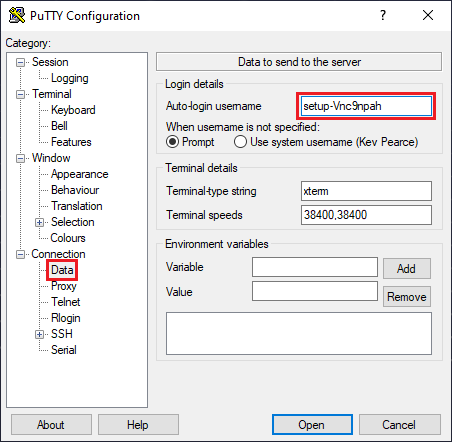
Next under Connection -> Data enter the one-time username displayed by 'sshconf' in the Auto-login username field.
-
Next under Connection -> SSH -> Auth -> Credentials, click
Browse...and select the private key file (.ppk file) that you created at the start (i.e. pam_ui_support.ppk).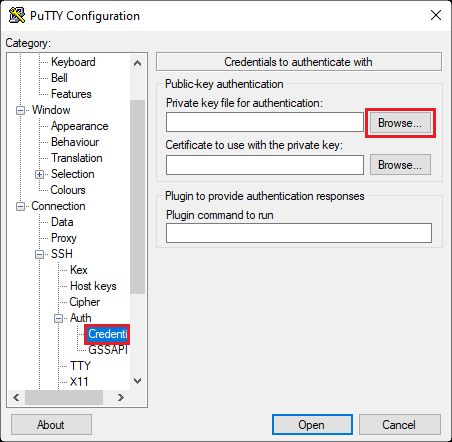
-
Click
Opento connect. -
As this is the first time you are connecting you will see a fingerprint alert box, accept the fingerprint.
-
The connection window will now only remain open for a few seconds and then disappear. PuTTY may display an error on disconnect. This is okay and expected.
-
This connection has now set the SSH key of the 'support' user for the PAM UI Server.
-
Now to SSH to the PAM UI Server open PuTTY, set the IP address, set the private key file (.ppk file) but now set the auto-login username to be 'support' (without the quotes).
-
Click
Openand you will be connected to the PAM UI Server. -
You are now ready to configure your PAM UI Server. See System configuration of the PAM UI Server.