Configuring the PAM Server
Follow these configuration steps if you are setting up a standalone server or if this is the first node in your cluster.
-
Within the Console window, press ENTER when prompted to start the setup and configuration.
-
Read and accept the EULA to continue.
-
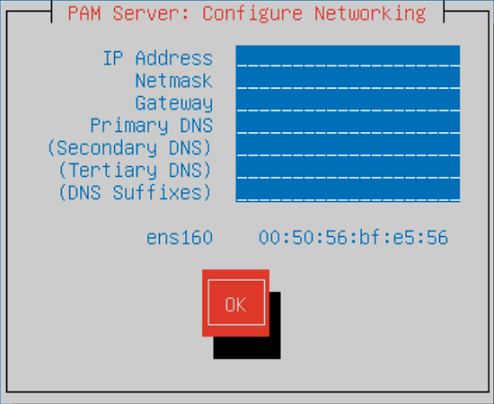
Within the Configure Networking screen, configure the following server settings. Press TAB to navigate between the fields.
- IP Address: Enter the IP Address which will be used to connect to the server.
- Netmask: Enter the network mask.
- Gateway: Enter the network default gateway IP address.
- Primary DNS: Enter the network primary DNS IP address.
- (Secondary DNS): Enter the secondary DNS IP address if relevant, else leave blank.
- (Tertiary DNS): Enter the tertiary DNS IP address if relevant, else leave blank.
- (DNS Suffixes): Enter the DNS Suffixes. Multiple entries can be separated with a comma, else leave blank.
-
Once completed TAB down to the
OKbutton and press ENTER. -
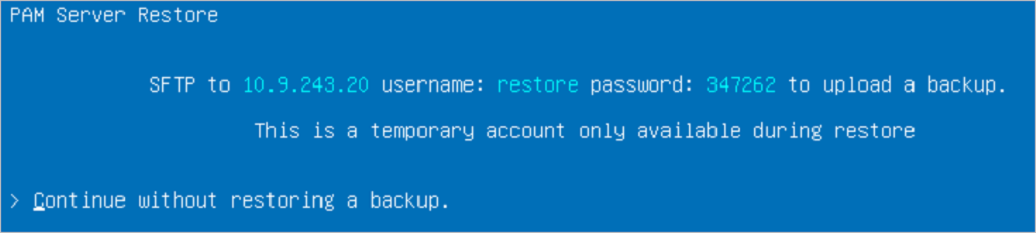
As you are creating a new PAM Server, press ENTER to Continue without restoring a backup.
-
Within the Enter a hostname window, enter a name to identify the new server.
-
TAB down to the
OKbutton and press ENTER. -
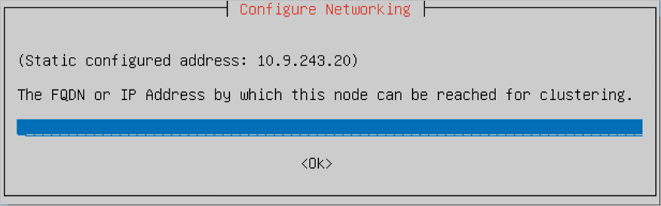
Enter the FQDN (all in lowercase) or IP Address which will be assigned to the node. The configuration entered here is used to communicate between nodes if you are setting up a cluster.
Warning
If your Osirium PAM deployment will be using the Mesh functionality which allows the PAM Server to push a copy of its backup files to a secondary PAM Server, then you must enter an FQDN and NOT an IP Address.
If the following error occurs then make sure that the hostname can be resolved and check if it has been included in the DNS A records - see Prerequisites.
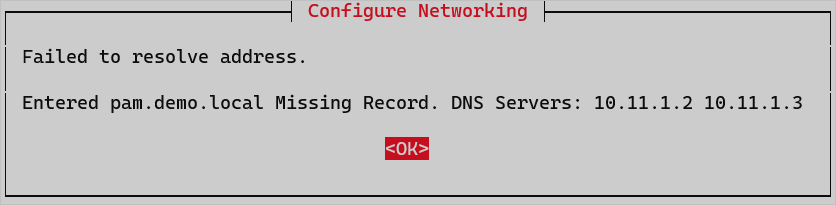
If the following errors occur then make sure that the entered hostname / address are correct and press ENTER to re-enter.


-
TAB down to the
OKbutton and press ENTER. -
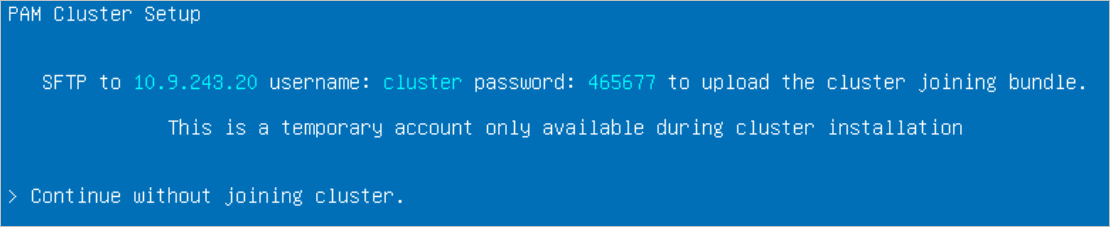
As this is the first node (leader) in the cluster press ENTER to Continue without joining cluster.
-
Your Master Encryption Key will be shown.
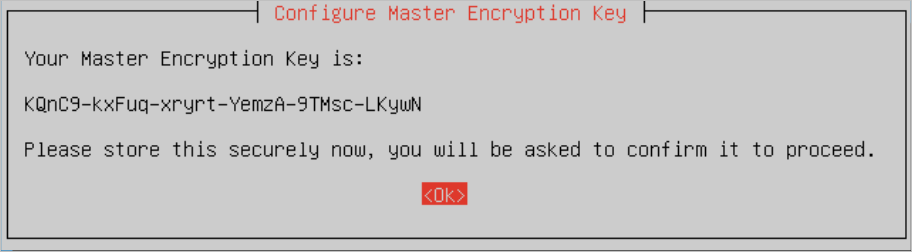
Type Description Master encryption key This key is VERY IMPORTANT so you MUST make a note of it and securely store it externally for future reference as it is not stored on the server. It will be required during a backup/restore procedure to recreate the hash file and decrypt the Osirium PAM database stored within the Osirium backup file. See Backup/restore upgrade procedure. Salt During the installation process the master encryption key is combined with the Salt to generate a hash which is stored in a file. The Salt is stored on the server and will be included in the Osirium backup file. Hash Is generated during the installation process and stored on the server. The hash file will not be included in the Osirium backup file. During a backup/restore procedure the master encryption key will be used with the salt to recreate the hash and decrypt the Osirium backup database file to reinstate the server. -
TAB down to the
OKbutton and press ENTER. -
Enter the Master Encryption Key including the dashes to verify.
-
TAB down to the
OKbutton and press ENTER. -
Set a password for the Primary SuperAdmin account. The username (SuperAdmin) and the password will be used later to log into the UI.
Note
The Primary SuperAdmin account and password will also be used to log into all other nodes in a cluster setup.
-
TAB down to the
OKbutton and press ENTER. -
Confirm the primary SuperAdmin account password.
-
TAB down to the
OKbutton and press ENTER. Wait while the system is configured. -
Once the setup has completed a message will be displayed. Make a note of the https address which will be required to connect to the PAM Server.
Info
From release v7.2 the PAM Server and PAM UI have been integrated to provide a single unified installation.
If you wish to install and configure a separate PAM UI Server click here for instructions.
-
Now the server has been successfully deployed and configured you will need to run through the System configuration steps.