Deploy using Microsoft Azure
The following steps will walk you through the deployment:
-
Logon to the Microsoft Azure portal.
-
From the Microsoft Azure dashboard click the Create a resource option in the upper left-hand corner.
-
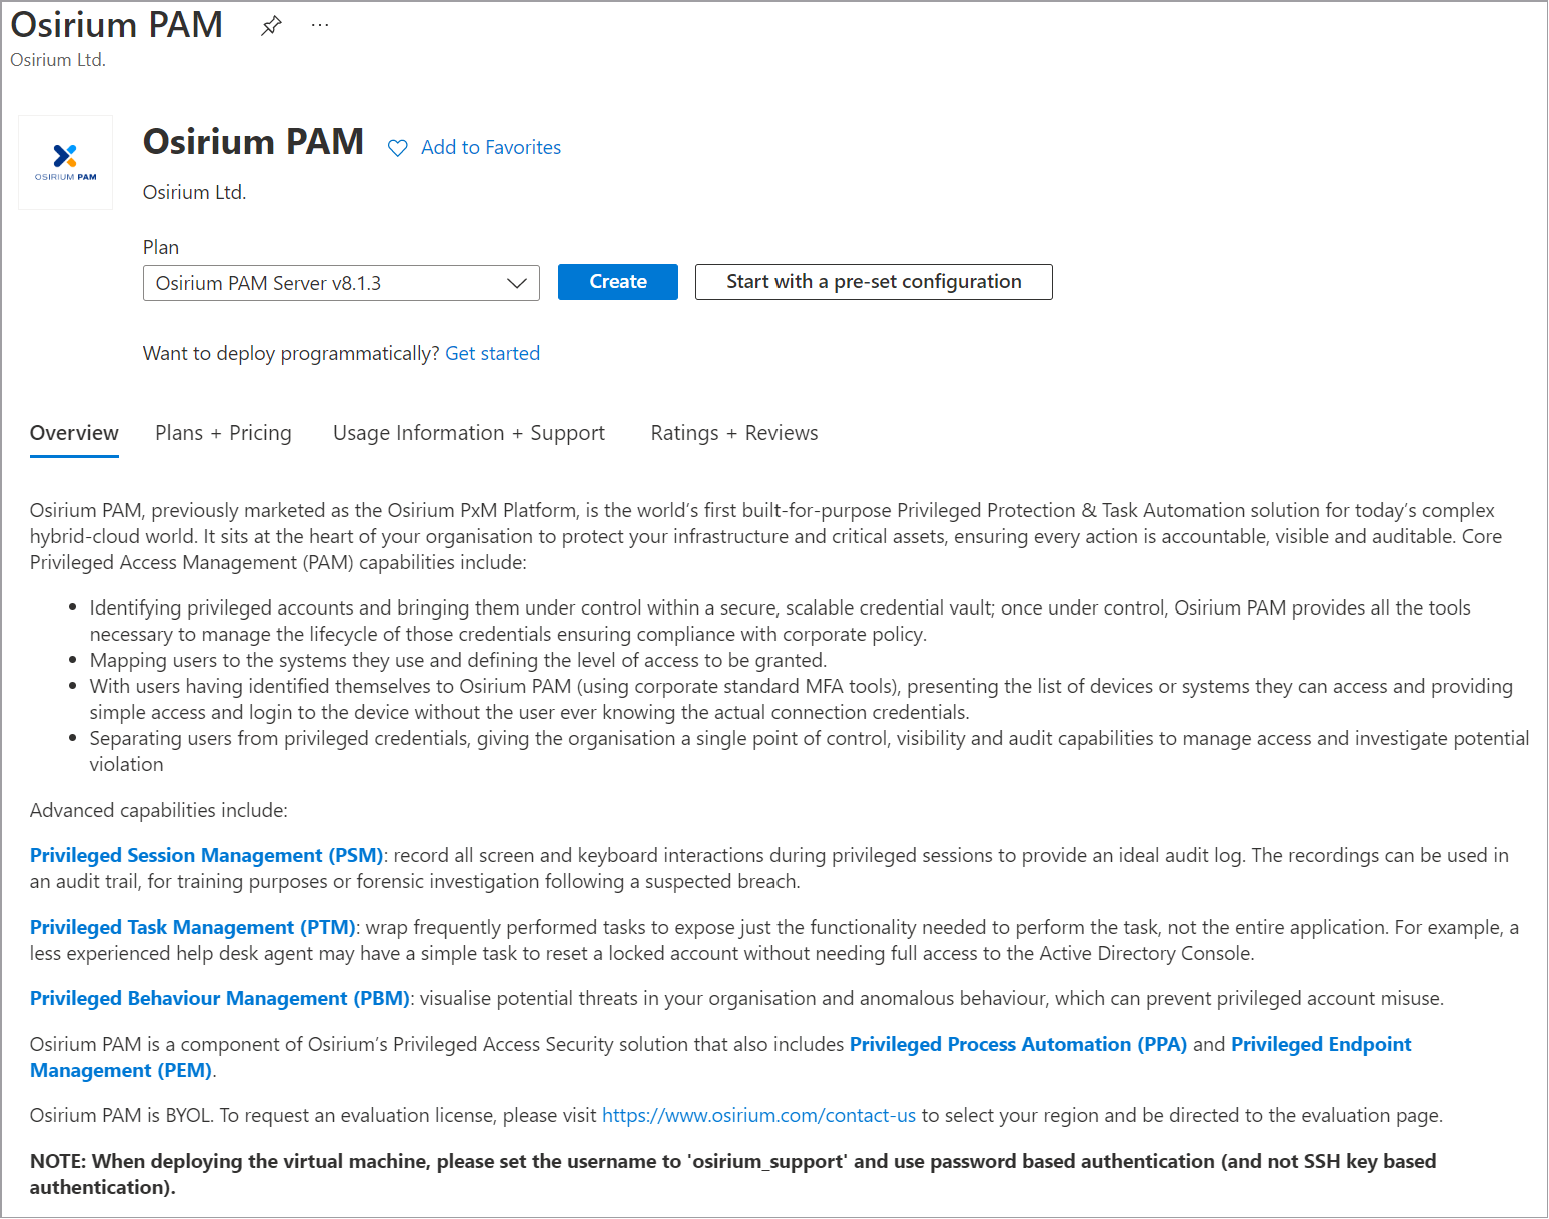
Within the New window, type Osirium PAM in the Search the Marketplace box and press ENTER .

-
Select Osirium PAM from the listings.
-
Within the Osirium PAM window, the search results will show the Osirium offerings. Read the information and select the version.
We recommend you use the latest version for a new installation, alternatively select the version you require.
-
Click
Create. -
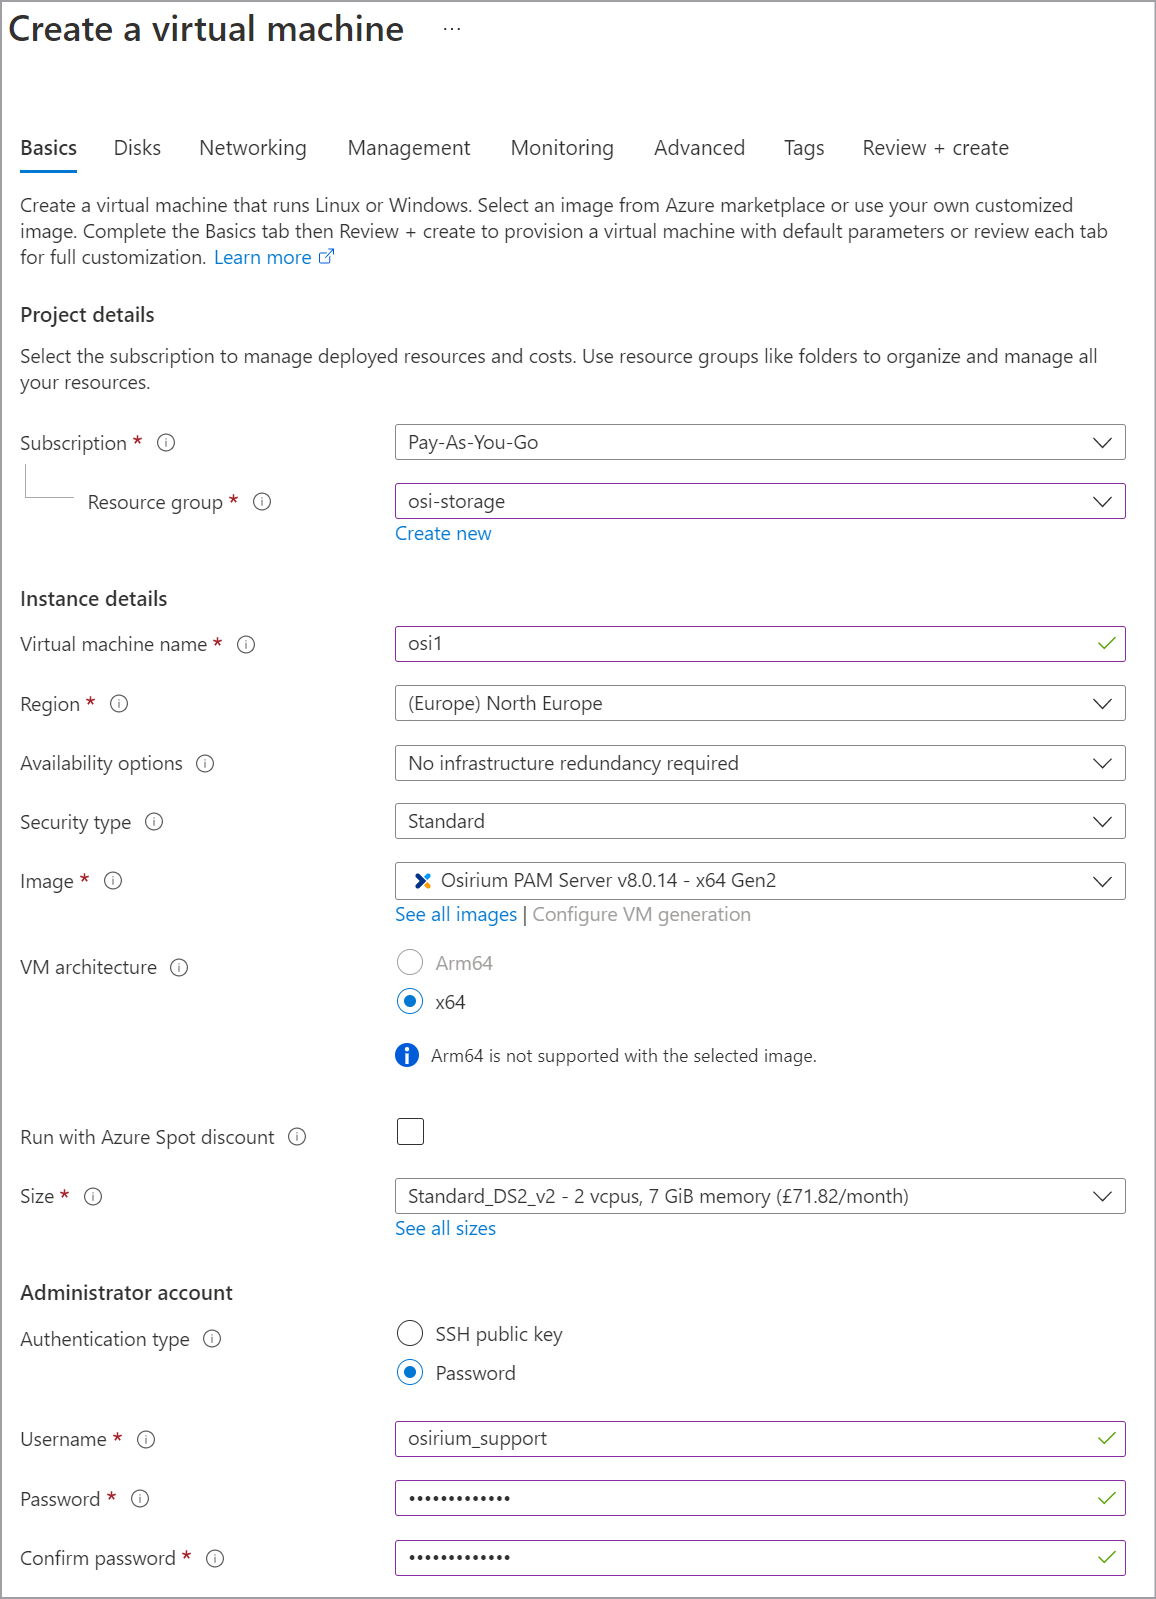
Within the Create virtual machine window, Basics tab, enter the Virtual appliance information.
When deploying the virtual machine, you MUST set the Username to osirium_support and use password based authentication type (and not SSH key based authentication).
PROJECT DETAILS
Field name Description Subscription Select based on your own deployment requirements. Resource group Select based on your own deployment requirements. INSTANCE DETAILS
Field name Description Virtual machine name Enter a name you want the server to be identified as. The name given will also be used as the hostname of the virtual appliance. NOTE: The name can not contain non-ACSII or special characters.
Region Select based on your own deployment requirements. Availability options Select based on your own deployment requirements. Security type Select based on your own deployment requirements. Image Leave as default. VM architecture Leave as default. Azure Spot instance Leave as default. Size Select from the recommended sizes listed. ADMINISTRATORS ACCOUNT
Field name Description Authentication type MUST set to Password. NOTE: The password value must be between 12 and 72 characters long and contain 3 of the following: 1 lower case character, 1 upper case character, 1 number, and 1 special character that is not \ or -.
Username This MUST be osirium_support and will be used to log into the PAM Server to install the PAM software. Password Enter a password that fulfills the recommended criteria set by Manage account. Confirm password Reconfirm the password set. Example:
-
Click
Next : Disks >. -
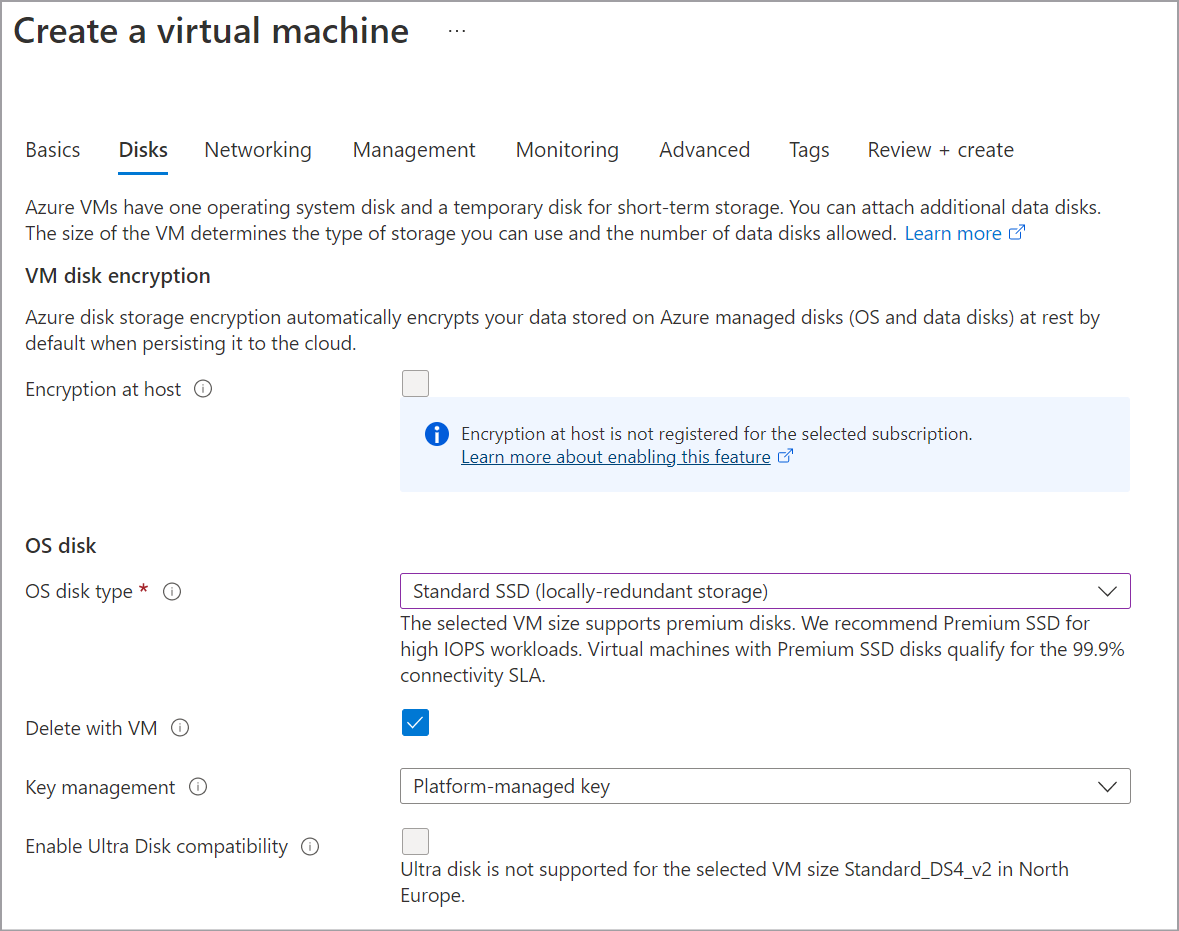
Within the Create virtual machine window, Disks tab, enter the disk options.
DISK OPTIONS
Field name Description Encryption at host Leave as default. OS disk type Recommended disk type is Standard SSD. DATA DISKS
No configuration required.
-
Click
Next : Networking >. -
Within the Create virtual machine window, Networking tab, select your preferred settings.
Note
As default the virtual appliance is given a public IP address and a corresponding Network security group (firewall) setting. This allows the PAM Server to be accessed and managed through the stated public IP address.
If you don't want to access via a public IP address then adjust the settings as required. If you are using a public IP address then set the Assignment to Static.
-
Click
Next : Management >, select your preferred settings. -
Click
Next : Monitoring>, select your preferred settings. -
Click
Next : Advanced >, select your preferred settings. -
Click
Next : Tags >, select your preferred settings. -
Click
Next : Review + Create >. Wait while the virtual machine is validated. -
Click
Createonce the validation has succeeded. Wait while the virtual appliance is created and deployed. -
Click
Go to resource. -
Within the Overview page, click
Connect, and selectSSH.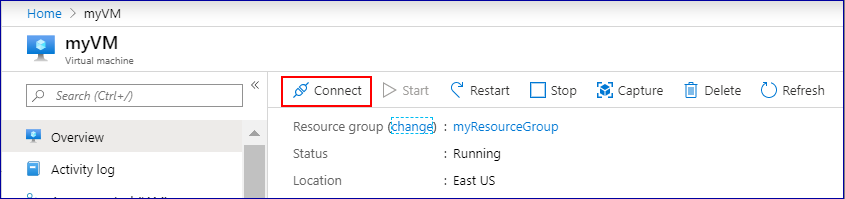
-
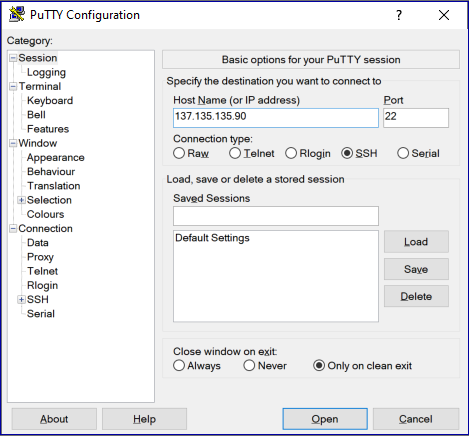
Open a SSH client of your choice.
-
Connect using the IP Address displayed in the Connect via SSH with client window.
-
Enter the Username as osirium_support and press Enter.
-
Enter the password you created for the osirium_support account Enter.
-
Enter the command
sudo pam-installand press Enter.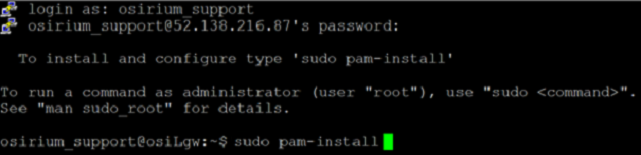
-
Press ENTER when prompted to start the setup and configuration.
-
The next step is to configure the server. Click one of the following installation steps to return to the correct steps: