Restoring a failed follower node
This section looks at how you can restore a failed follower node. When a follower node fails, it can't be recovered using an Osirium backup, it must be recreated.
- Prerequisites
- Restore failed follower node procedure
- Steps to restoring follower node
- Post restore tasks
Prerequisites
Before starting your restore of a follower node make sure the following prerequisites are met:
| Prerequisite | Description |
|---|---|
| Hardware & Software | Ensure the correct resources are available before deploying. The following outlines the hardware and software requirements.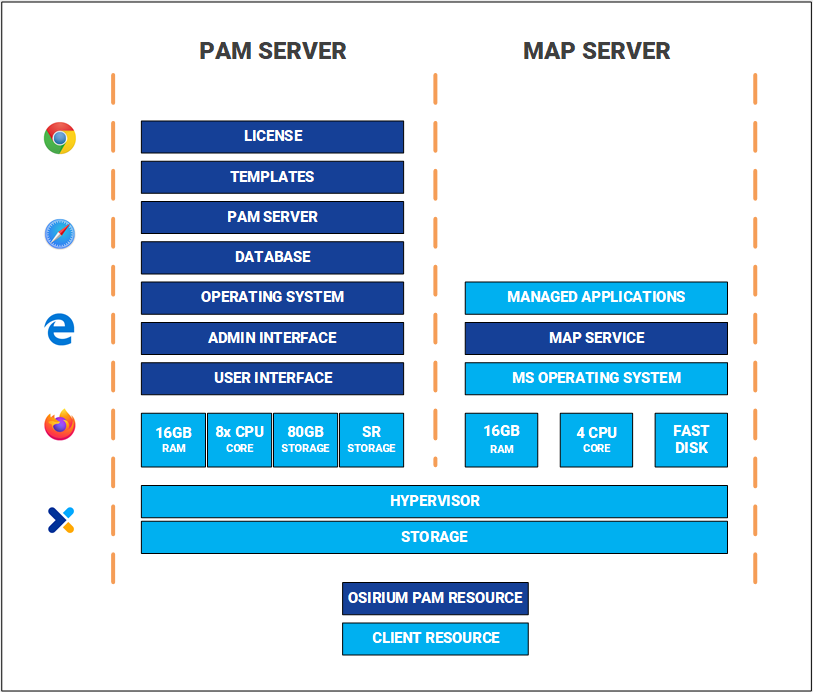 |
| Software downloads | Download the same Osirium PAM version the cluster was deployed onto. To download the latest PAM Server software release package for deployment into your infrastructure, click here. To download earlier versions of the PAM Server software packages, please contact Osirium support by clicking here. |
| Disk space | Ensure the main disk has a minimum of 5GB free disk space. |
| Master Encryption Key | Ensure you have the Master Encryption Key (MEK) of the leader node. |
| Power off the failed follower node | Ensure the failed follower node is powered down. |
Restore failed follower node procedure
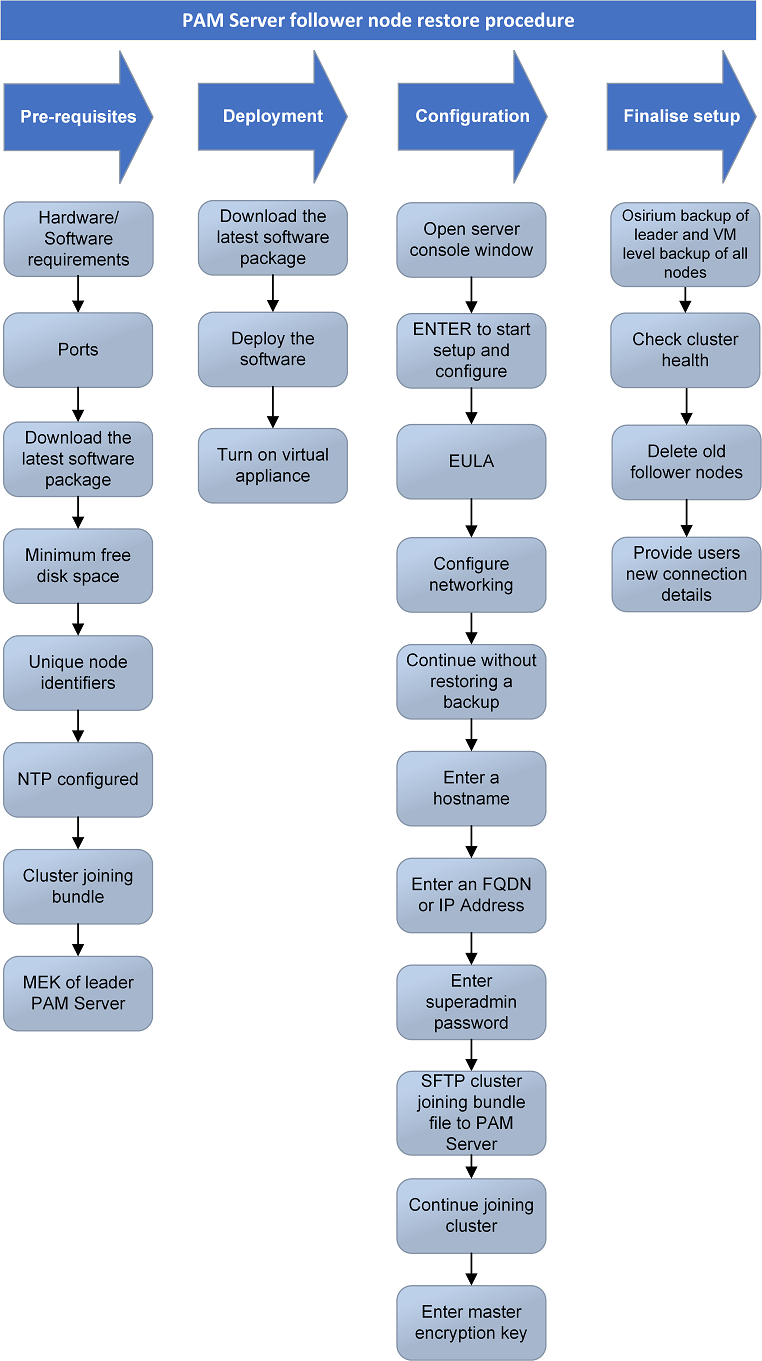
The diagram provides a high-level overview of the process for restoring a failed follower node back into your cluster.
Restore follower node procedure
Warning
Before starting your restore make sure that all Prerequisites have been met.
Steps to restore follower node
The following steps are required to replace a follower node that has failed.
-
Deploying the PAM Server: You will firstly need to deploy a new PAM Server. Deployment into the different supported infrastructures may vary, therefore click on a link below to be navigated to the correct deployment steps.
-
Downloading the cluster joining bundle: To join the new PAM Server as a follower node to the existing cluster will require the cluster joining bundle which can only be downloaded from the leader node.
-
Log onto the leader node and open the Admin Interface.
-
Within the Admin Interface navigate to System configuration > Clustering tab.
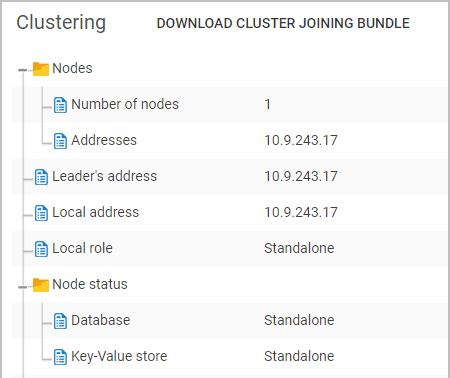
Note
If this is first time you are adding a follower node to create a cluster then the leader node will be shown as a standalone.
-
Click the
DOWNLOAD CLUSTER JOINING BUNDLEbutton. -
Within the Download cluster joining bundle? window take note of the message and then click the
YES, DOWNLOADbutton.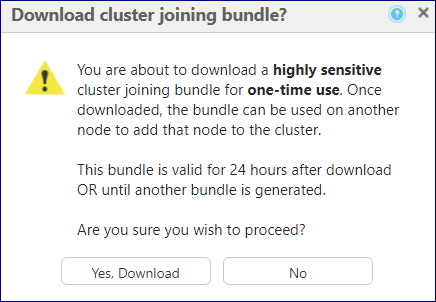
-
Configuring the follower node: Navigate to the newly deployed PAM Server and open the Console window.
-
Within the Console window, press ENTER when prompted to start the setup and configuration.
-
Read and accept the EULA to continue.
-
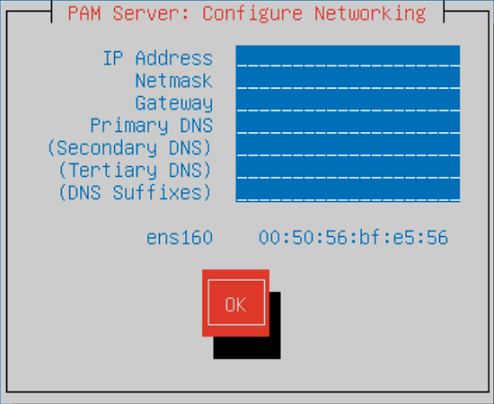
Within the Configure Networking screen, configure the following server settings. Press TAB to navigate between the fields.
- IP Address: Enter the IP Address which will be used to connect to the server.
- Netmask: Enter the network mask.
- Gateway: Enter the network default gateway IP address.
- Primary DNS: Enter the network primary DNS IP address.
- (Secondary DNS): Enter the secondary DNS IP address if relevant, else leave blank.
- (DNS Suffixes): Enter the DNS Suffixes. Multiple entries can be separated with a comma, else leave blank.
Note
When adding a follower node to a cluster and you have Active Directory configured with just a hostname, enter the search suffixes to allow users to login in to the follower.
Alternatively if you do not enter the search suffixes here you can configure them later in the Admin Interface of the follower. See DNS search suffix.
-
Once completed TAB down to the
OKbutton and press ENTER. -
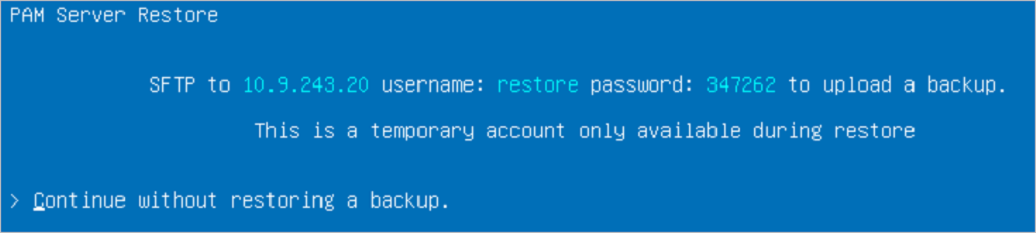
You are creating a new server so press ENTER to Continue without restoring a backup.
-
Within the Enter a hostname window, enter a name to identify the new server within your cluster.
-
TAB down to the
OKbutton and press ENTER. -
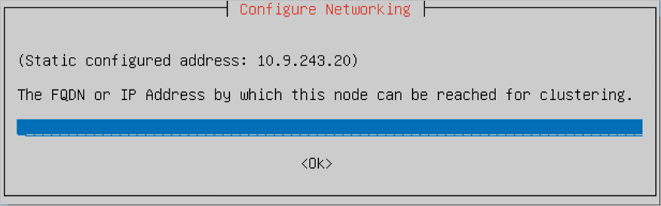
Enter the FQDN (all in lowercase) or IP Address which will be assigned to the node. The configuration entered here is used to communicate between nodes.
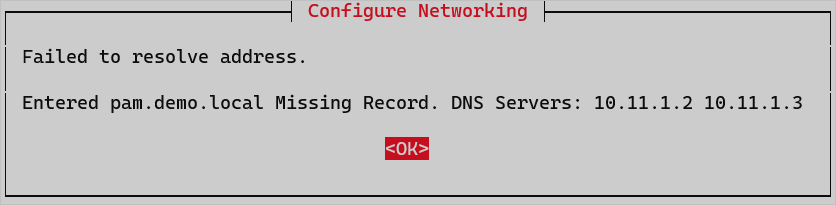
If the following error occurs then make sure that the hostname can be resolved and check if it has been included in the DNS A records - see Prerequisites.
If the following errors occur then make sure that the entered hostname / address are correct and press ENTER to re-enter.


-
TAB down to the
OKbutton and press ENTER. -
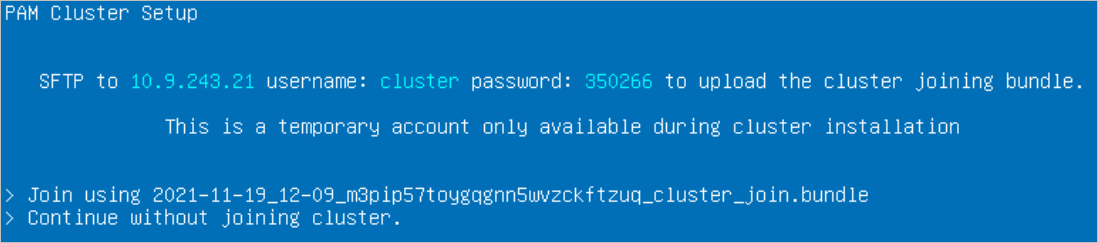
When you get to the PAM Cluster Setup screen you need to upload the downloaded Cluster joining bundle. Use the SFTP credentials provided on the Console screen to log onto the server and copy the cluster joining bundle file. Once it is successfully copied it will appear in the list.
-
Select the cluster joining bundle file and press ENTER.
-
Within the Are you sure? window press ENTER to continue.
-
You will be asked to enter the Master Encryption Key of the leader node.

-
TAB down to the
OKbutton and press ENTER. -
If the Master Encryption Key has been successful you will be notified that the process may take 5 minutes, press ENTER to continue.
-
Once the setup is complete the following will be displayed on the Console window. Your follower node has been successfully joined to the cluster. You will also see that the Clustering tab on the Admin Interface has been updated.

Post restore tasks
Once all the followers have been successfully joined to the cluster, you will need to run through the following tasks before allowing users to connect:
| Post upgrade task | Description |
|---|---|
| Backup of all nodes | Take an Osirium backup of the leader and a VM level backup of all nodes. See Backup & Recovery for further details. |
| Check cluster health | Check the System Configuration -> Clustering tab of the Leader node to ensure all nodes are displayed and the Cluster status is shown as Healthy. See Clustering tab for further details. |
| Delete old follower nodes | Delete the old follower node but keep the VM level backup files for auditing requirements. |
| Provide new connection details | Provide users with new hostname connection details as they will have changed. |