HyperV
Configuration of PPA should take around 15 minutes.
You will:
- Configure networking
- Setup an SSH key
- Set a strong admin password
- Setup up Active Directory integration
Set VM Console Password (optional)
If you would like to add additional security to the virtual machine's console, you can configure password protection.
Right-click on the virtual machine and select Connect. Then run:
passwd
Once a password has been configured the terminal will automatically log out after 3 minutes of inactivity.
Set Static IP Address
After deploying the virtual machine it is good practice to set a static IP address for the appliance.
Note
To complete this step you will require:
- An available static IP address
- Routing and DNS settings
Connect to the virtual machine's Console to access a command prompt.
If DHCP is configured to return settings that are applicable in a static context, helpful commands when configuring a static IP address include:
| Command | Description | |
|---|---|---|
ip route | grep default |
Print the default gateway set by DHCP | |
ip addr show eth0 |
Print the current IP address and netmask | |
cat /etc/resolv.conf |
Show the current DNS settings |
Run sudo netconf to start the network setup utility:
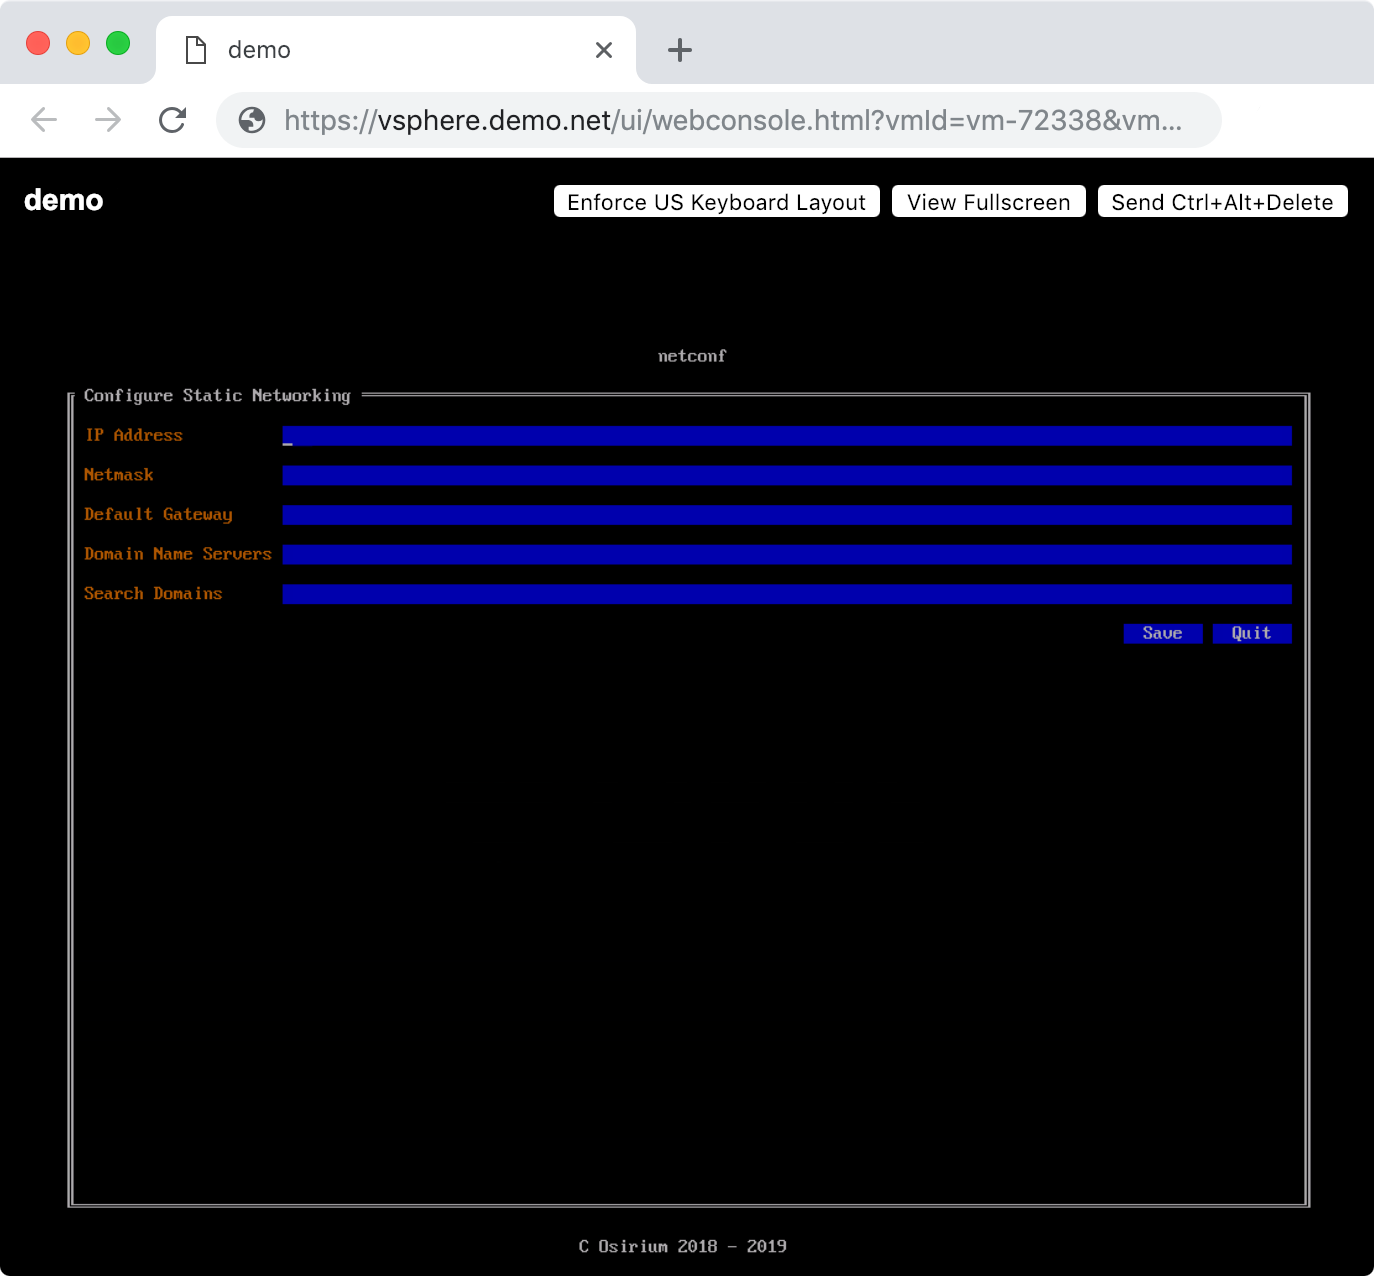
Once configuration is complete, run sudo reboot when prompted to apply the changes.
Securing the Appliance
After configuring the network, the next step is to secure it.
Check Fingerprint
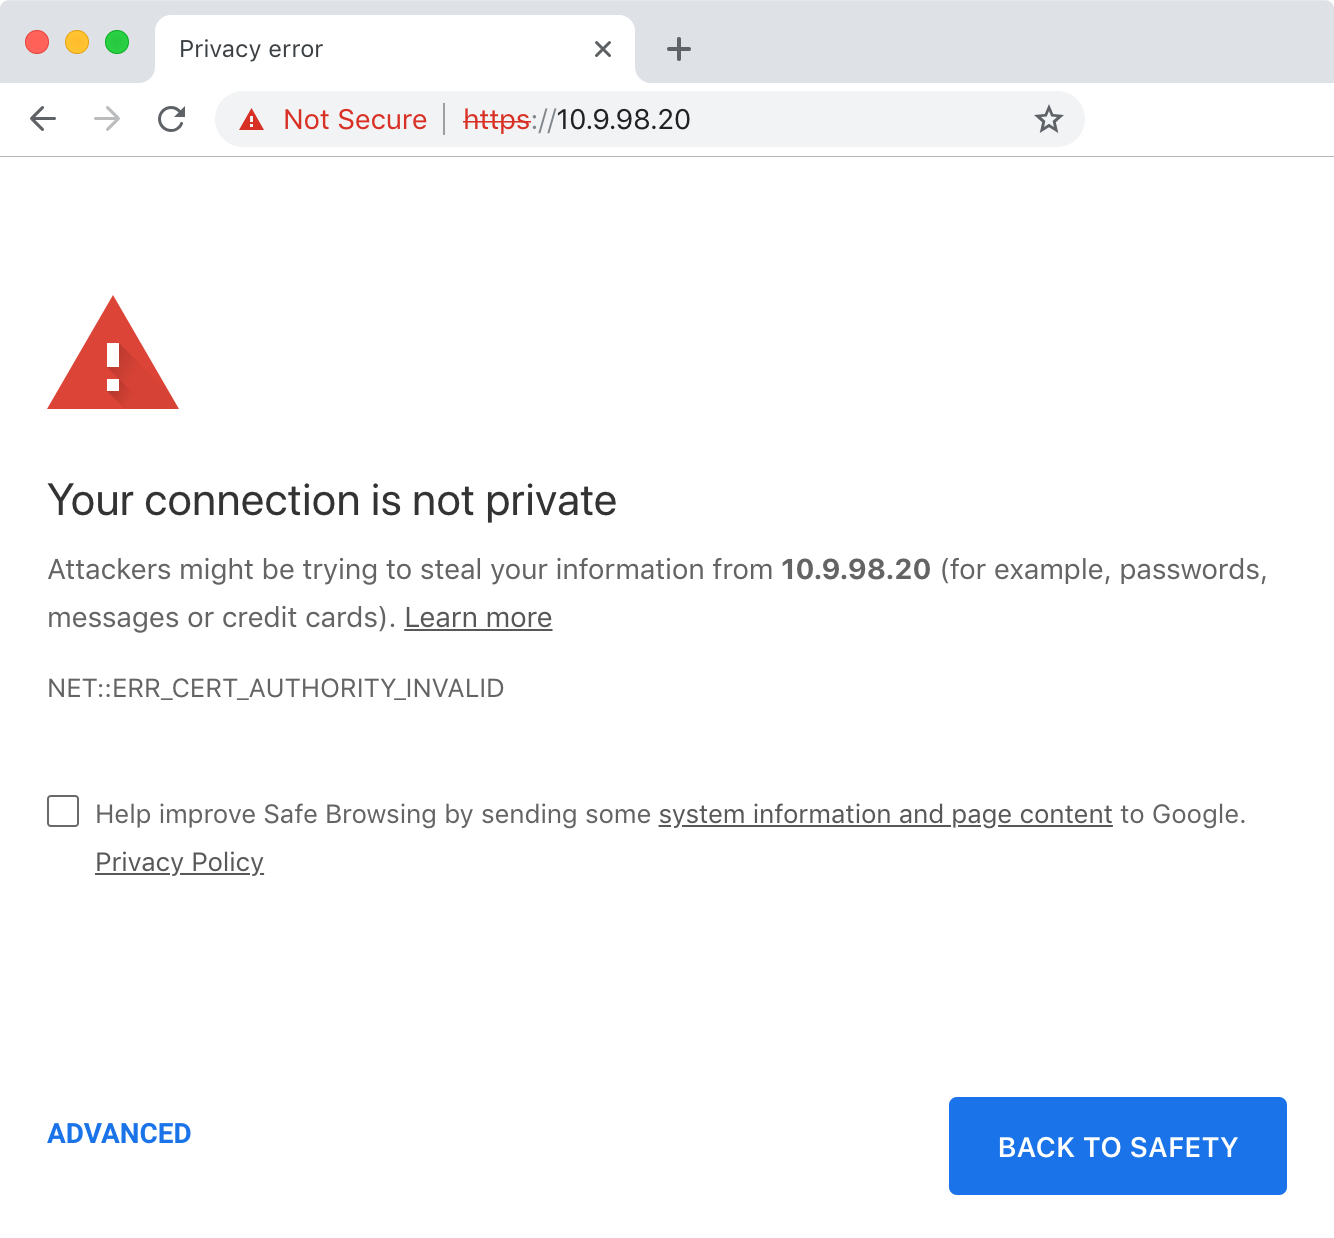
Browse to the appliance address using the IP address shown in the VM/cloud console.
PPA creates a self-signed certificate on first boot that will be reported as insecure by browsers:
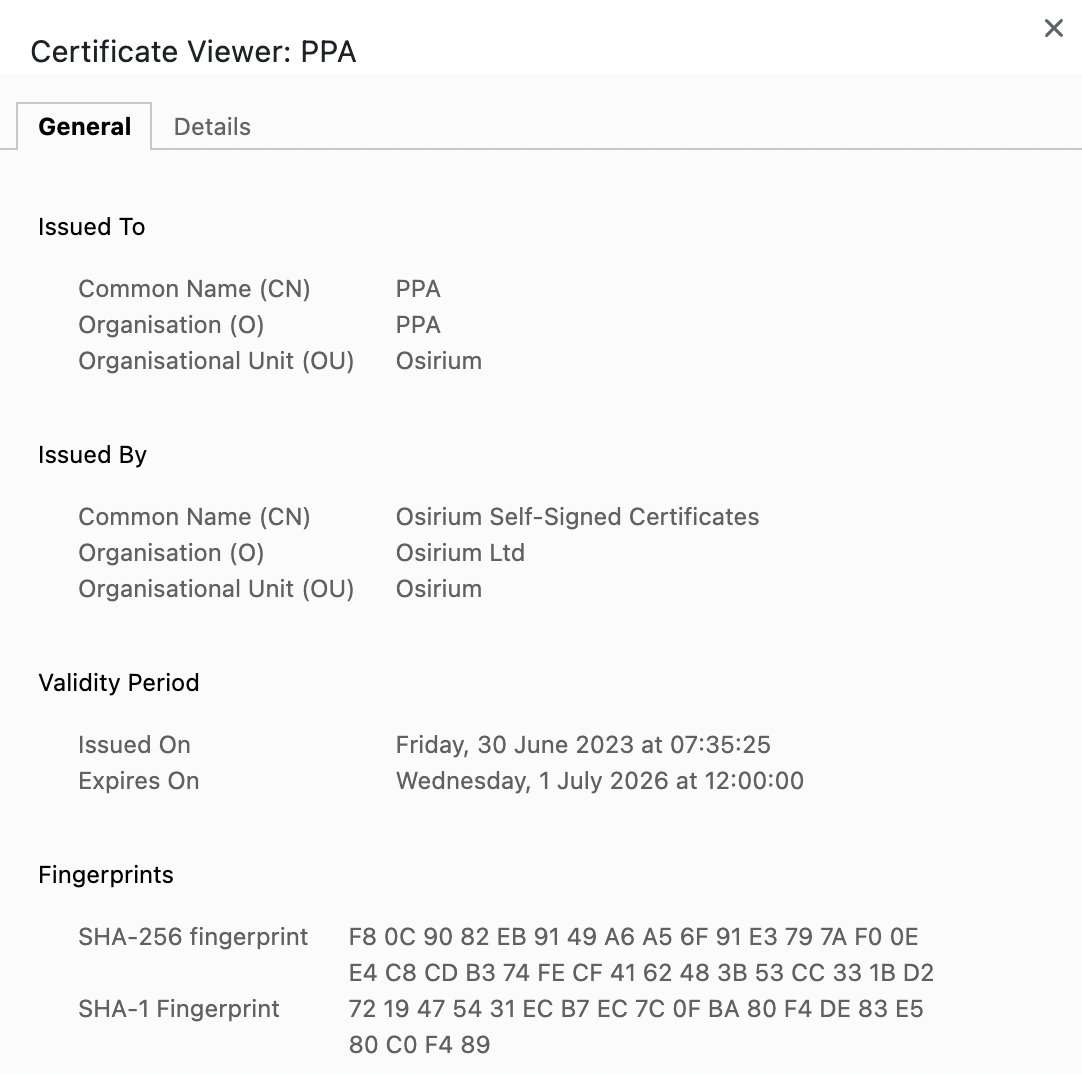
Confirm the connection is secure by comparing the fingerprints displayed in:
- The browser certificate viewer
- The console after running the
fingerprintcommand
Running the fingerprint command
The fingerprint command can be run via:
- The VM console on VMware & Hyper-V
- SSH on AWS & Azure
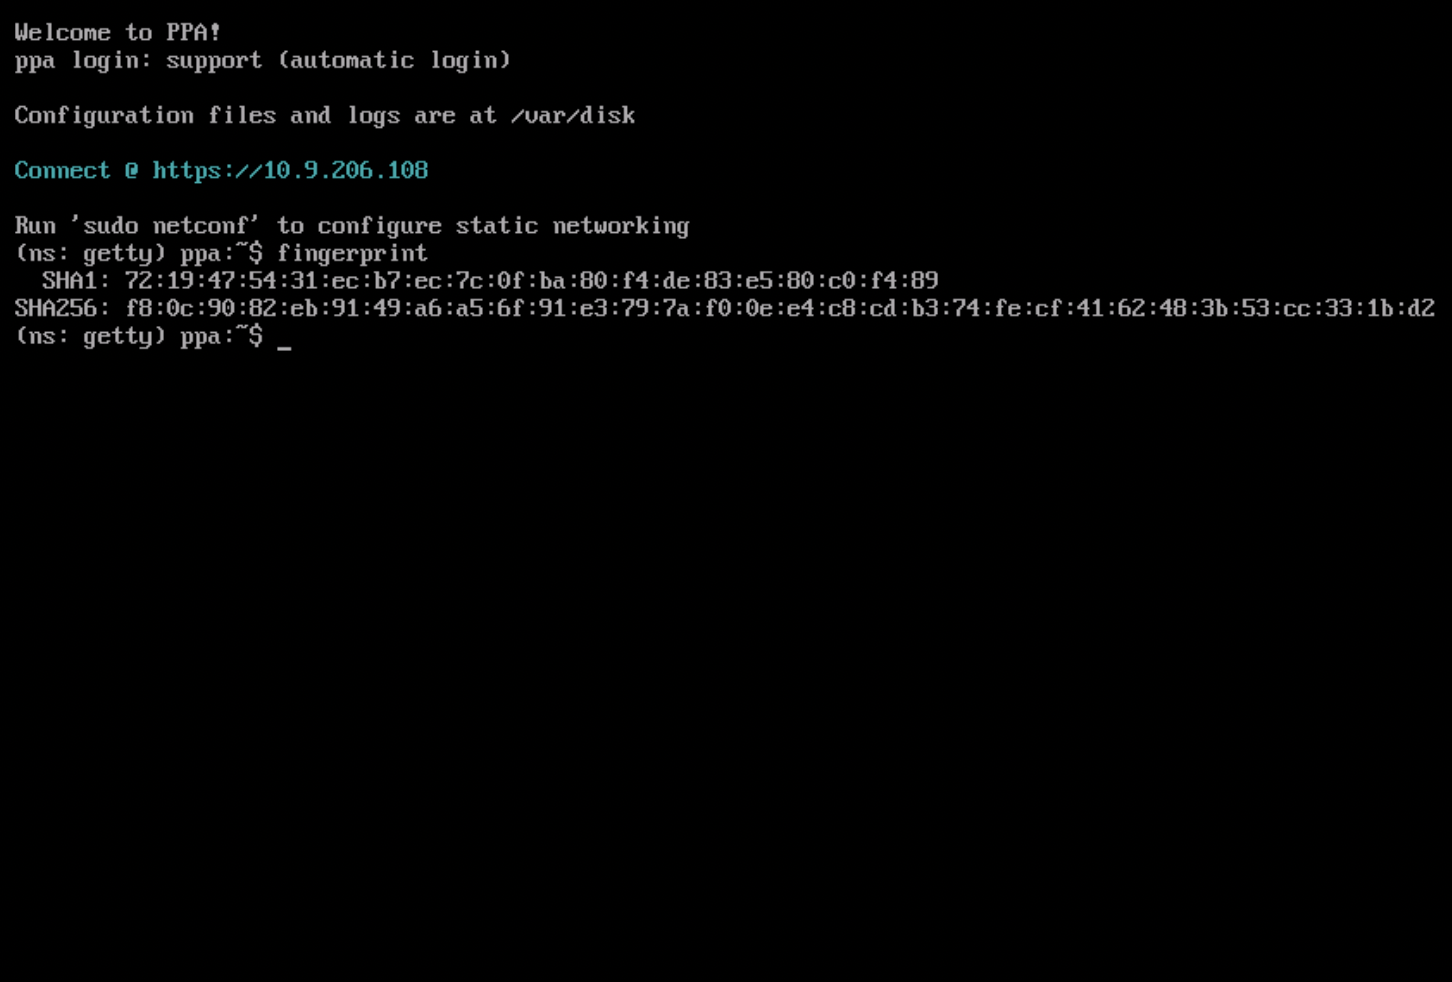
Once you have confirmed the fingerprints match, trust the certificate & navigate to PPA interface.
Set First SSH Public Key
Generate Key Pair
If you have not used SSH previously you will probably need to generate a new SSH key pair.
You can use ssh-keygen to generate a new key pair.
ssh-keygen -t rsa
Make sure you do not overwrite an existing key pair!
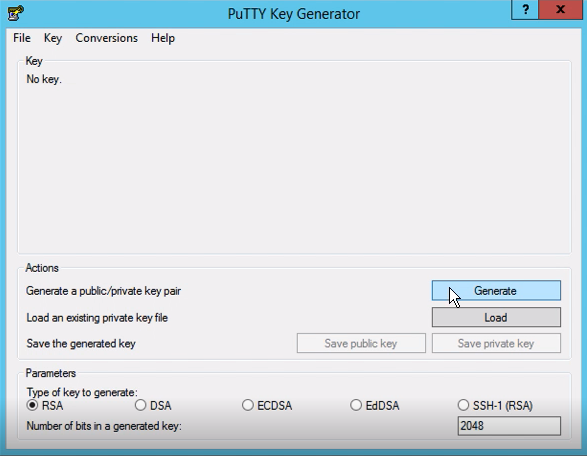
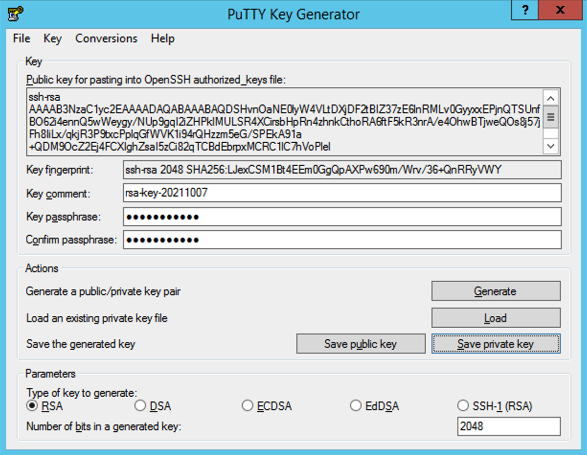
You can use PuTTYgen to generate a new key pair.
- Click Generate to start
- You may add passphrase to the key (recommended but optional)
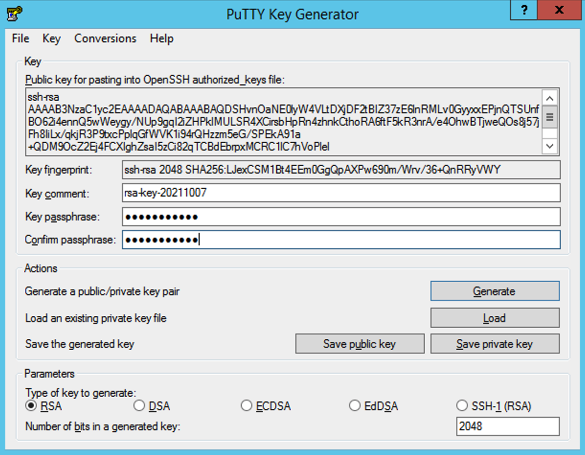
- Click Save private key to save the generated key
If you supplied a passphrase, be sure to note it down & store it in a secure place!
Set First Public Key
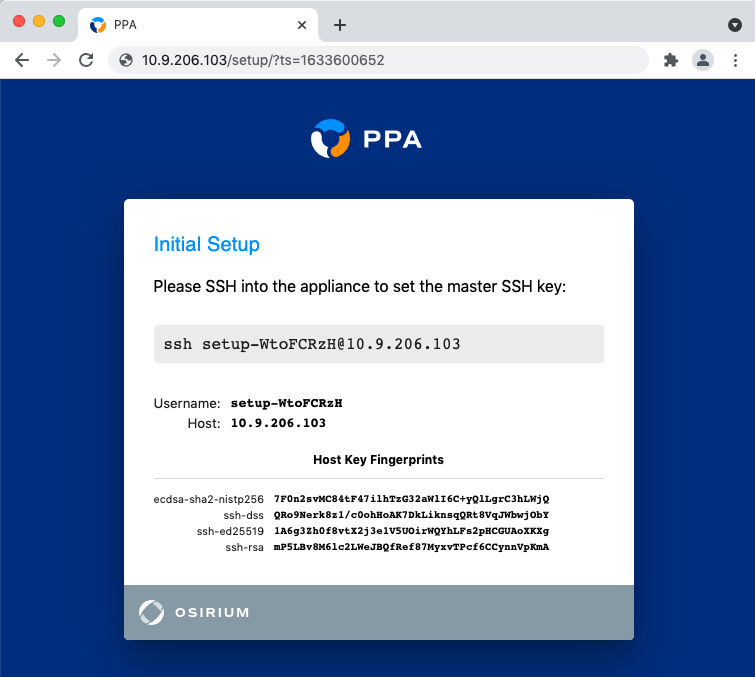
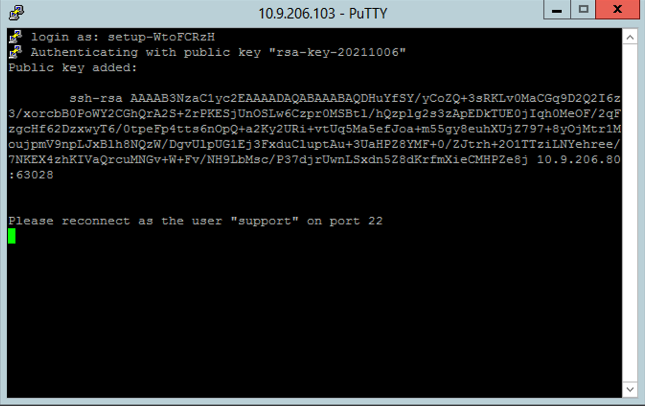
PPA will pick a random username for the first SSH connection.
When the first connection is made, PPA will store the public key from the key pair.
You will be able to authenticate with this key pair for all subsequent connections.
The PPA interface will display the username to use for this first connection.
You may also check the fingerprint against the one displayed in the interface.
Additional keys can be added after setup.
-
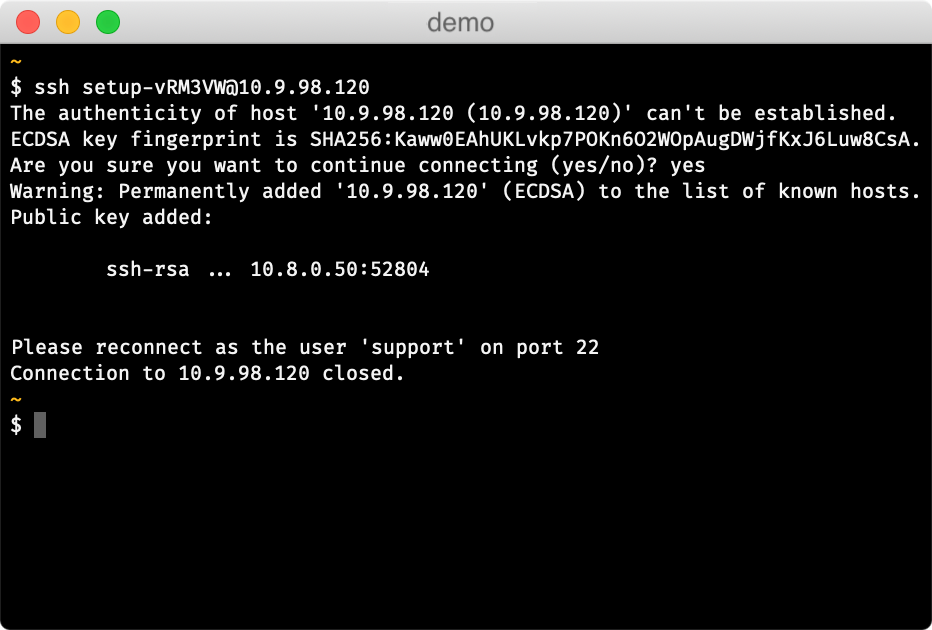
Run the SSH setup command on your local machine in your terminal
-
On connecting, the appliance should report that your key has been added
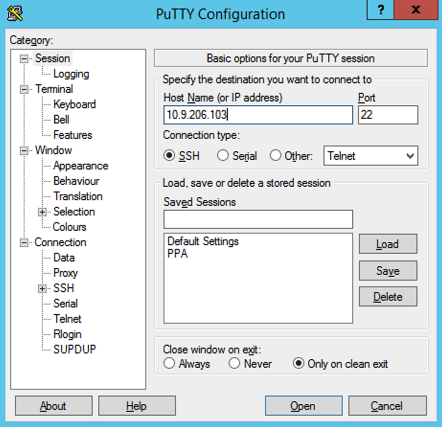
You can use PuTTY to connect to the appliance.
- Provide the host and port and select SSH connection type
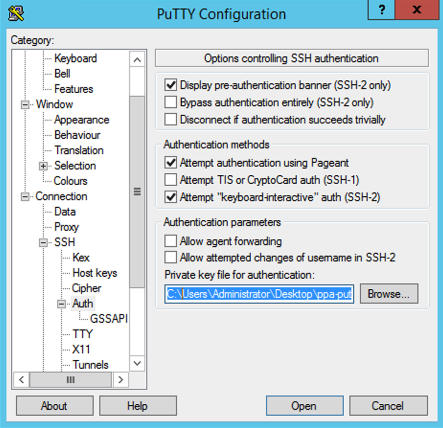
- Select the private key file that you created earlier with PuTTYgen for authentication
- Click Open to make the connection, and provide the username from the SSH setup command e.g.
setup-WtoFCRzH
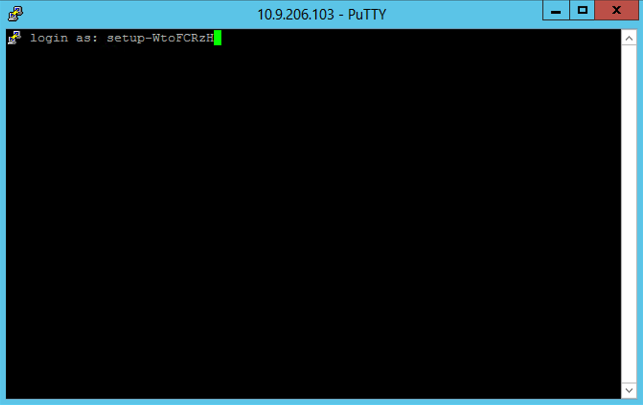
- On connecting, the appliance should report that your key has been added:
Add Additional Public Keys
PPA adds the first public key to /var/disk/config/authorized_keys
You can add additional public keys to this file if required.
Connect via SSH
Once the first public key has been set, all connections should be made with username support.
Admin password
Back in the web-browser, you will need to provide a strong password for the admin user:
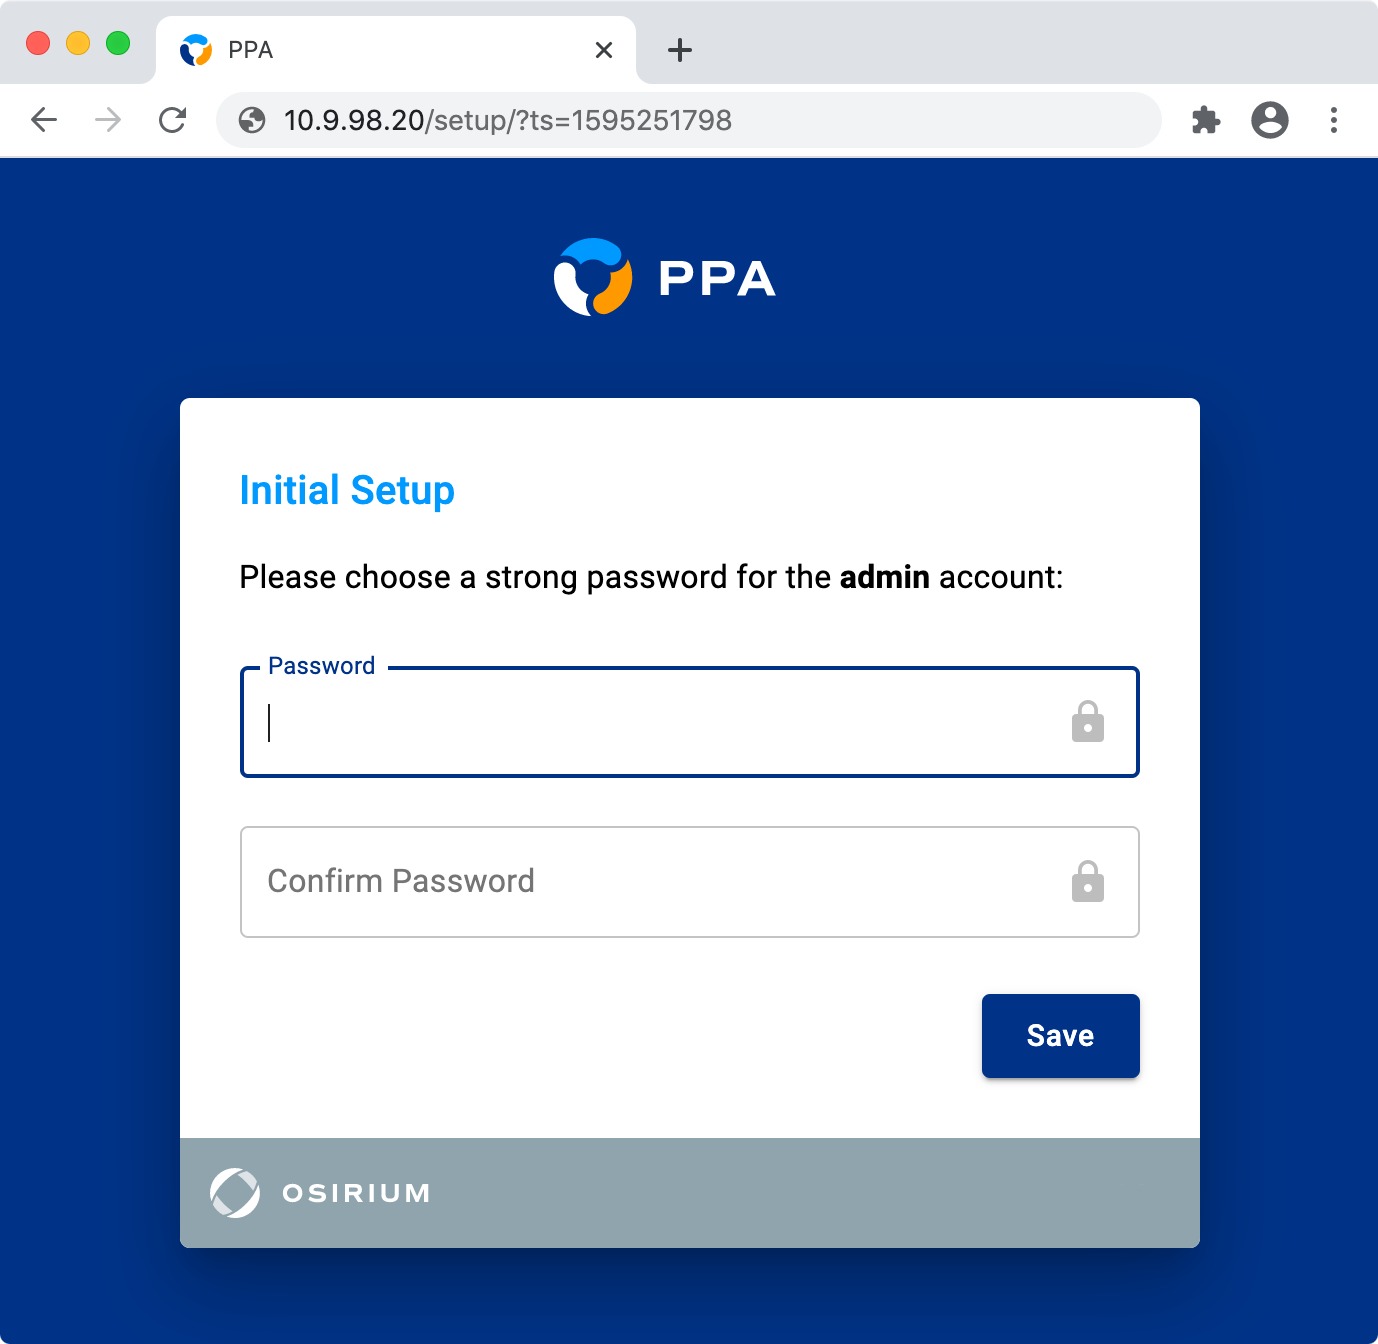
The admin user has complete control over the appliance.
We recommend:
- generating a strong password & storing it in a password manager
- using an Active Directory account to access PPA after initial configuration
The admin user can be managed in the web interface, see Admin User for more information.
Vault Setup
[Recommended]
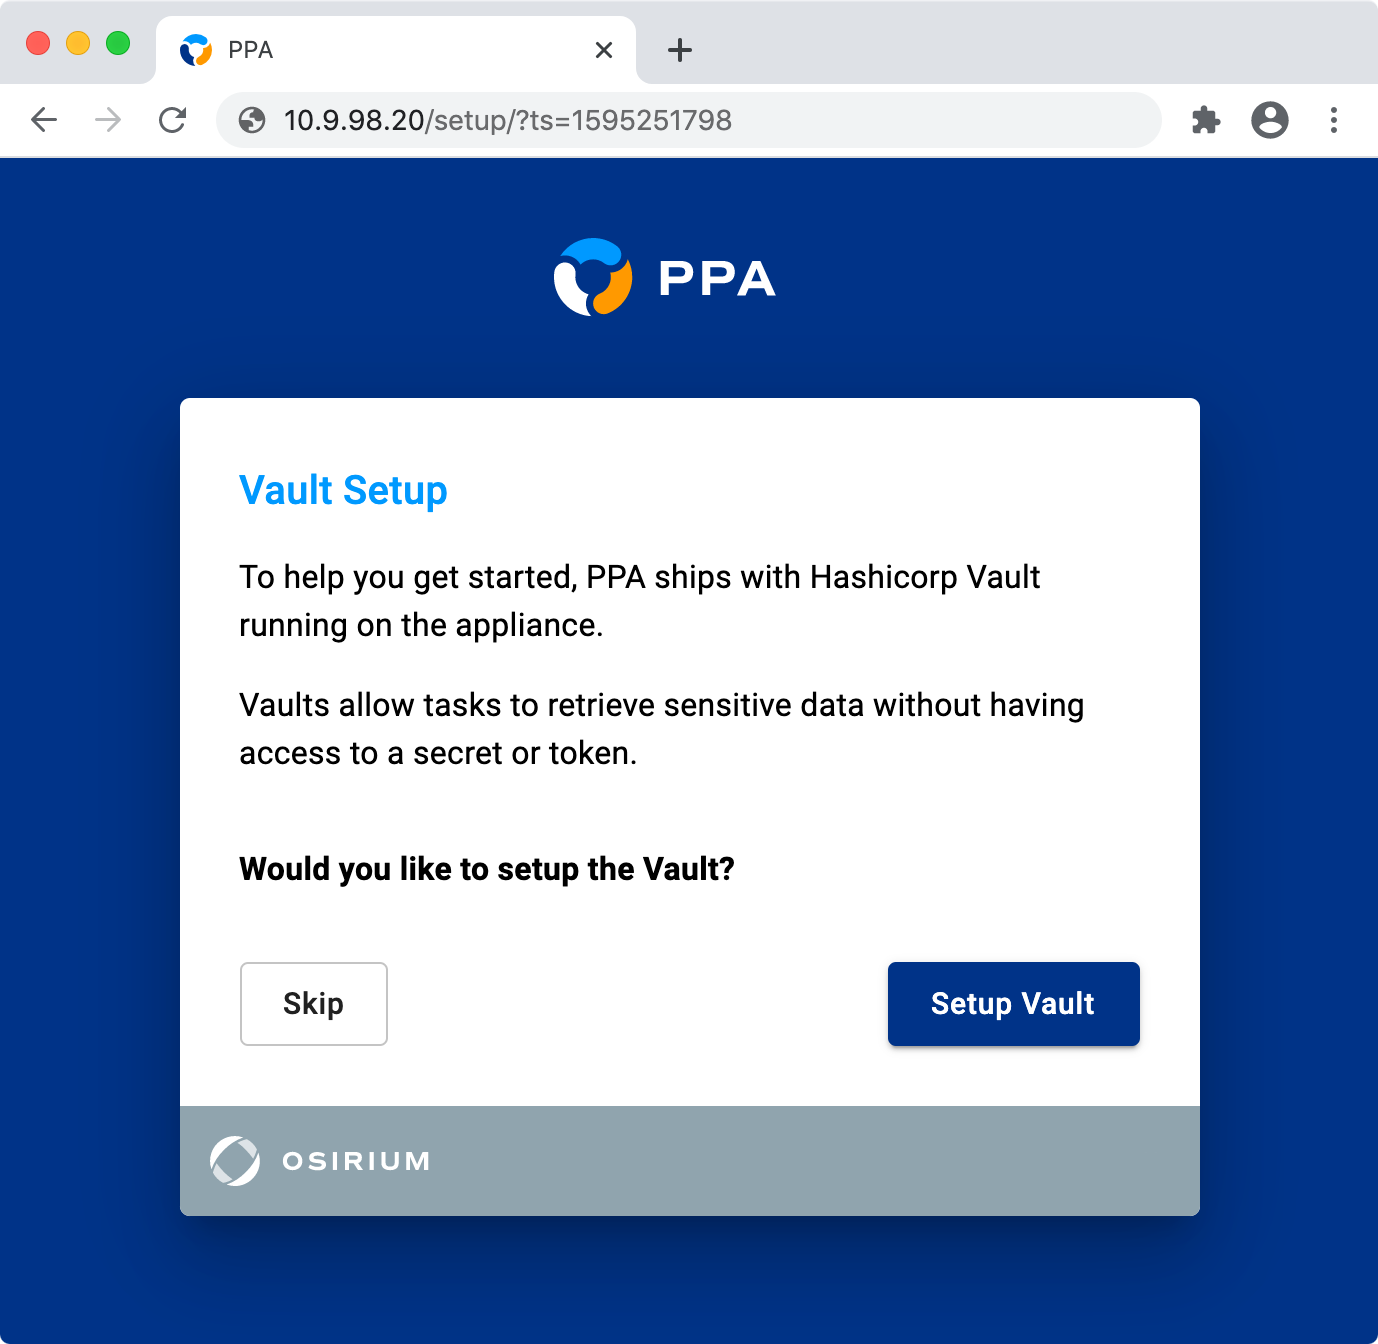
Tasks in PPA use Vaults to securely store & retrieve secrets.
PPA will now offer to configure a local Hashicorp Vault for your tasks to use.
All the tasks built into PPA are pre-configured to use this local Hashicorp Vault.
If you wish to set up this local Hashicorp Vault, click 'Setup Vault' & PPA will configure it for you.
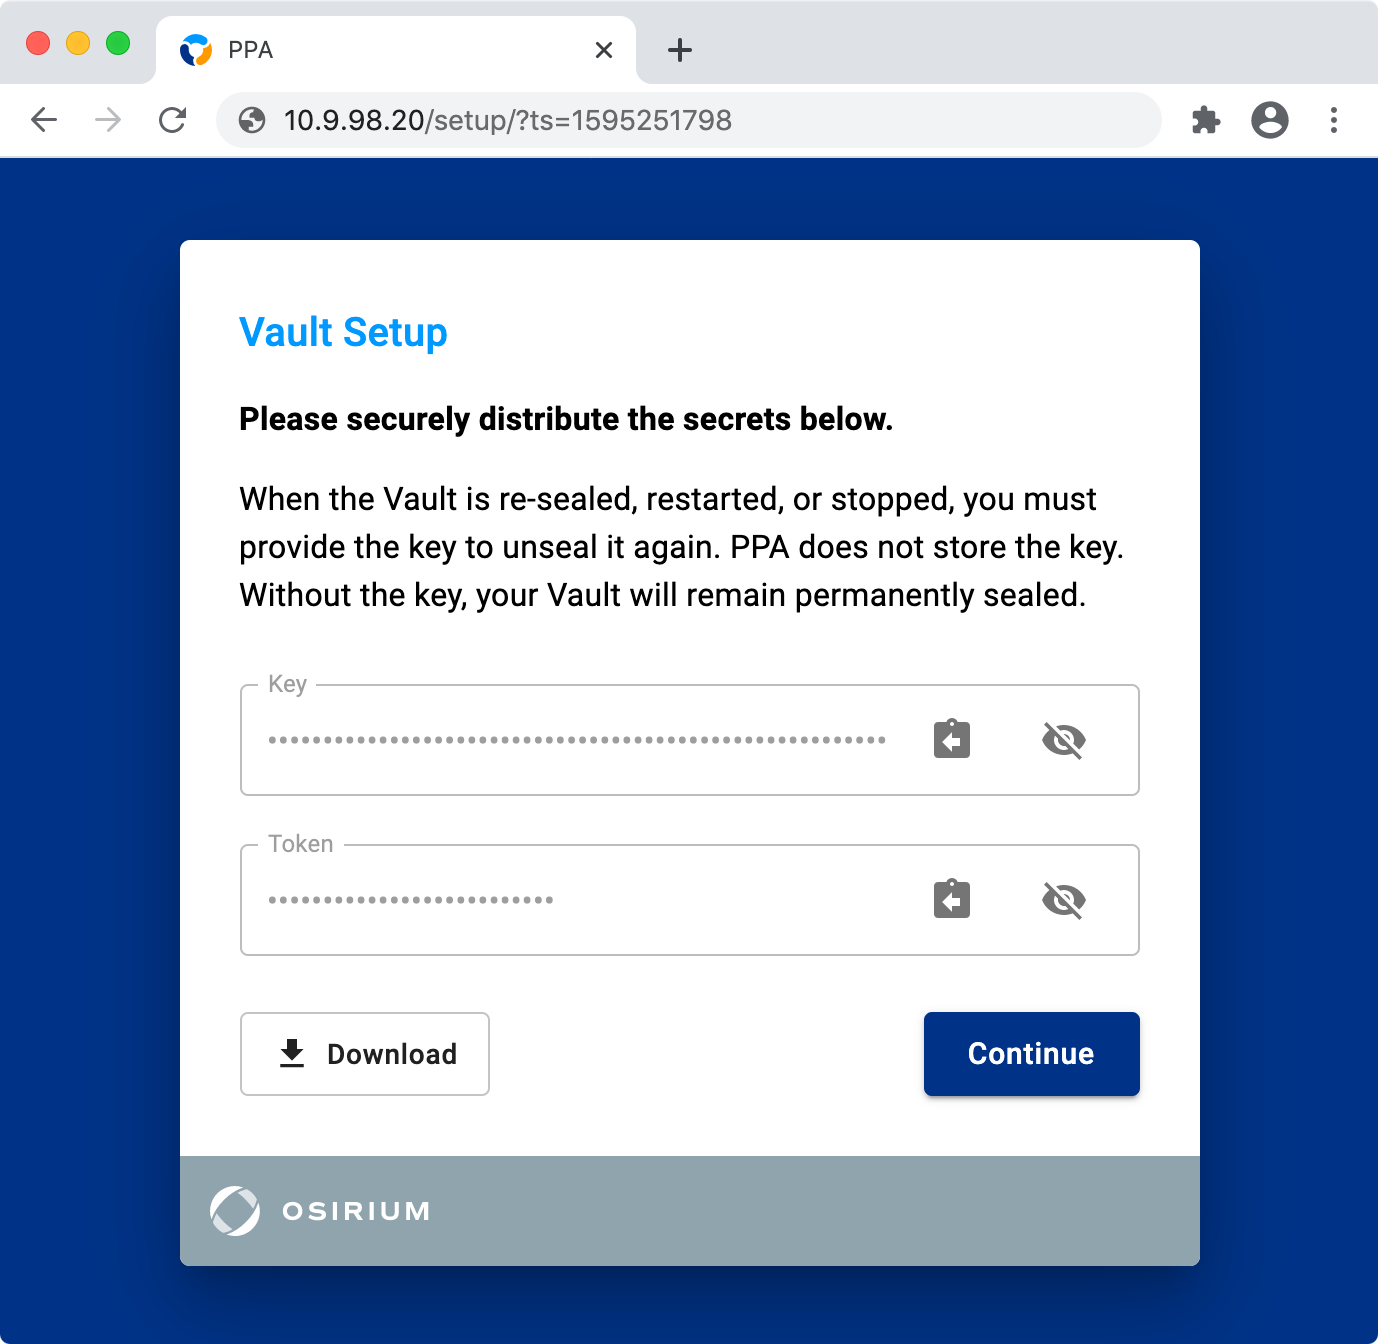
After it has been configured, you must download the vault keys & keep them safe.
To do this, click the Download button shown below.
Vault Keys
If you have chosen to configure the local Hashicorp Vault, you must download the vault keys.
Without the keys you will not be able to use the vault after a PPA reboot.
If you want to use a different vault or credential store, you can skip this step & configure it later.
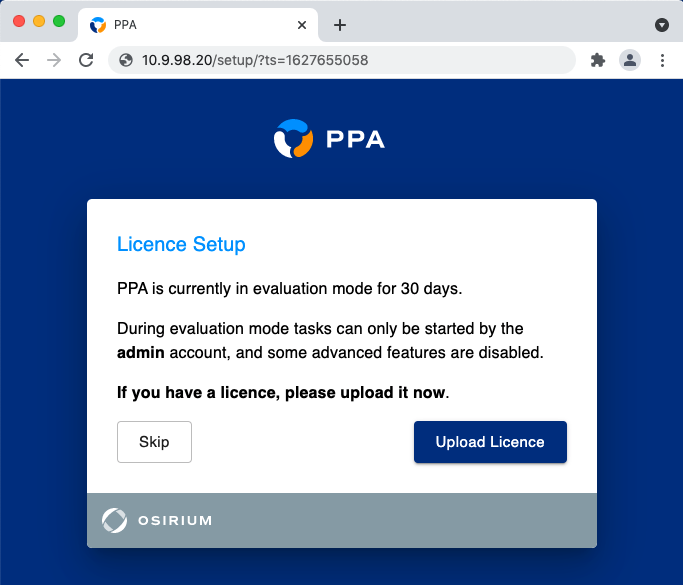
Licence Setup
[Recommended]
In evaluation mode only the built in admin user can start tasks.
Uploading a licence will allow other imported users to start tasks too.
If you already have a licence you can upload it now, or later on the Licensing & Credits page.
Active Directory
[Recommended]
Configuring Active Directory is an important step during PPA deployment.
It enables you to do the following:
- Import users & groups
- Delegate roles & tasks
- Authenticate to PPA using Active Directory credentials
See the Active Directory feature page for more information.
You can set the Active Directory domain during initial setup, or choose to do it later.
If you would like to do it later, just click the 'Skip' button.
Prerequisites
You will need:
- An Active Directory domain to use for authentication
- A domain controller with LDAP(S) enabled
The form fields are explained underneath.
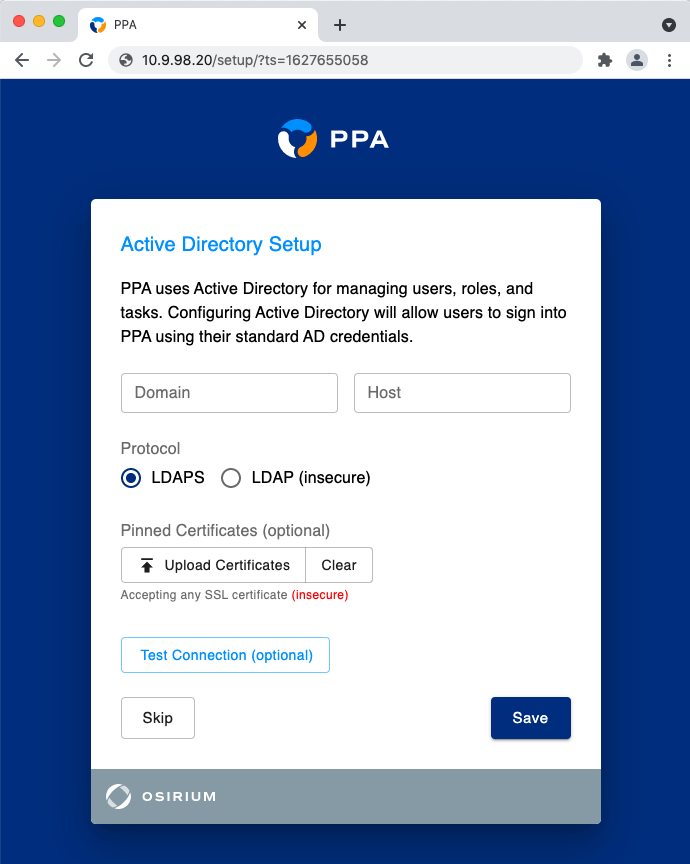
Domain
The fully qualified Active Directory domain.
Host
One or more Domain Controller IP/DNS addresses.
When supplying multiple addresses, each much be comma-separated.
Protocol
The protocol PPA will use to communicate with Active Directory.
LDAPS vs LDAP
PPA supports LDAP for user authentication into the appliance.
However, all Active Directory tasks require LDAPS to be enabled on the domain controller.
This is because the tasks perform write operations which are not supported by the LDAP protocol.
For this reason we strongly recommend using LDAPS instead of LDAP.
Pinned Certificates
The certificate to use when communicating with Active Directory.
This is optional & by default PPA will accept any certificate.
Test Connection
This button tests the connection using the supplied network details.
You will be prompted for a set of one-time credentials if either:
- Active Directory is being configured for the first time
- You are modifying an existing configuration & group synchronisation is not enabled
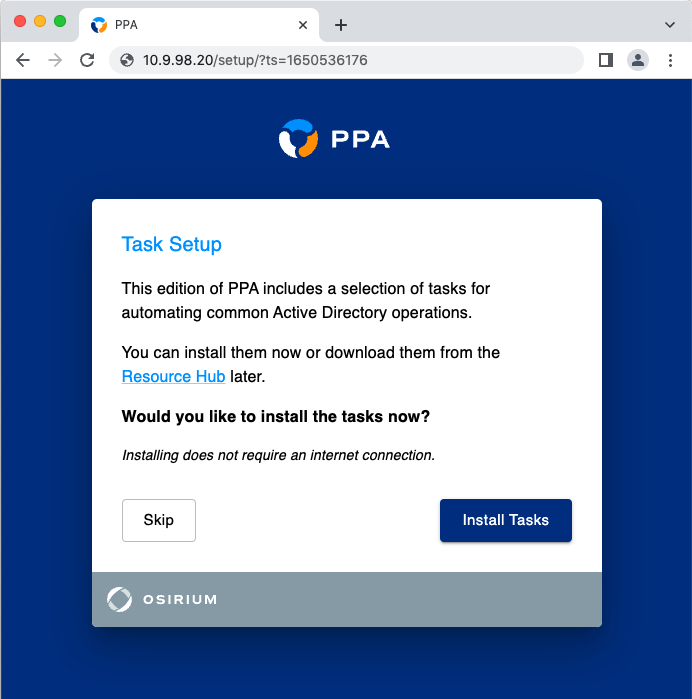
Task Setup
[Recommended]
PPA includes a selection of example tasks for automating operations in:
- Active Directory
- Azure AD
Installing these tasks during the setup process makes them ready to use when you first sign in.
Alternatively, you can download and import these tasks from the Resource Hub later.
Initial Setup Complete
After setting a password for admin you will be asked to log in.
Setup is now complete.
Further Configuration & Features
There are many extra configuration options & features available in PPA.
These include but are not limited to:
Visit the Configuration & Features area on the left for more information & instructions.